¶ Introduction
Various Duet 3 tool boards have a built-in accelerometer. However for systems not using a tool board, this small standalone accelerometer can be used. It connects to the SPI Daughterboard header (also labelled Temp DB on earlier Duets) with the supplied 1m ribbon cable. Accelerometer readings captured can be used to tune input shaping parameters to avoid ringing artefacts.
¶ Features
| Duet3D Accelerometer v0.2 | Duet3D Accelerometer v1.0 | |
|---|---|---|
| Accelerometer | LIS3DH | LIS2DW12 |
| Supply voltage | 3.3V - Do not connect to 5V it will be damaged | |
| Interface | SPI Slave - Duet Mainboard is SPI master | |
| LED | There is a green LED on the board to indicate power is applied | |
| Maximum ambient temperature | 85°C | |
| Additional details | LIS3DH datasheet | LIS2DW12 datasheet |
¶ Firmware notes
- Duet3D Accelerometer v0.2 is compatible with RepRapFirmware v3.4.6 or v3.5.0 and later
- Duet3D Accelerometer v1.0 is compatible with RepRapFirmware v3.5.0 and later
- Connection to the SPI daughterboard header of a Duet 3 Expansion 3HC or Duet 3 Expansion 1HCL version 2.0 is supported in RepRapFirmware 3.7 and later
¶ Physical properties and connections
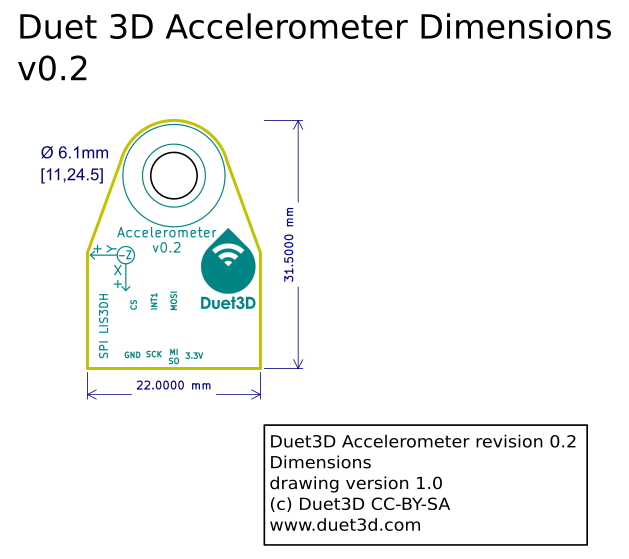
¶ Dimensions
¶ Mounting
The hole in the PCB is 6.1mm so it can be mounted using a standard 3D printing nozzle as well as systems like the Revo nozzles:
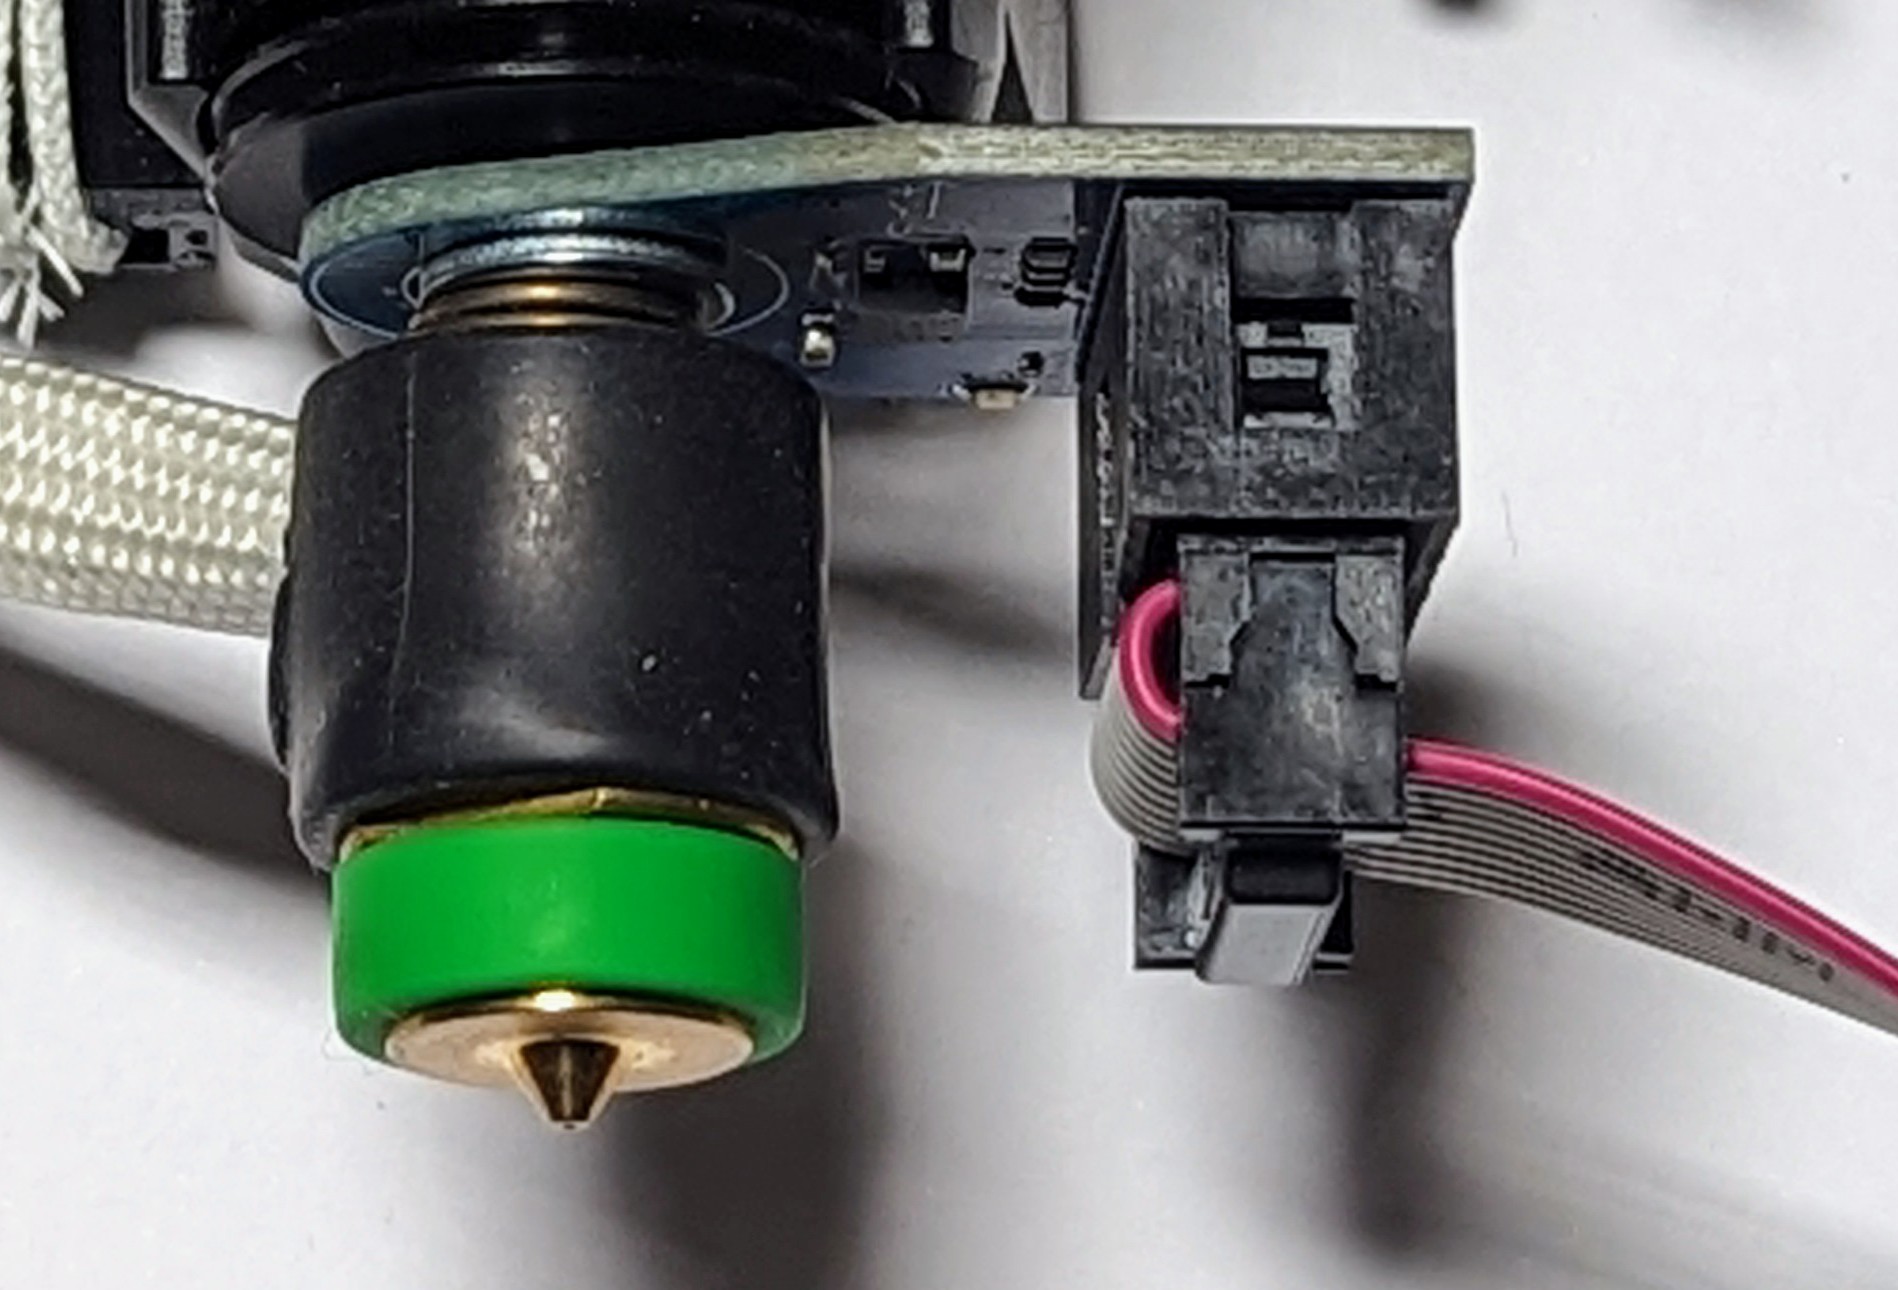
The accelerometer needs to be firmly mounted for data collection so if the nozzle is <6mm (such as the Revo) use an M4 washer between the flanged top of the Revo heatbreak and the accelerometer PCB. This is not necessary for V6 and similar nozzles.
In the case of the Revo the spring holding the heater core against the end of the nozzle is not sufficient to hold the accelerometer PCB firmly in position by itself, hence the requirement to mount it using an M4 washer and the flange of the nozzle.
Note the orientation of the accelerometer board is important for correct data collection and analysis. See the orientation section below.
WARNING: Do not heat the hot end with the accelerometer mounted using the nozzle.
Manually set the active and standby temperature to 0°C before using the IS plugin.
¶ 3D model
A STEP 3D model is available on GitHub.
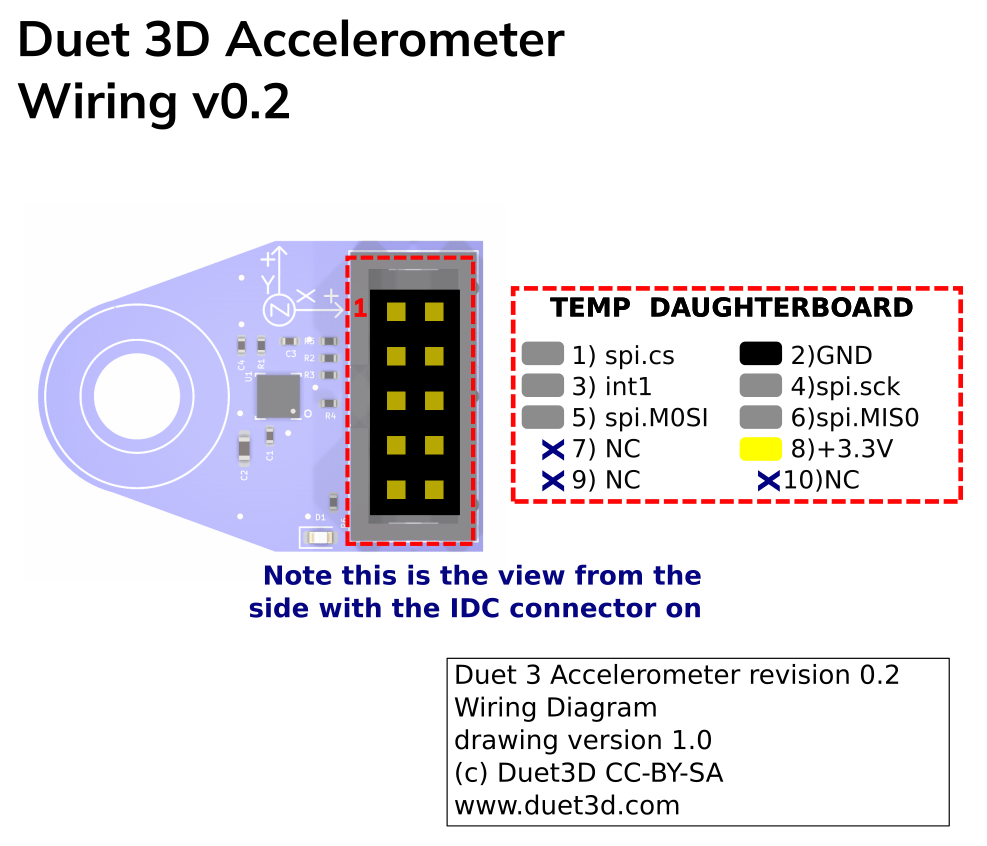
¶ Wiring Diagram
¶ Wiring notes
The accelerometer comes with a 1m long 10 way IDC cable that plugs directly into the SPI DB header on Duet mainboards.
IMPORTANT: Some supplied cables have a reversed IDC plug.
Ensure the connector orientation is correct so pin 1 on the IDC goes to pin 1 on the mainboard.
* Do not rely on the red stripe on the cable to indicate pin 1.
* If the green light on the accelerometer does not come out reverse the orientation of the plug at the Duet Mainboard end of the connection.
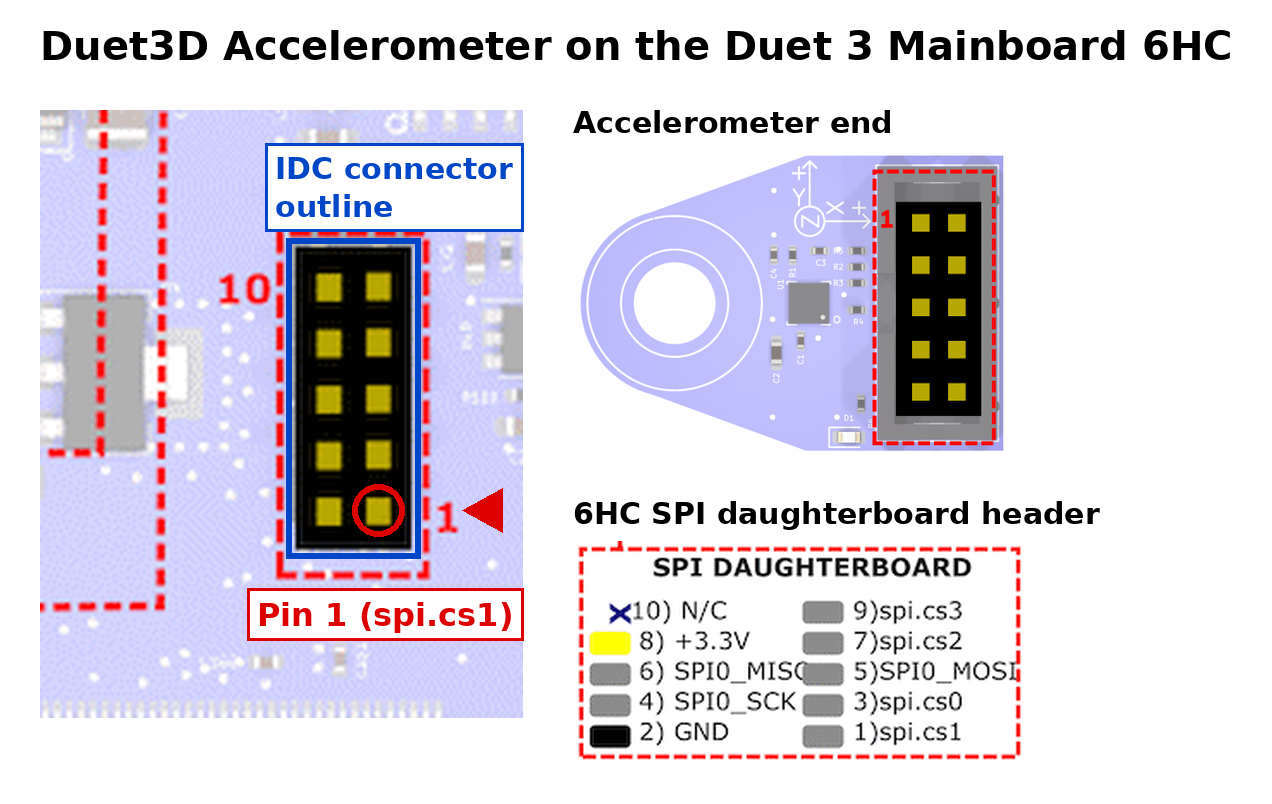
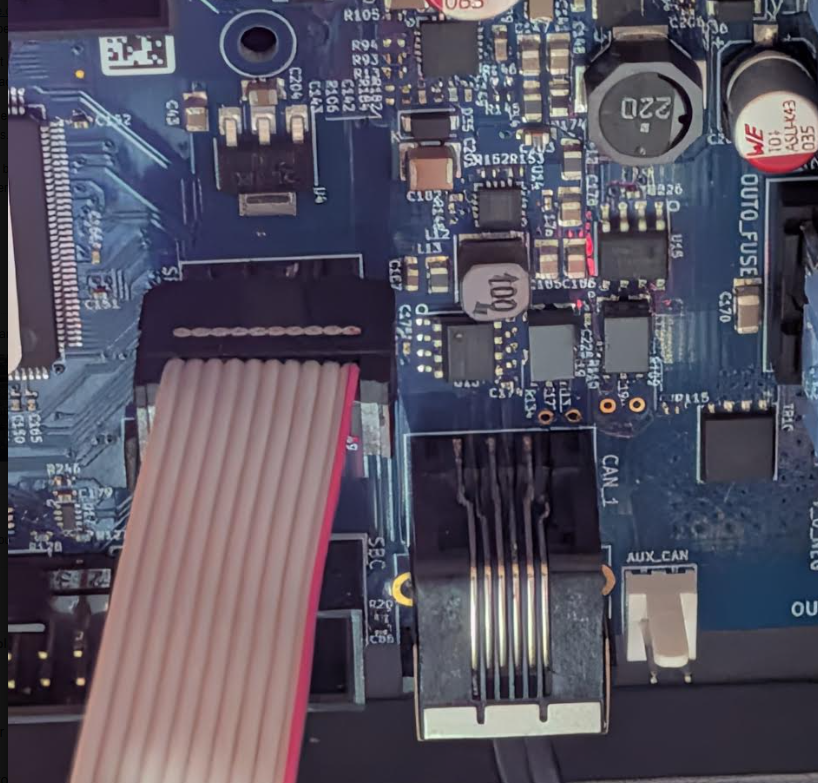
Duet3D accelerometer connected to the Duet 3 6HC mainboard (reversed IDC plug cable)
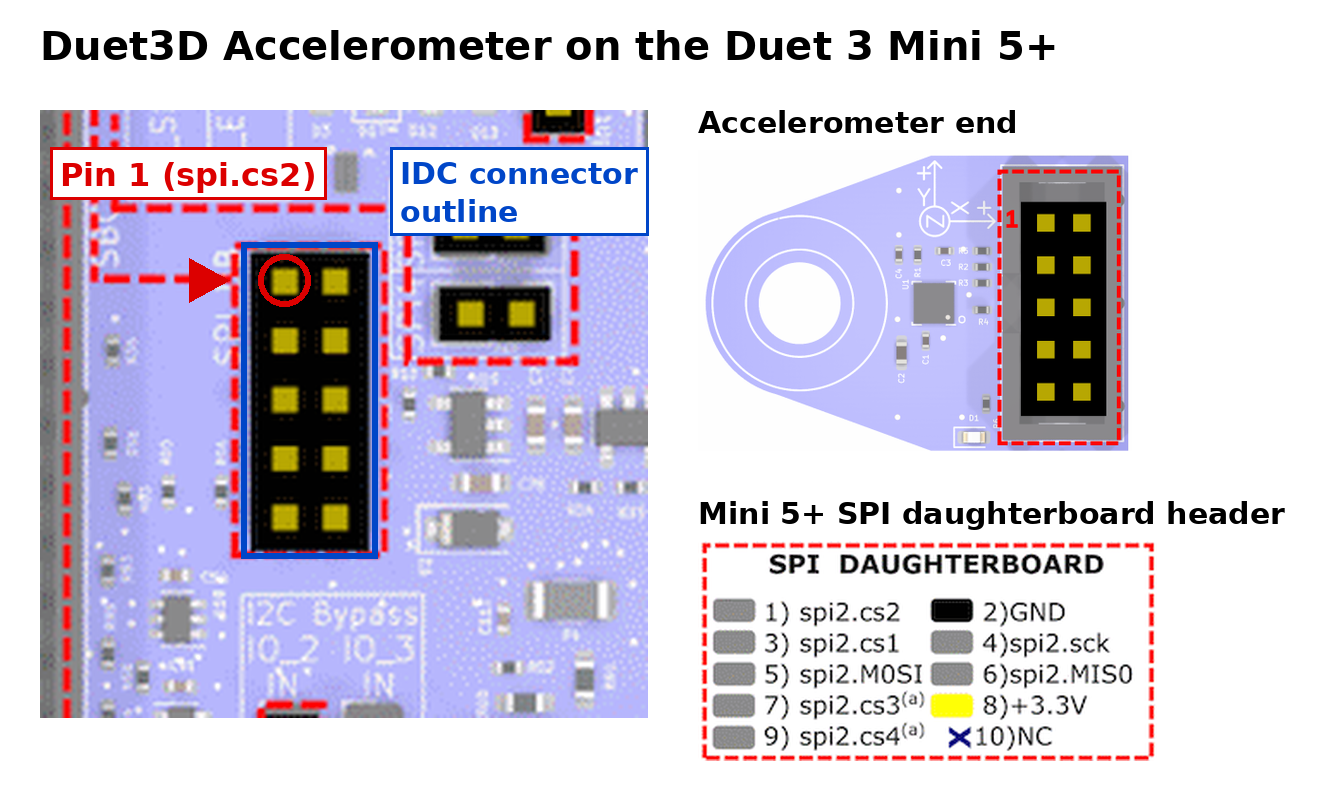
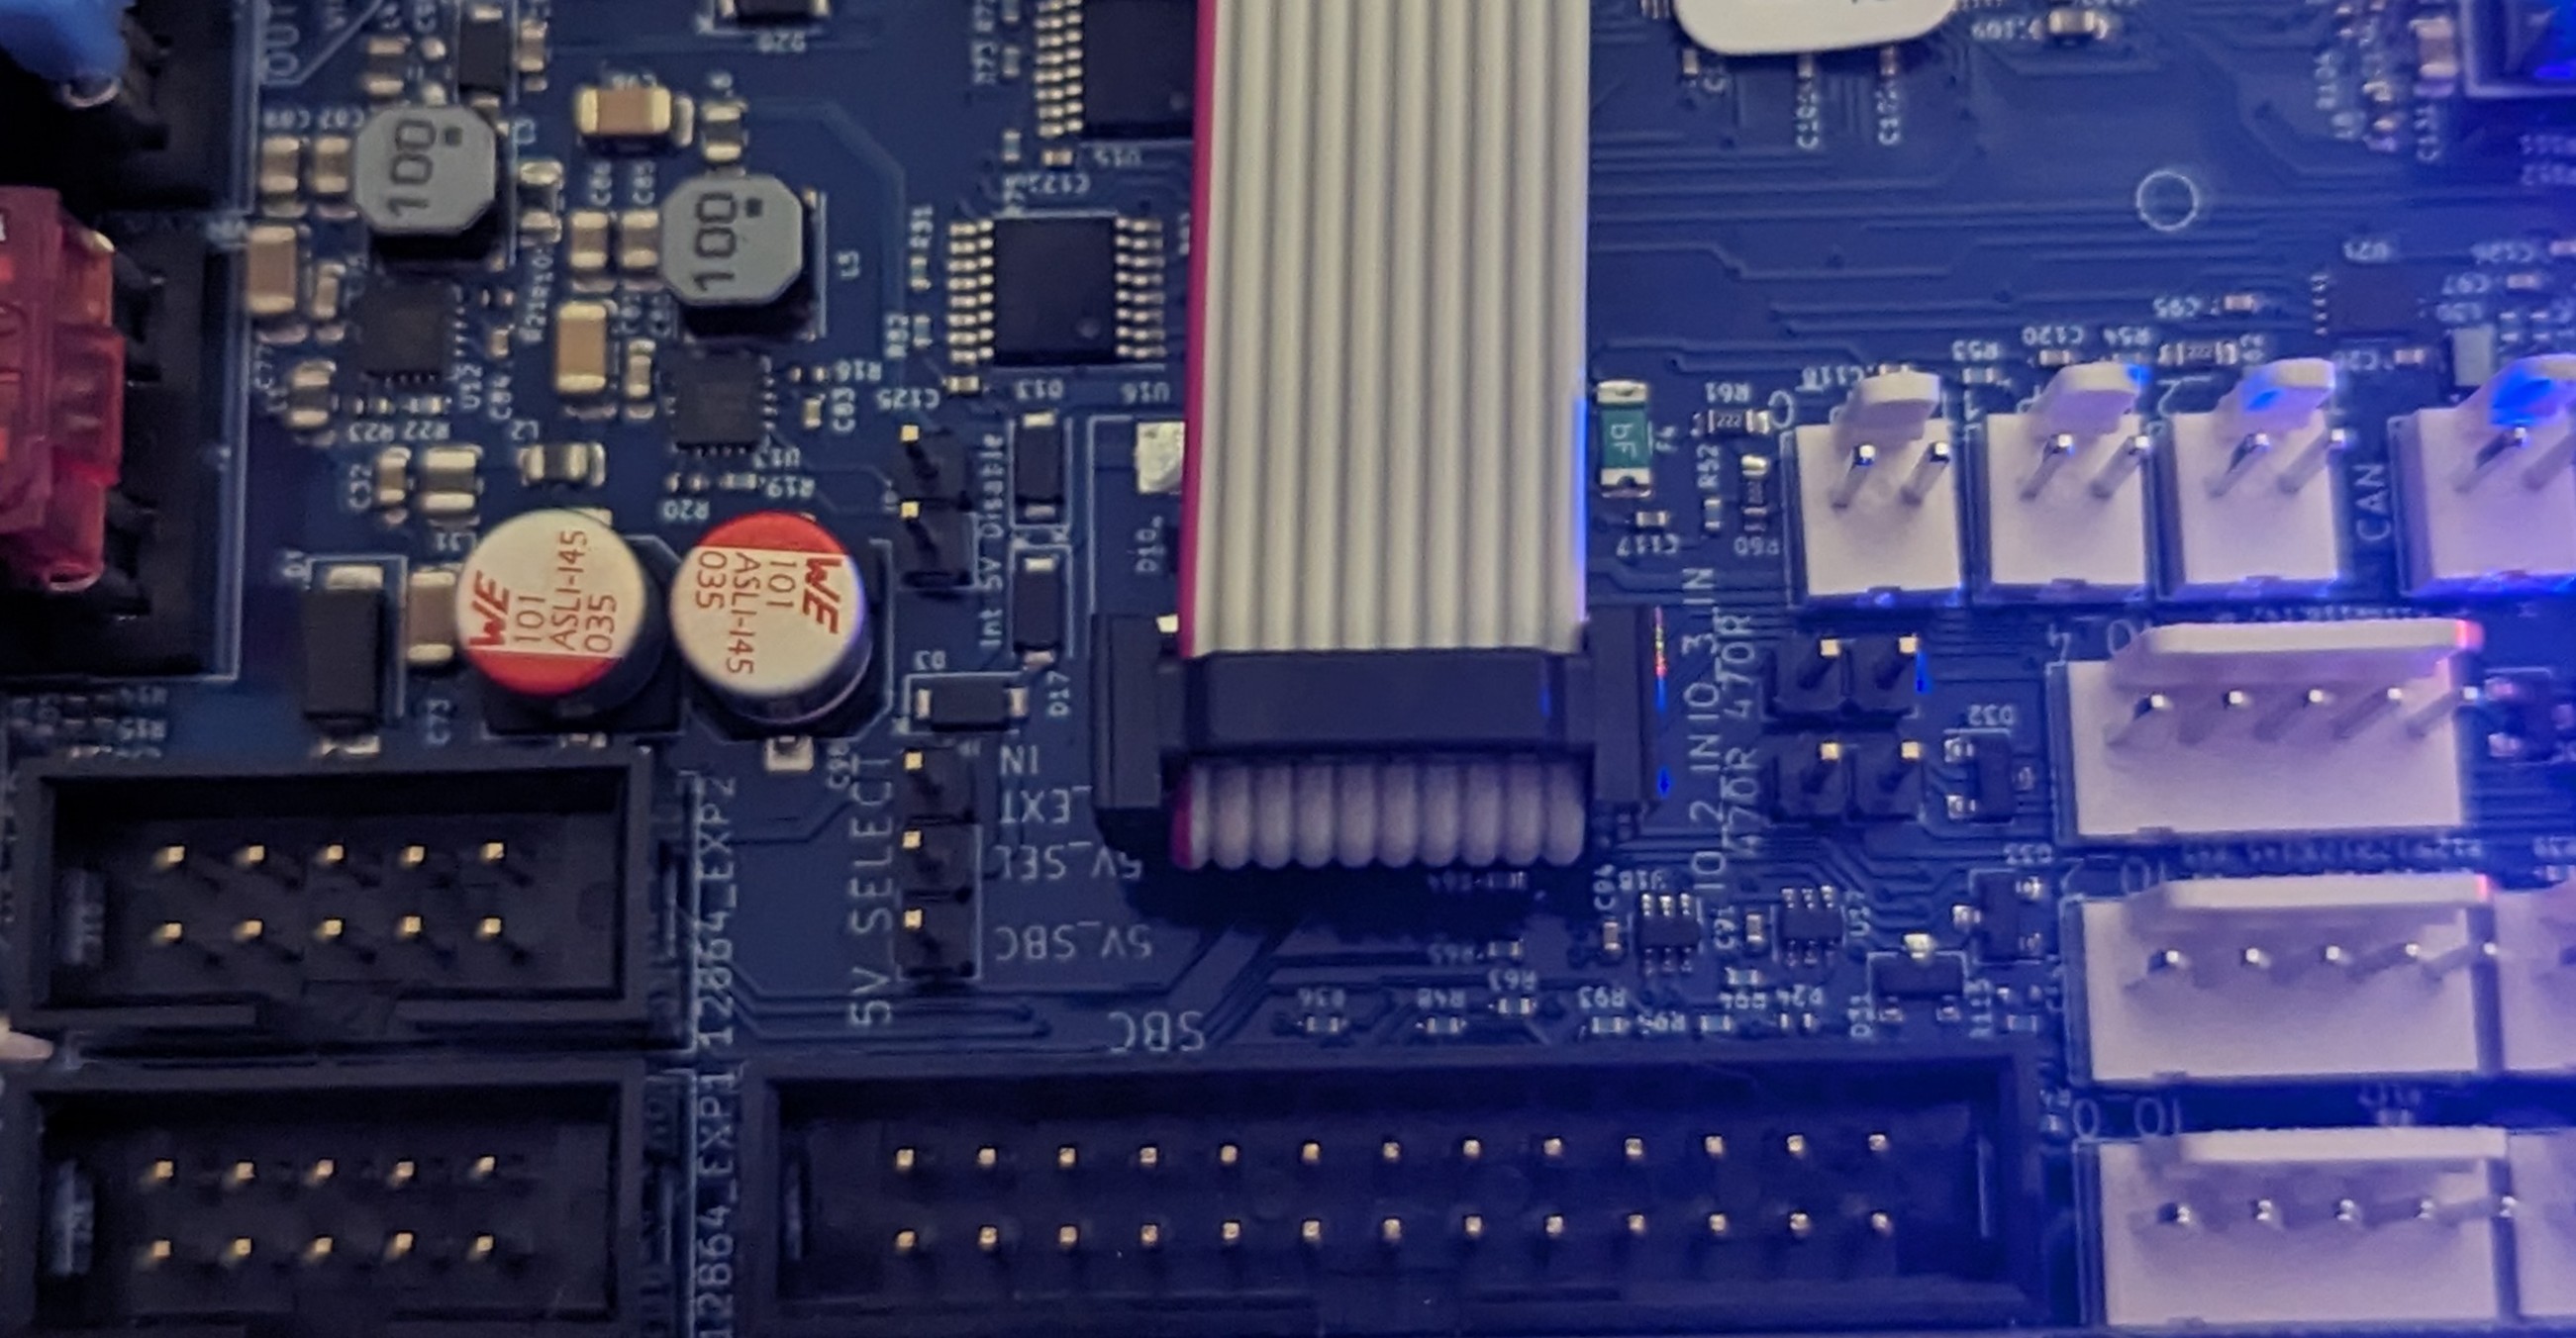
Duet3D accelerometer connected to the Duet 3 Mini5+ mainboard (non reversed IDC plug cable)
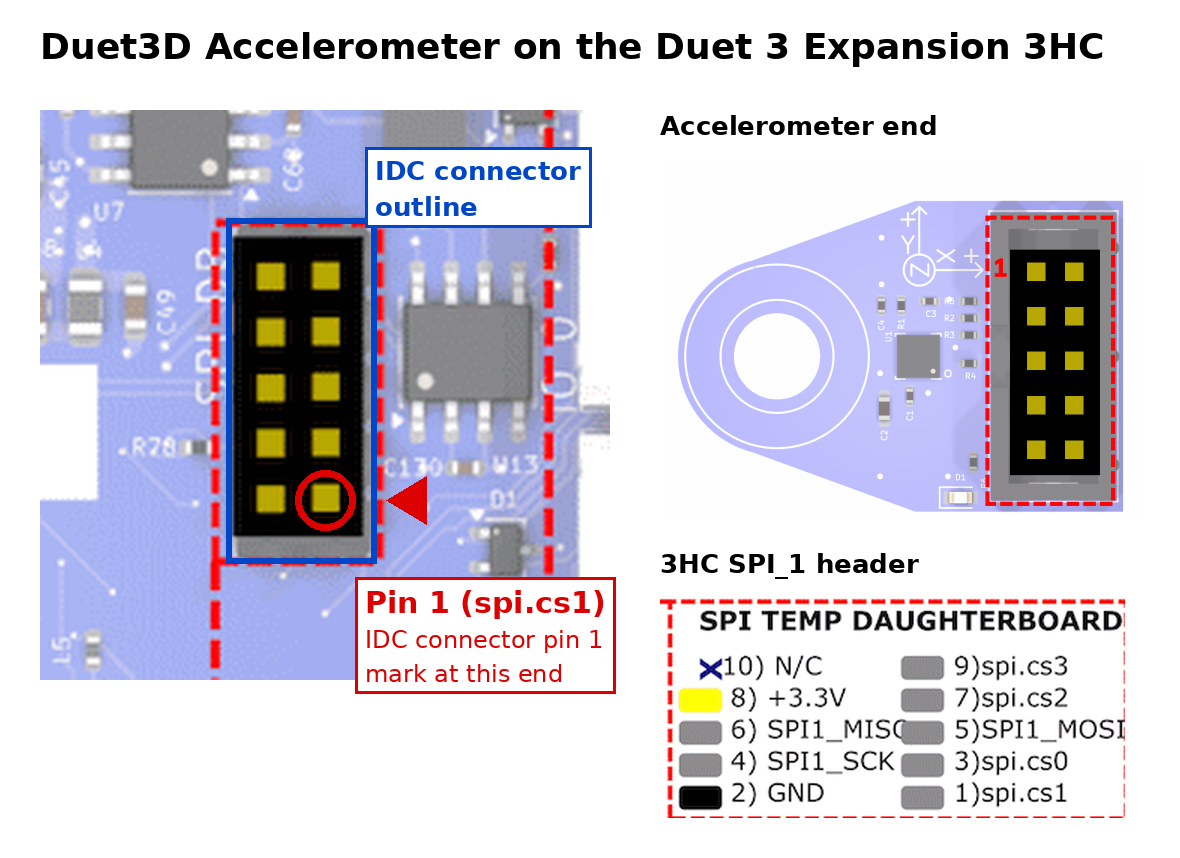
Duet3D accelerometer connection to the SPI_1 header of the Duet 3 Expansion 3HC (RRF 3.7 and later)
The SPI_1 header on the Duet 3 Expansion 3HC (v1.03 shown) has the same pin order as the SPI daughterboard header on the Duet 3 Mainboard 6HC. Connect the cable so that pin 1 of the connector goes to pin 1 of the header. With the driver connectors at the bottom, as in the 3HC wiring diagram, pin 1 is the bottom right pin. The accelerometer CS signal uses pin 1 (spi.cs1) and INT1 uses pin 3 (spi.cs0), so the command is M955 P[address].0 C"spi.cs1+spi.cs0", where [address] is the CAN address of the 3HC.
¶ Orientation
The I (orientation) parameter tells the firmware which of the 24 possible orientations the accelerometer chip is in relative to the printer axes. It is expressed as a 2-digit number. The first digit specifies which machine direction the Z axis of the accelerometer chip (usually the top face of the chip) faces, as follows: 0 = +X, 1 = +Y, 2 = +Z, 4 = -X, 5 = -Y, 6 = -Z. The second digit expresses which direction the X axis of the accelerometer chip faces, using the same code. If the accelerometer chip axes line up with the machine axis, the orientation is 20. This is the default orientation if no orientation has been specified.
In all the images below the image of the accelerometer is shown as if stood in front of a "normal" machine where X+ is to the right and Y+ is towards the back.
| Accelerometer axis to machine axis | ||||||
|---|---|---|---|---|---|---|
| +X to +X | +X to +Y | +X to +Z | +X to -X | +X to -Y | +X to -Z | |
| +Z to +X | NA | 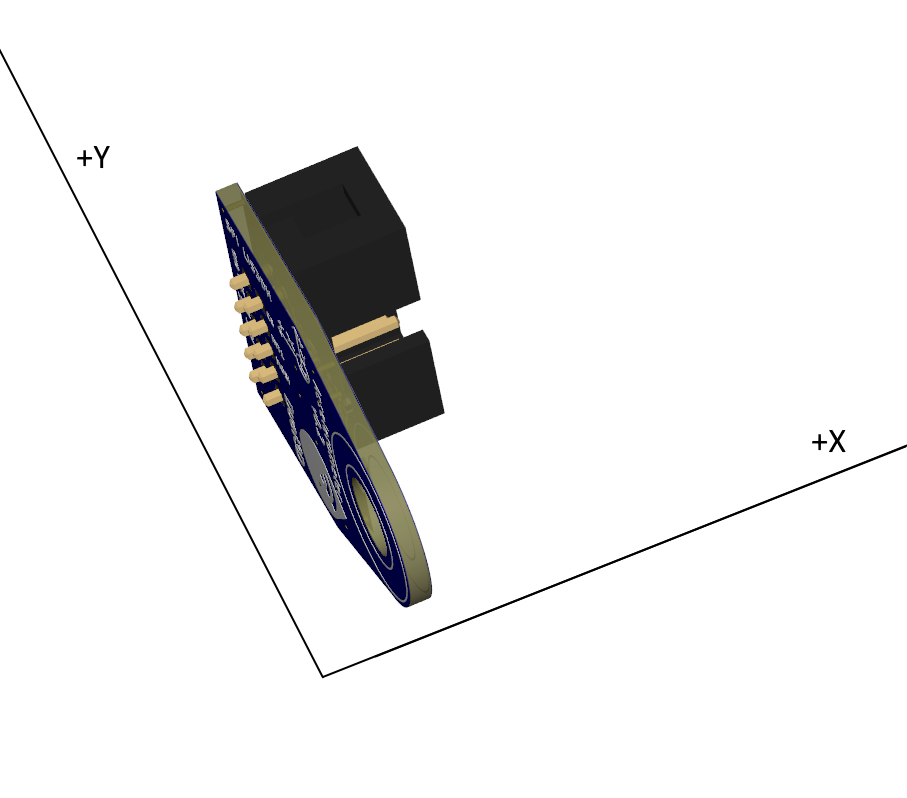 M955 P[##] I01 |
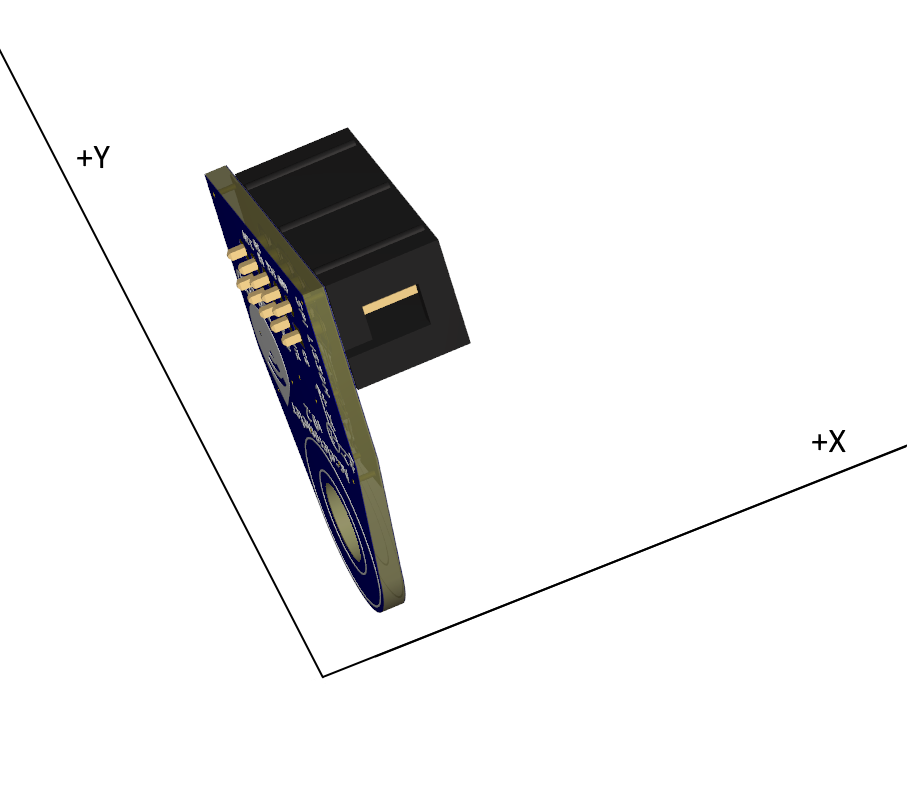 M955 P[##] I02 |
NA | 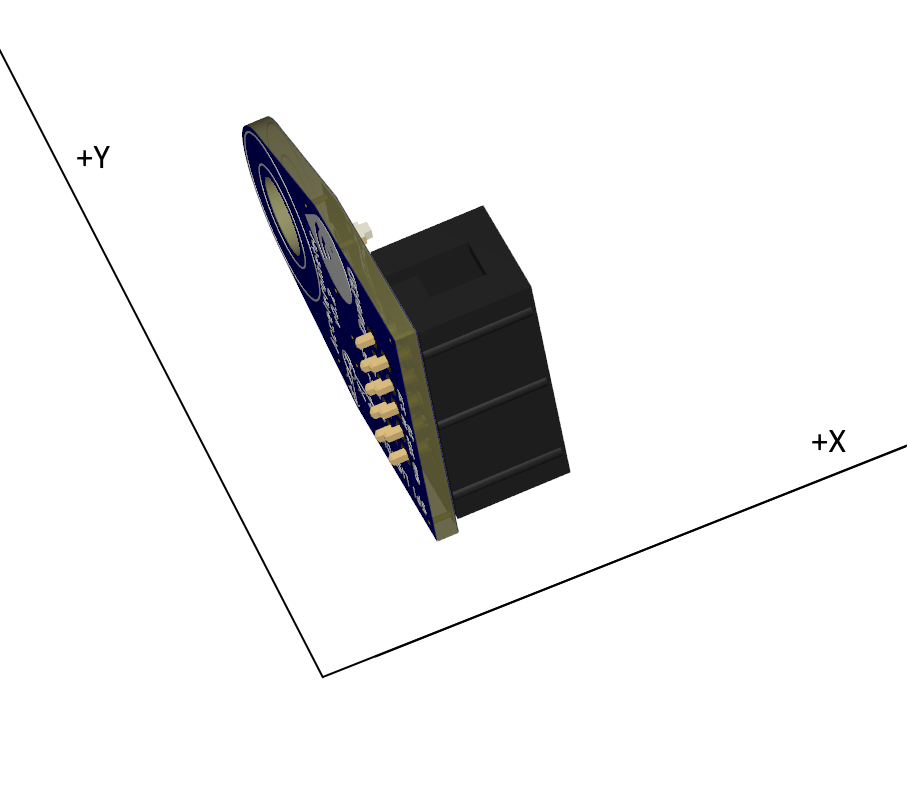 M955 P[##] I05 |
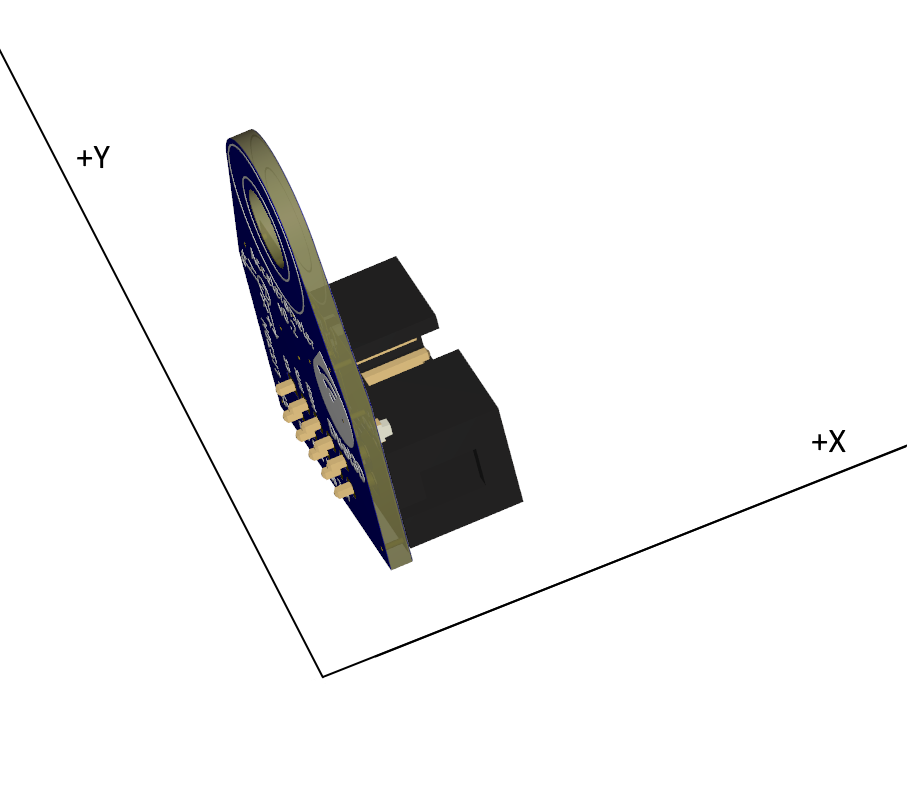 M955 P[##] I06 |
| +Z to +Y | 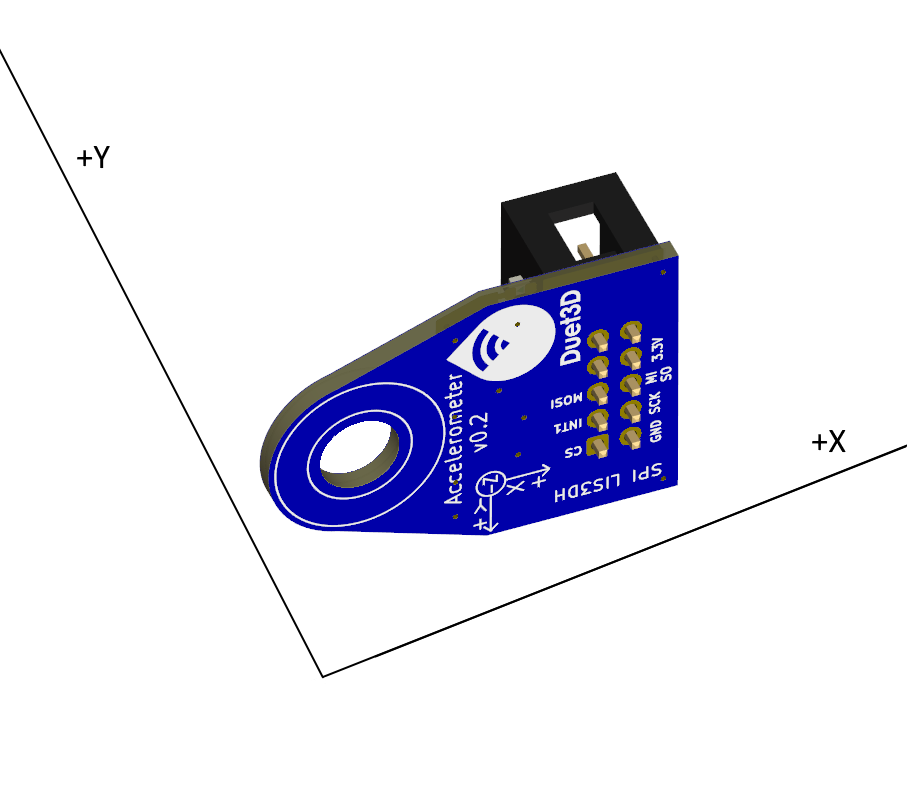 M955 P[##] I10 |
NA | 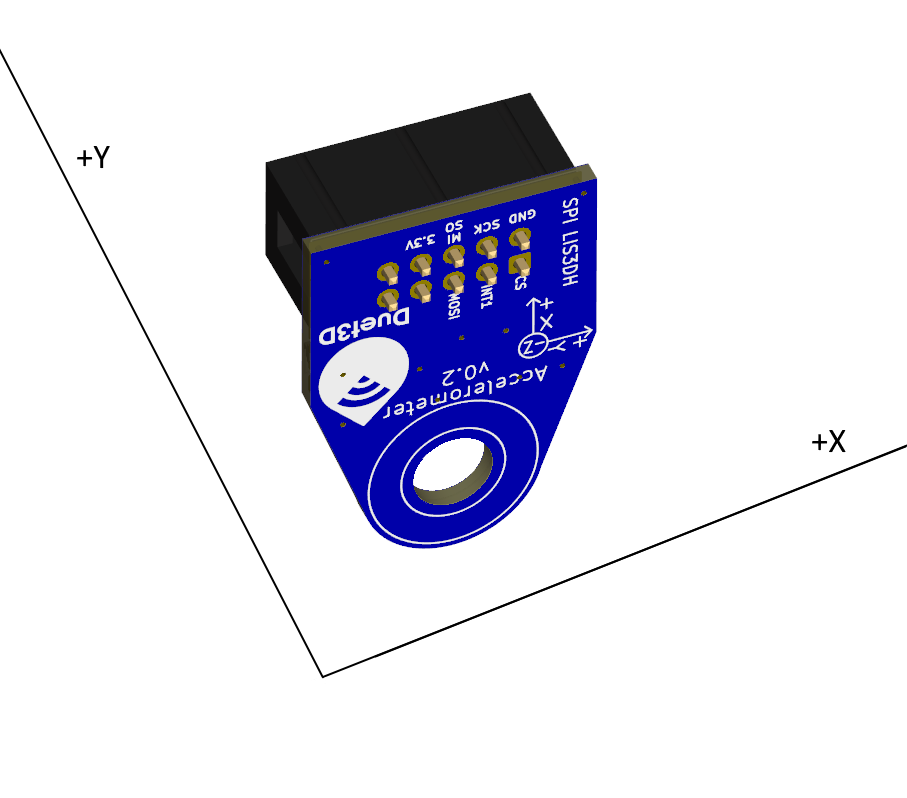 M955 P[##] I12 |
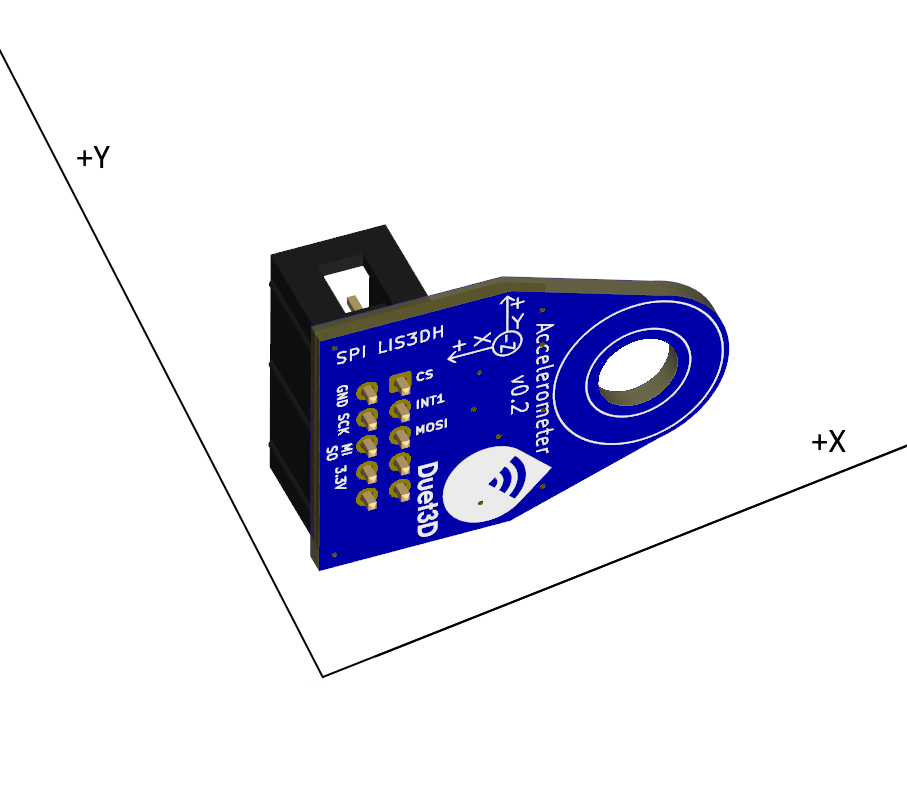 M955 P[##] I14 |
NA | 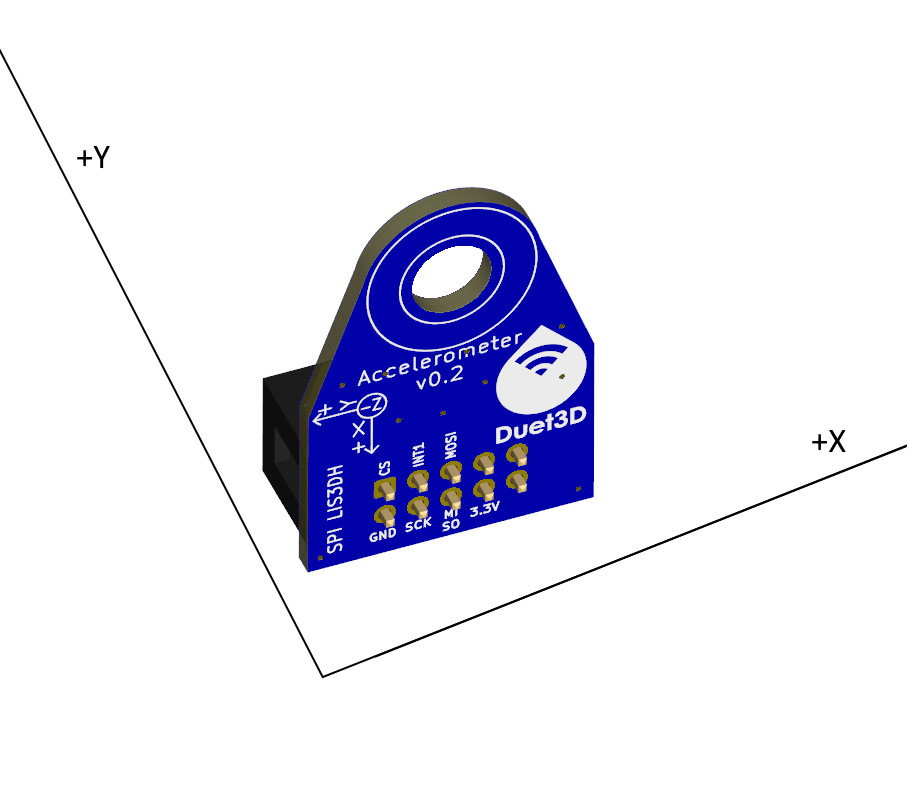 M955 P[##] I16 |
| +Z to +Z | 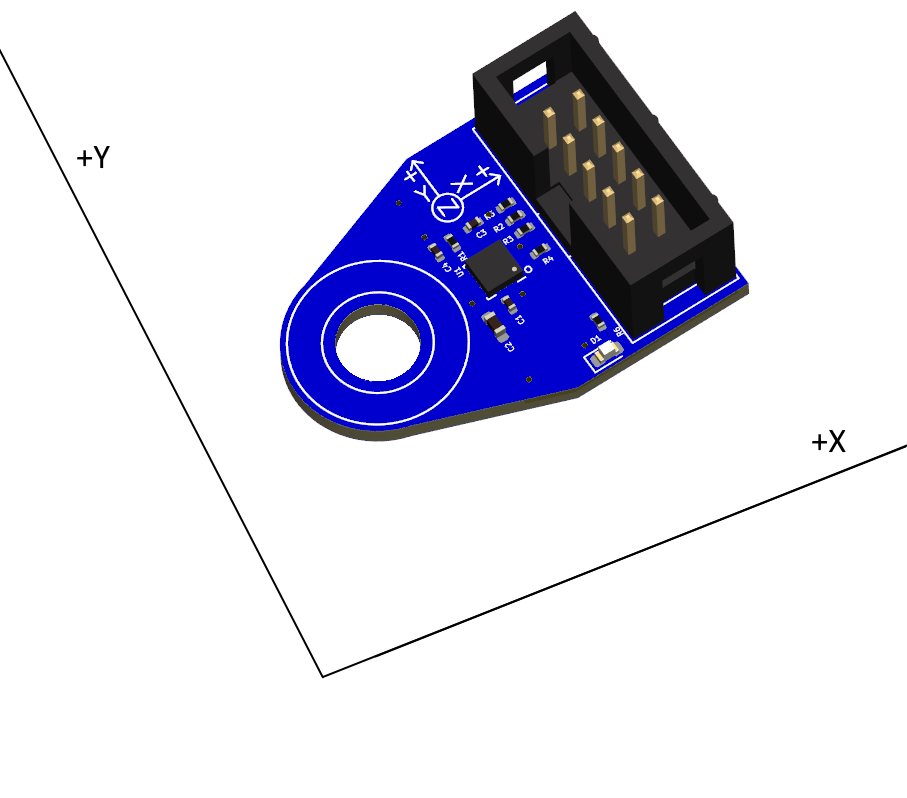 M955 P[##] I20 |
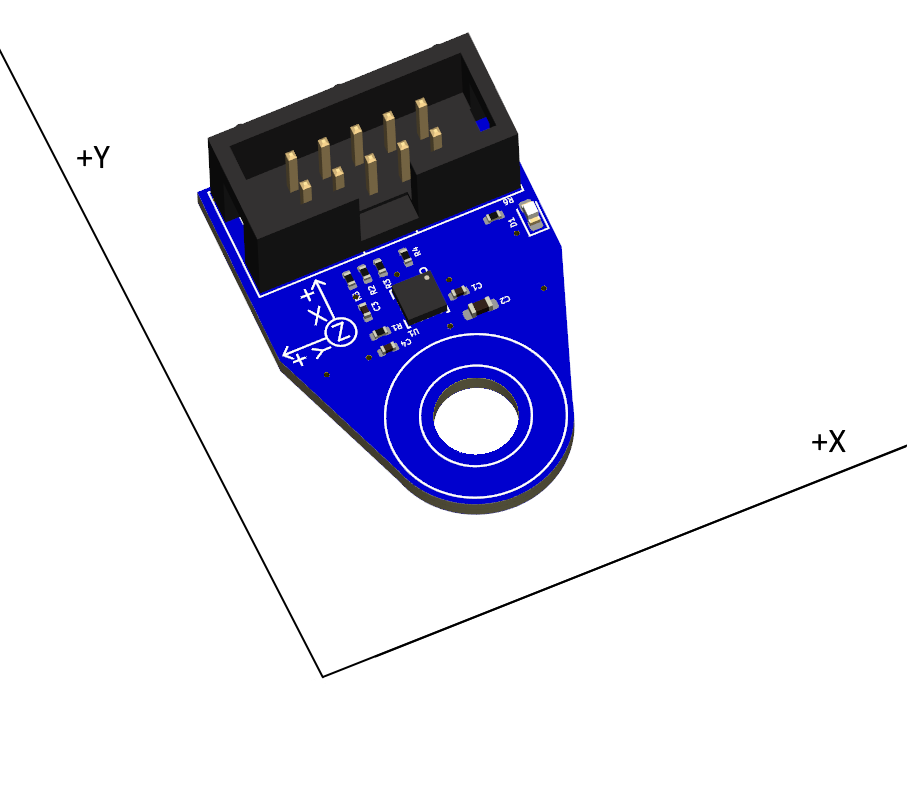 M955 P[##] I21 |
NA | 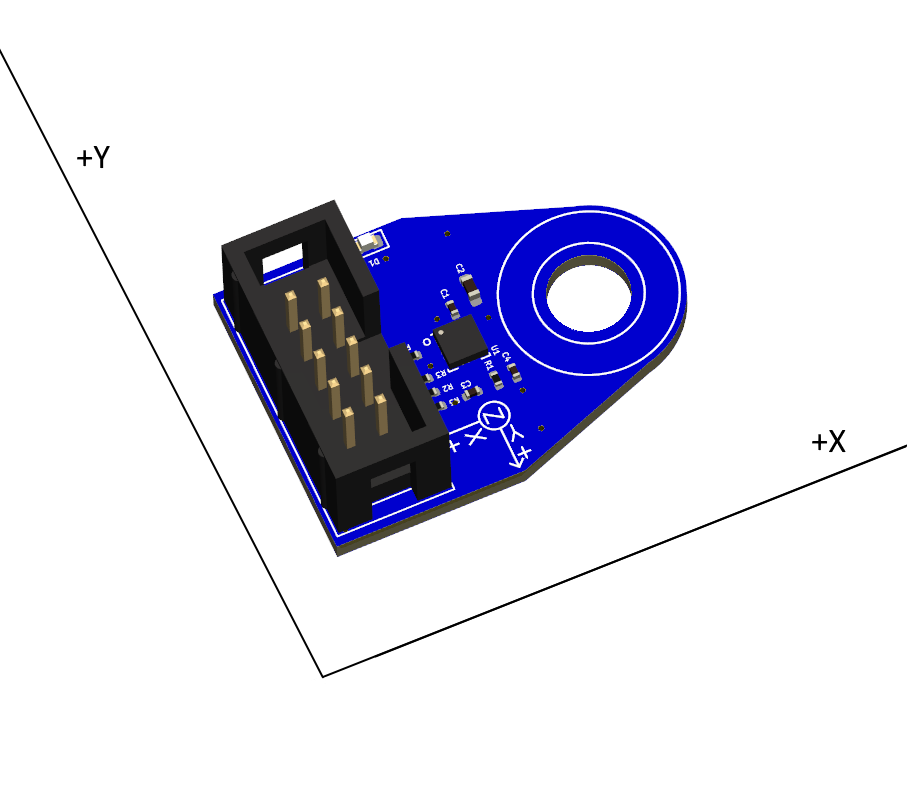 M955 P[##] I24 |
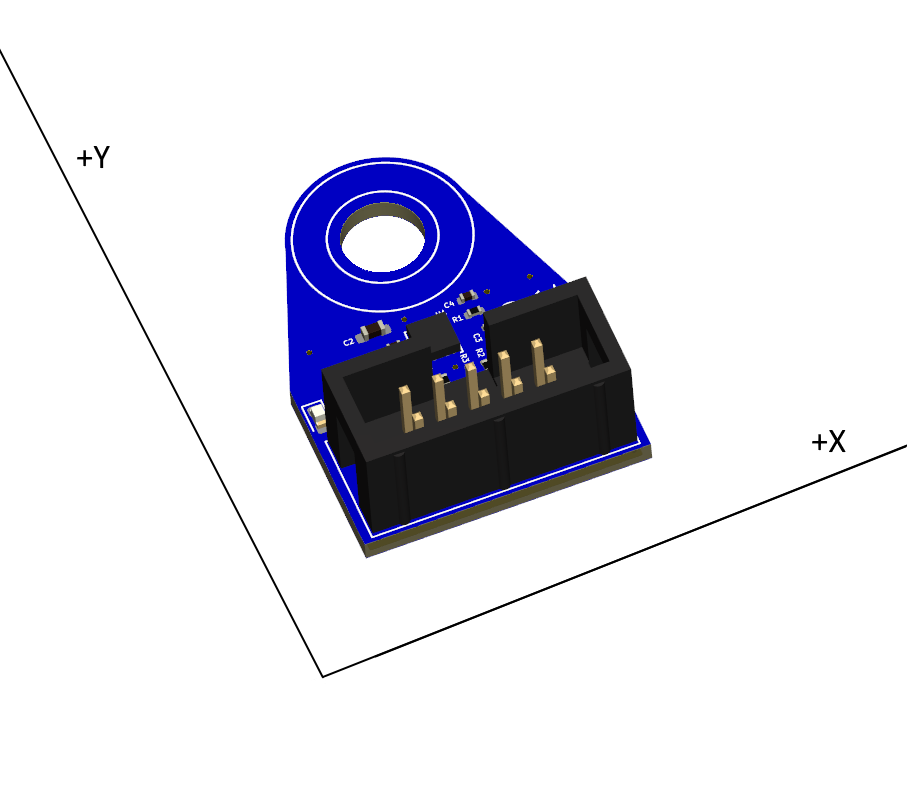 M955 P[##] I25 |
NA |
| +Z to -X | NA | 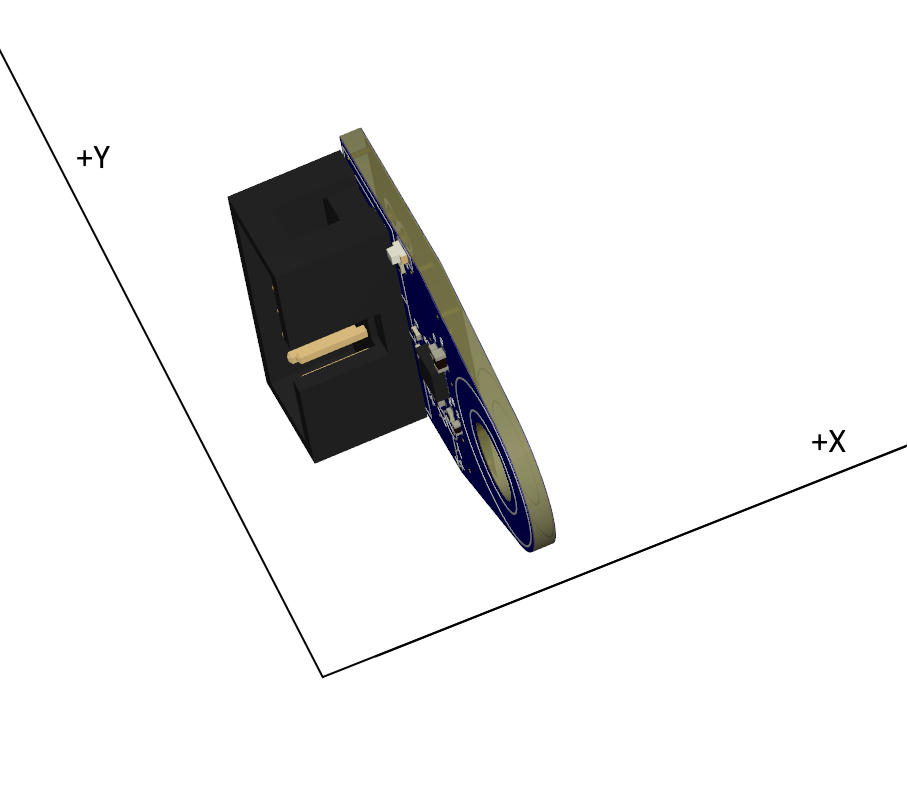 M955 P[##] I41 |
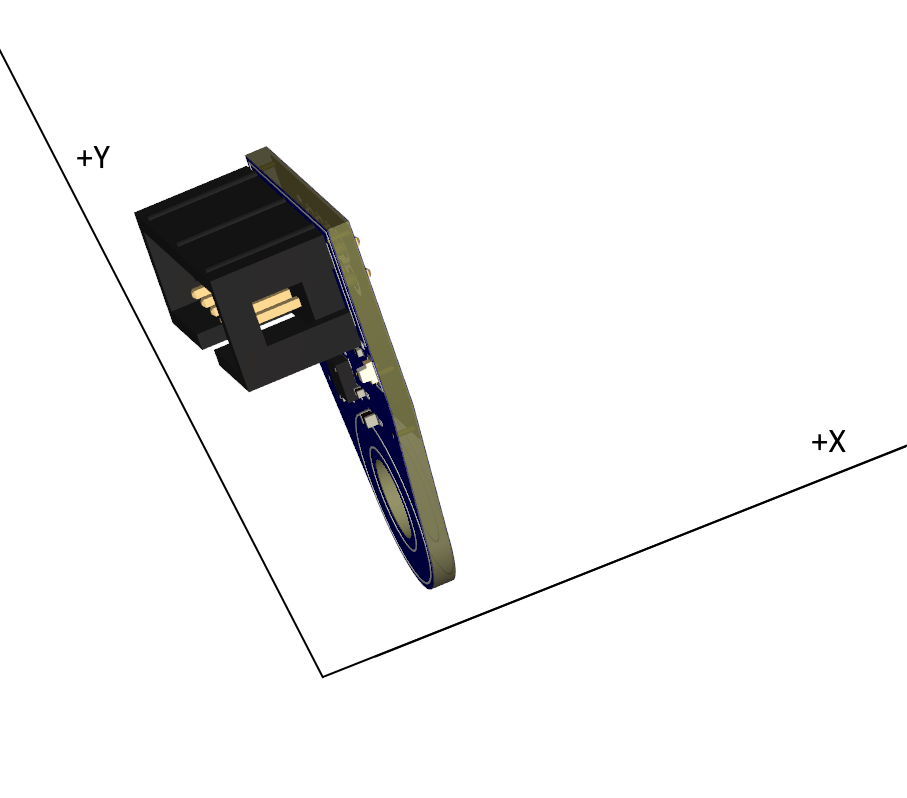 M955 P[##] I42 |
NA | 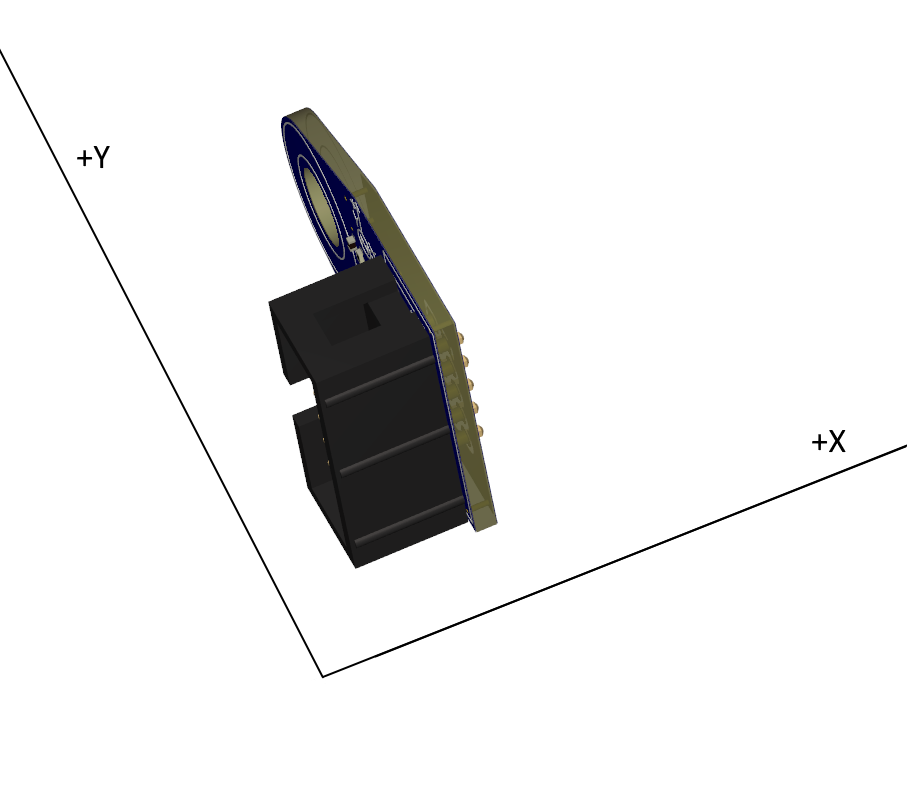 M955 P[##] I45 |
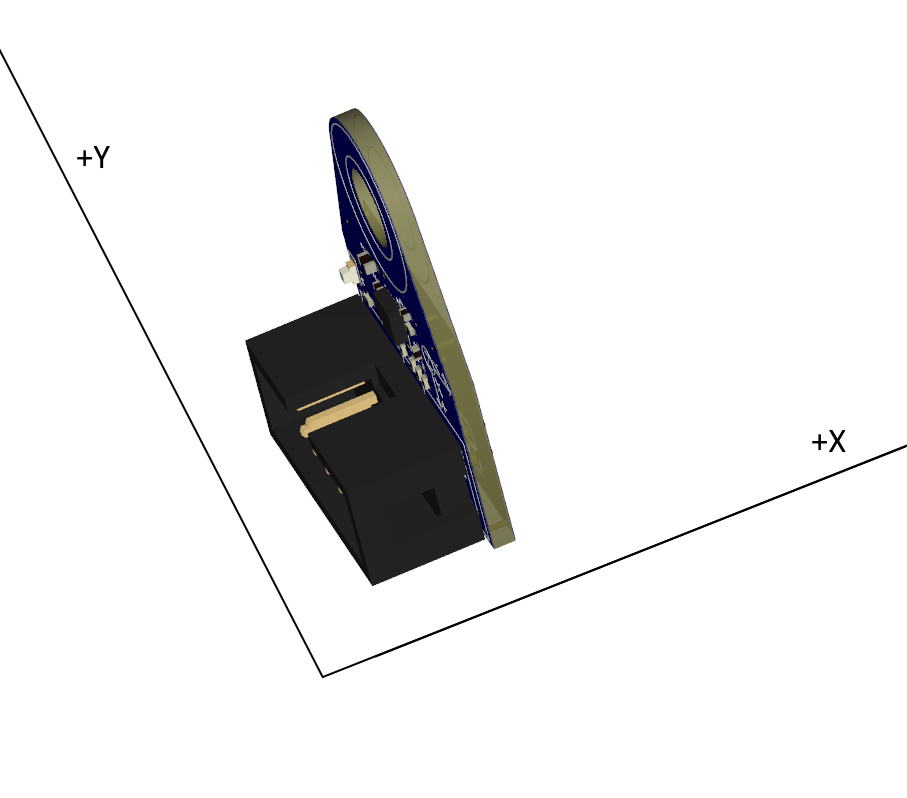 M955 P[##] I46 |
| +Z to -Y | 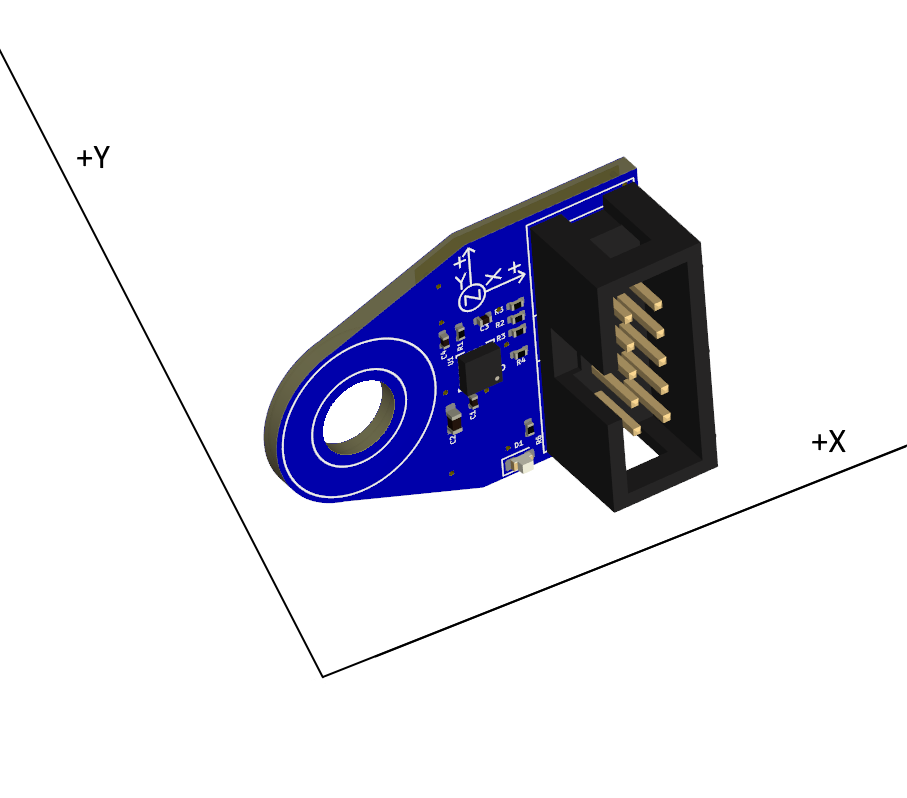 M955 P[##] I50 |
NA | 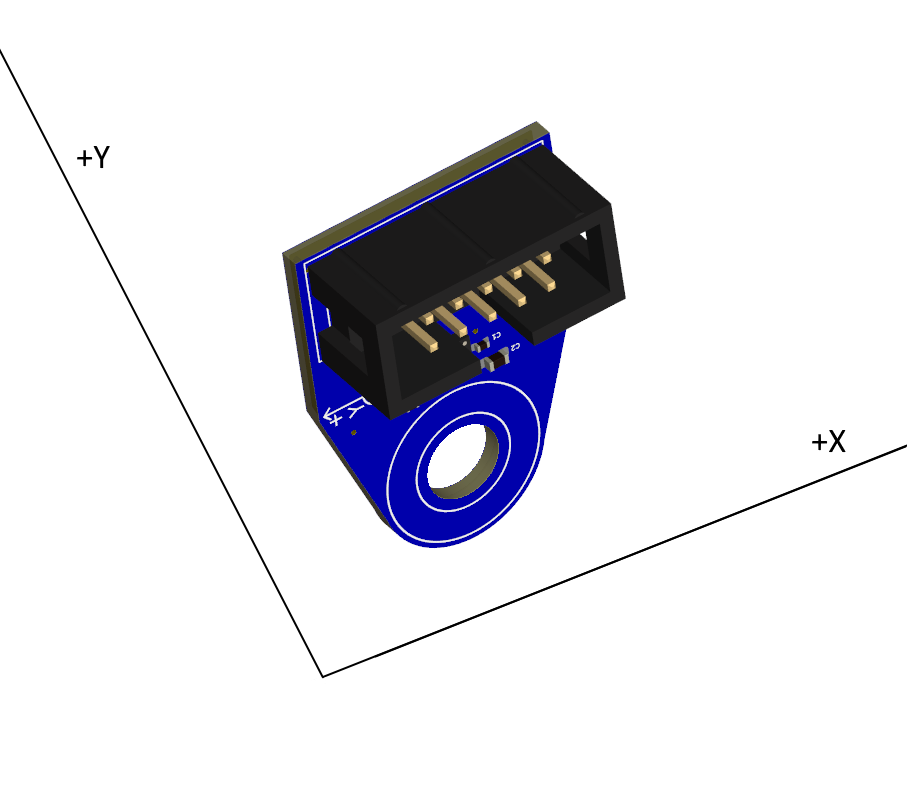 M955 P[##] I52 |
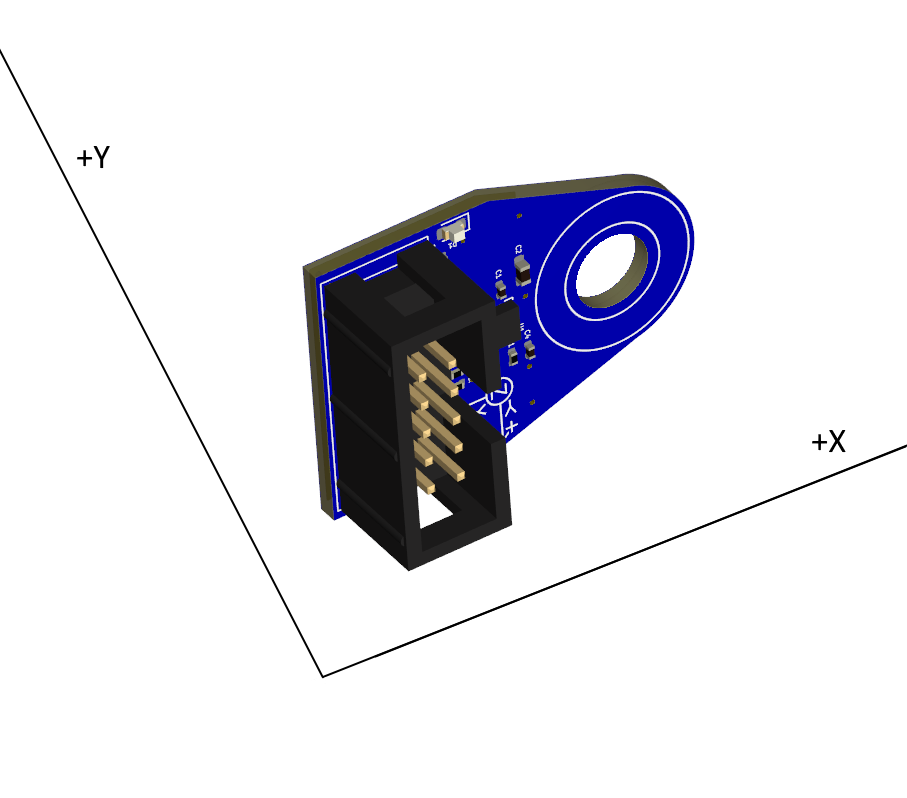 M955 P[##] I54 |
NA | 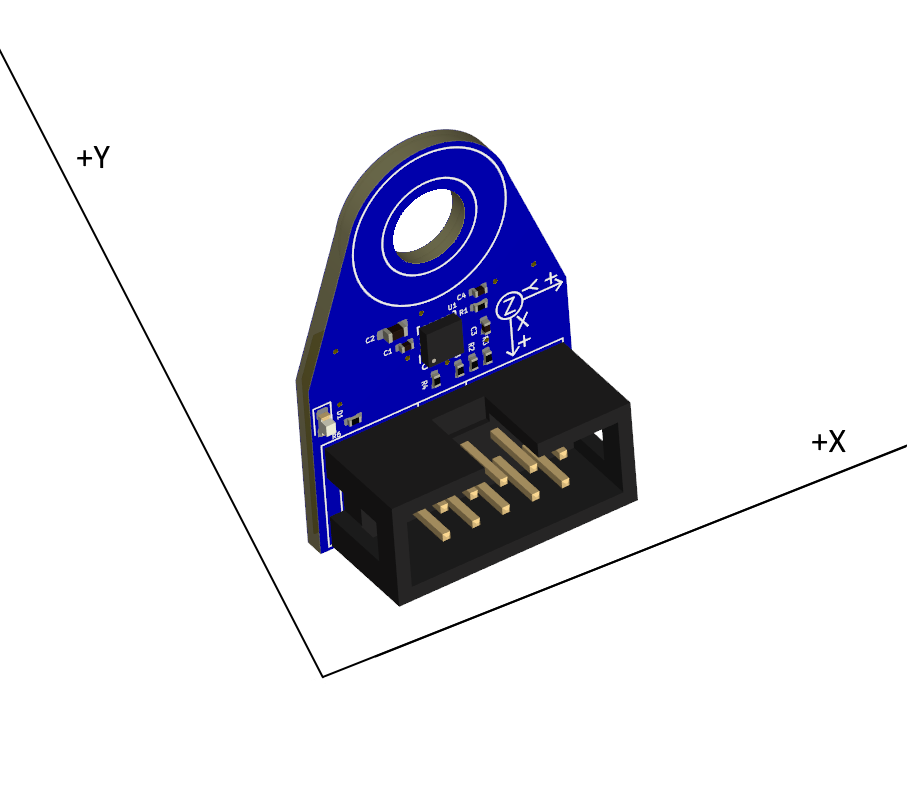 M955 P[##] I56 |
| +Z to -Z | 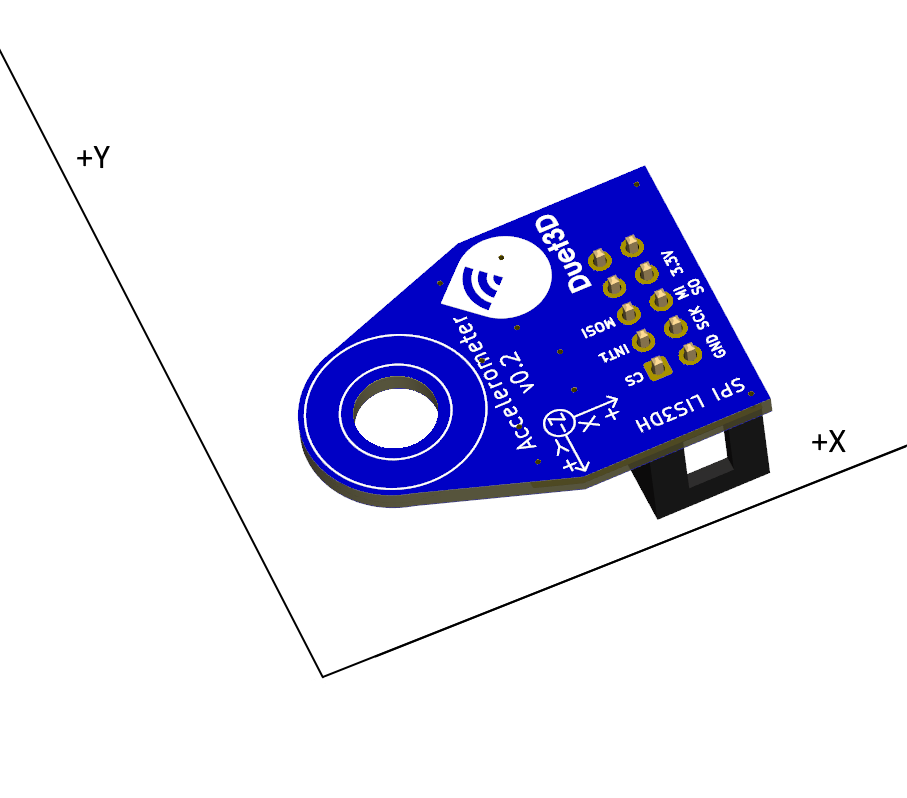 M955 P[##] I60 |
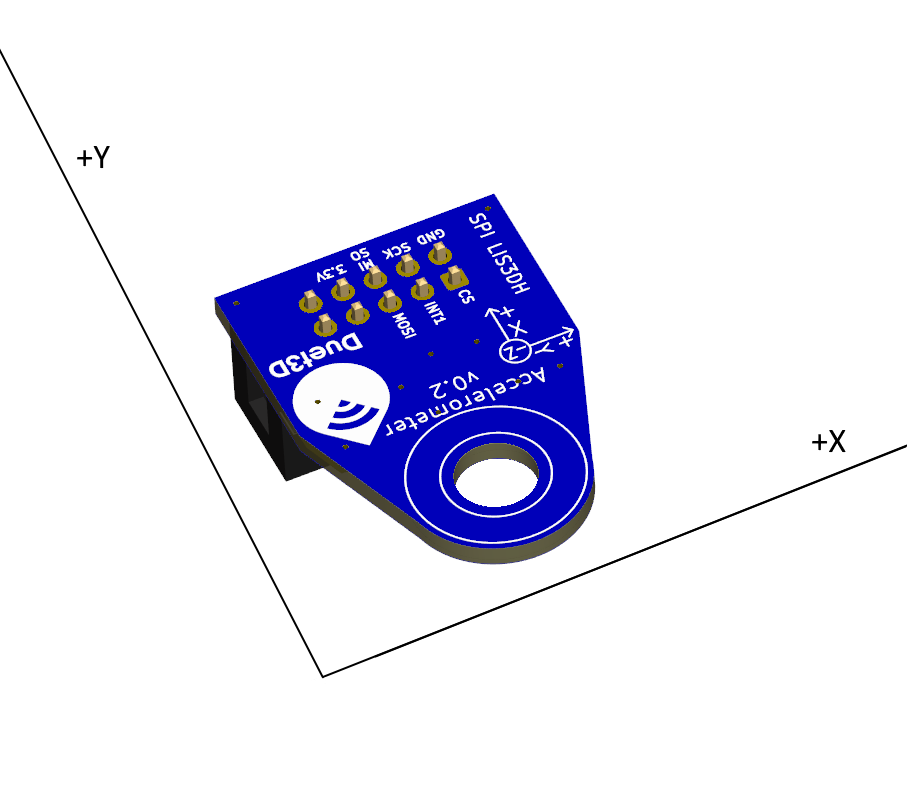 M955 P[##] I61 |
NA | 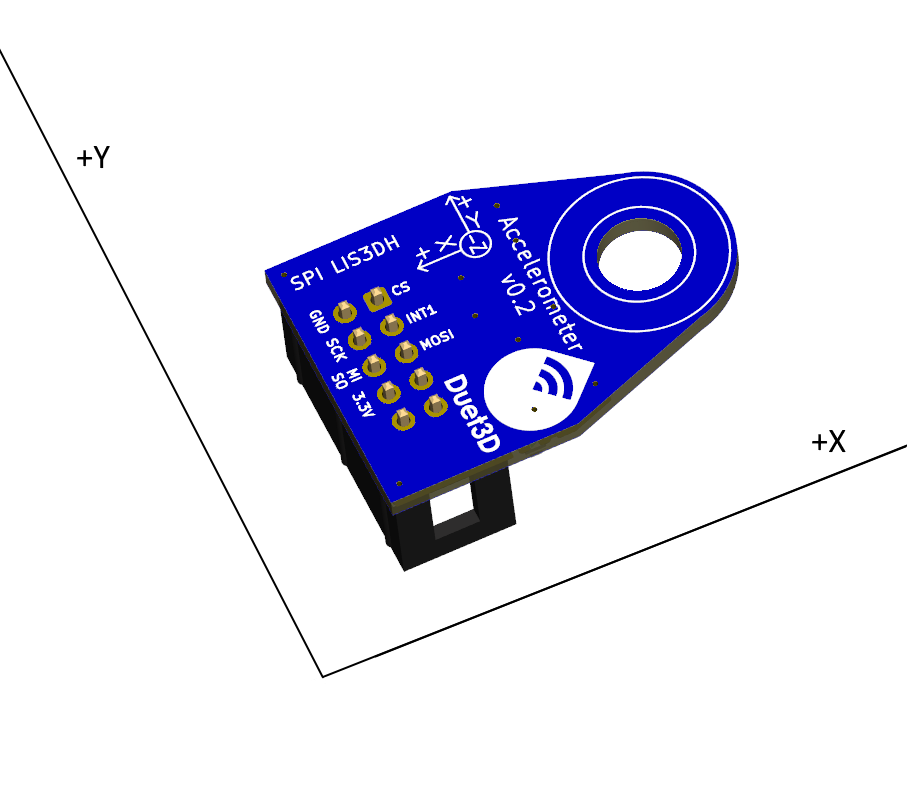 M955 P[##] I64 |
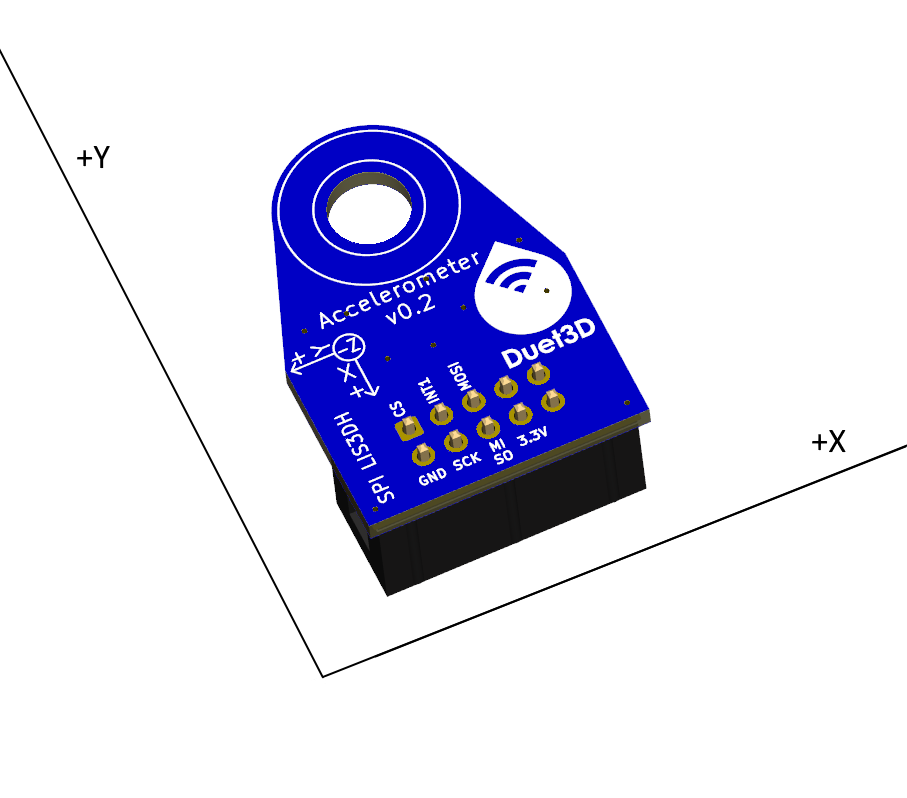 M955 P[##] I65 |
NA |
In RRF 3.7 and later, the M955 command must also include the C parameter. Otherwise, the I parameter is not applied. See M955.
¶ Configuration and use
See the connecting an accelerometer page for details on how to configure and use the accelerometer.
See the input shaping page for details on how to use input shaping.
¶ Revision History
- LIS3DH accelerometer replaced with LIS2DW12
- Initial version