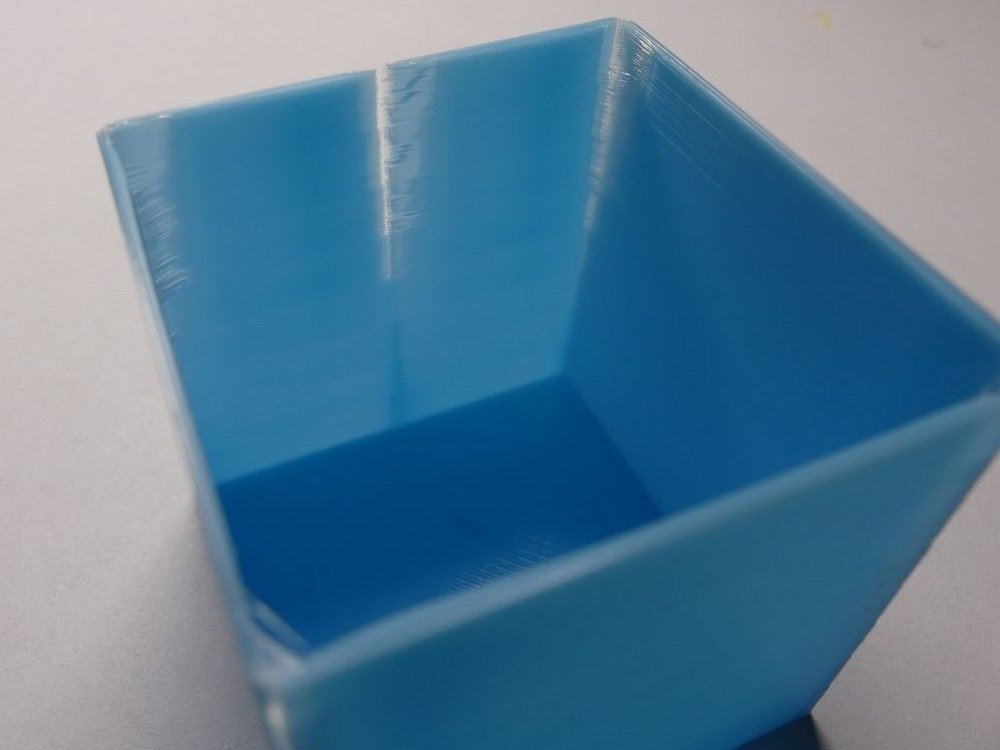
¶ What is pressure advance?
Pressure advance aims to compensate for the elasticity of the filament and the extruder system. There are at least three sources of elasticity:
- The filament in the Bowden tube behaves as if it is compressible, because its diameter is typically 0.25mm smaller than the inside diameter of the tube. When it is under tension, it will take the most direct path that the tube allows. When it is under compression, it will snake from side to side, so the length of filament in the tube will be greater.
- The filament itself is slightly compressible.
- In order to produce torque, the angle of the rotor of a stepper motor must lag the angle commanded by the current in the coils. The more the filament resists being fed, the greater the lag angle. So the motor itself is slightly "springy".
These factors cause under-extrusion whenever the extrusion rate is increasing, for example at the start of a straight line when the nozzle has to accelerate from zero or near-zero speed. This is because some of the filament fed at the start of the move is used to counter the elasticity and build up the pressure. Similarly, you get over-extrusion when the rate of extrusion decreases, for example when the nozzle slows down at the end of a straight line. This is because the pressure in the Bowden tube continues to push filament through the nozzle even after the extruder drive slows down or stops.
Pressure advance compensates for elasticity by feeding additional filament through the extruder drive when the extrusion speed is increasing, and feeding less filament through the extruder when the extrusion speed is decreasing, This may result in filament actually being retracted during the last part of the deceleration phase of a move.
Mathematically, it works like this:
actual_extrusion_speed = requested_extrusion_speed + (K * current_extruder_acceleration)
The constant K is the amount of pressure advance you configure.
¶ How to enable and configure pressure advance
Pressure advance is configured on a per-extruder-drive basis. Different extruder drives can have different amounts of pressure advance. To enable pressure advance on an extruder drive, use the following form of command:
M572 D0 S0.1
The D parameter is the extruder drive number, and the S parameter is the amount of pressure advance you want for that extruder drive. To set the same S parameter for multiple extruders, list each extruders D value, separated by colons:
M572 D0:1 S0.1
To assign different values to different extruders, you need to use separate M572 commands.
¶ How much pressure advance to use?
The amount of pressure advance required will vary based on numerous factors that affect the elasticity of the extrusion system such as the distance between hotend and extruder gears, the type of material, the print speed and temperature, jerk and acceleration values. The predominant factor being the length of bowden tube between the extruder and hotend. A very long bowden tube (1m) may require S values approaching 1.0 or even 2.0 in some cases. Whereas a direct drive extruder like a Titan Aero has good results with a value of ~0.05.
A good starting point for tuning for PLA is as follows:
- Direct Drive: S0.025 and up
- Short Bowden (200mm): S0.1 and up
- Medium Bowden (400mm): S0.3 and up
- Long Bowden (600mm): S0.5 and up
- Very long bowden (800mm+): S0.7 and up
These are only starting points, your particular setup may require more or less. The only way to know for sure is an actual print test. Different materials may behave very differently.
¶ Calibrating pressure advance
¶ NOTE: Extruder speed, jerk and acceleration
With pressure advance enabled, RRF will automatically limit extruder acceleration (M201 E, mm/sec^2) to the lower of either the M201 E value, or the instantaneous speed change allowed (M566 E, aka jerk, converted to mm/s) divided by the pressure advance constant (M572 S, in seconds), to avoid pressure advance causing the extruder motor to skip steps. For extruder-only moves, only the M201 limit is applied.
This means the extruder speed, acceleration and jerk settings are important to get right.
Extruder maximum speed (M203 E parameter, mm/min) should be set to the maximum retraction speed achievable without skipping steps, usually around 30 to 60mm/s, so 1800 to 3600mm/min. For normal extrusion moves, the speed is much lower than this.
Extruder allowable instantaneous speed change (jerk) (M566 E parameter, mm/min) This largely depends on the extruder; a direct-drive NEMA17 motor can have jerk set between 2000 to 6000mm/min. Smaller, high-geared NEMA14 motors might be between 200 to 500mm/min as they can't tolerate high jerk values, but then these are often used for direct-drive hotends, for which the amount of PA needed is usually small. High jerk is also a problem for Flexi shaft remote extruders, so follow the manufacturers recommendation. Ideally, set jerk high enough to avoid acceleration being limited during printing moves, as long as this doesn't result in skipped steps.
Extruder acceleration (M201 E parameter, mm/sec^2) smaller, geared extruders will need lower acceleration, while larger NEMA17 direct-drive can be set higher. Settings in the range of 2000 to 4000mm/sec^2 should be fine, but test for skipped steps. This value will be used for extruder-only moves, like retract and reprime moves.
Determine and test full-speed extruder moves before tuning PA, then check whether accleration is set correctly for your PA testing range. Note M566 reports jerk in mm/min, M205 reports jerk in mm/s.
For example, if a machine uses extruder jerk of 50mm/s (3,000mm/min) at a PA of 0.02s, maximum extruder acceleration would be 50 / 0.02 = 2,500mm/s^2.
¶ Methods of finding the right amount of pressure advance
See the set of macros developed by Duet3D stalwart Phaedrux in this forum thread
Another option for finding your ideal PA value is to use a customizable python script developed by a forum user that generates a gcode file with varying amounts of PA, which is described in this forum thread
Another option is to use the Marlin K factor script and modifying it as described in this forum thread
Another option still is this detailed method described in this forum thread
¶ Simplest Method Possible
Alternatively, the following method is proven to work, but requires you use post processing or manually edit the gcode file.
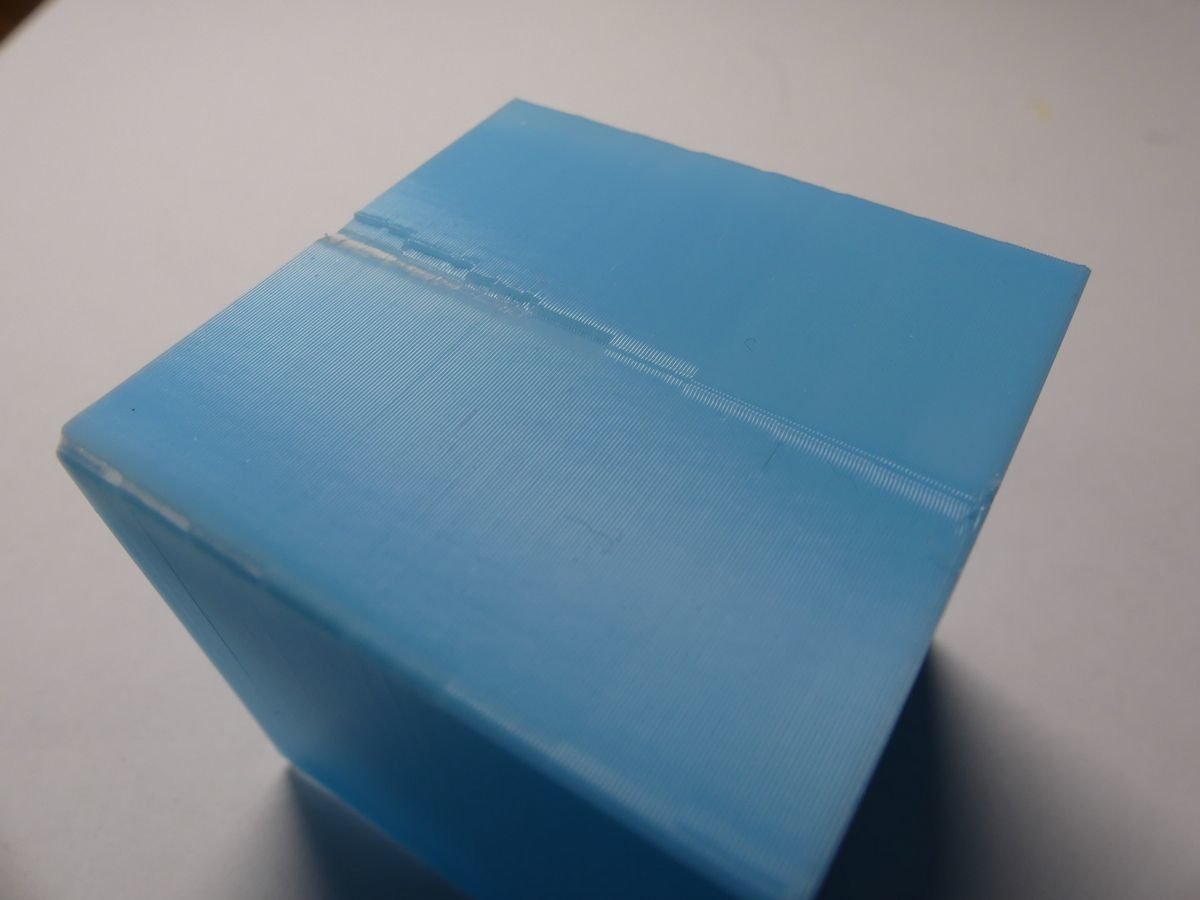
The most simple method of tuning pressure advance is to slice a 100mm cube, 1 bottom layer, 1 or 2 perimeters, and minimal or no infill. Ensure cooling is adequate for printing an object with very short layer times. Ensure the Z seam is aligned to a single point on the middle of a face. Use a print speed close to your normal print speed. Ensure your extruder steps per mm has been calibrated. Ensure any wipe and coasting settings are disabled in the slicer.
Now start the print with pressure advance disabled. After a few layers enable pressure advance by sending the M572 command with your desired starting amount in the gcode console. You may notice a brief pause in movement while the value changes. Continue the print for a few more layers. Try various amounts above or below the starting value and pay attention to the Z seam. Too little PA may result in a bulge at the end of the perimeter before the layer change. Too much PA may result in a gap at the seam.
If you use PrusaSlicer, you can use the before layer change gcode found in the Printer Tab > Custom Gcode, to automate the pressure advance value change.
; 0.2mm layer, 8 bands 5mm each, total height 40mm
{if layer_num== 1}M572 D0 S0.0
{elsif layer_num== 25}M572 D0 S0.05
{elsif layer_num== 50}M572 D0 S0.10
{elsif layer_num== 75}M572 D0 S0.15
{elsif layer_num== 100}M572 D0 S0.20
{elsif layer_num== 125}M572 D0 S0.25
{elsif layer_num== 150}M572 D0 S0.30
{elsif layer_num== 175}M572 D0 S0.35
{endif}
For Simplify3D, you can put the code below into the post processing commands found at Edit process settings > Scripts, then scroll down to find "Additional commands for post processing"
; 0.2mm layer, 8 bands 5mm each, total height 40mm
{REPLACE "; layer 25" "M572 D0 S0.0\n; layer 25"}
{REPLACE "; layer 50" "M572 D0 S0.05\n; layer 50"}
{REPLACE "; layer 75" "M572 D0 S0.10\n; layer 75"}
{REPLACE "; layer 100" "M572 D0 S0.15\n; layer 100"}
{REPLACE "; layer 125" "M572 D0 S0.20\n; layer 125"}
{REPLACE "; layer 150" "M572 D0 S0.25\n; layer 150"}
{REPLACE "; layer 175" "M572 D0 S0.30\n; layer 175"}
{REPLACE "; layer 200" "M572 D0 S0.35\n; layer 200"}
This script will insert a new M572 value every 25 layers. You can customize it by changing the S value at the end.
¶ Interpreting the Results


These images show the results of the various PA values. Choose the value where the seam is most even and the corners do not bulge. If there is a gap at the seam or corners, the PA value is too high.
Once you choose a range that looks best, you can repeat the test and expand the values within the range. In this example case, the best value was 0.15. A repeat test could test all the values between 0.1 and 0.2, and so on. If you have a very long bowden tube, you may need to test a fairly wide range of values and may need to run multiple tests.
Once you have a good value, do some other test prints of more detailed models, like a Benchy just to verify that there are no other odd issues.
¶ Side effects of enabling pressure advance
If you use a large amount of pressure advance then the extruder may retract filament at the end of a move. If that move is followed by a travel move with retraction of the filament, then the total amount of retraction may be too great for your hot end. Therefore you should consider reducing retraction when you enable pressure advance.
When the extruder acceleration changes, the extruder velocity has to change instantaneously. If the configured extruder jerk is too low to permit this, the extruder acceleration will be restricted so as to honour the maximum configured extruder jerk, and this may in turn limit the printing acceleration. So if enabling pressure advance slows down printing, this may be a sign that the allowed extruder jerk configured in the M566 command is too low. This may prove problematic for remote direct drive extruders like the Zesty Nimble which use a high gear ratio and low jerk values.
You may notice that when using pressure advance there may be a gap between the perimeters and the solid infill lines. To combat this you may need to adjust the infill overlap value in the slicer.
If you configure Input Shaping, you will need to retune your Pressure Advance. It is recommend to first tune Input Shaping, then Pressure Advance, then Retraction.