¶ Introduction
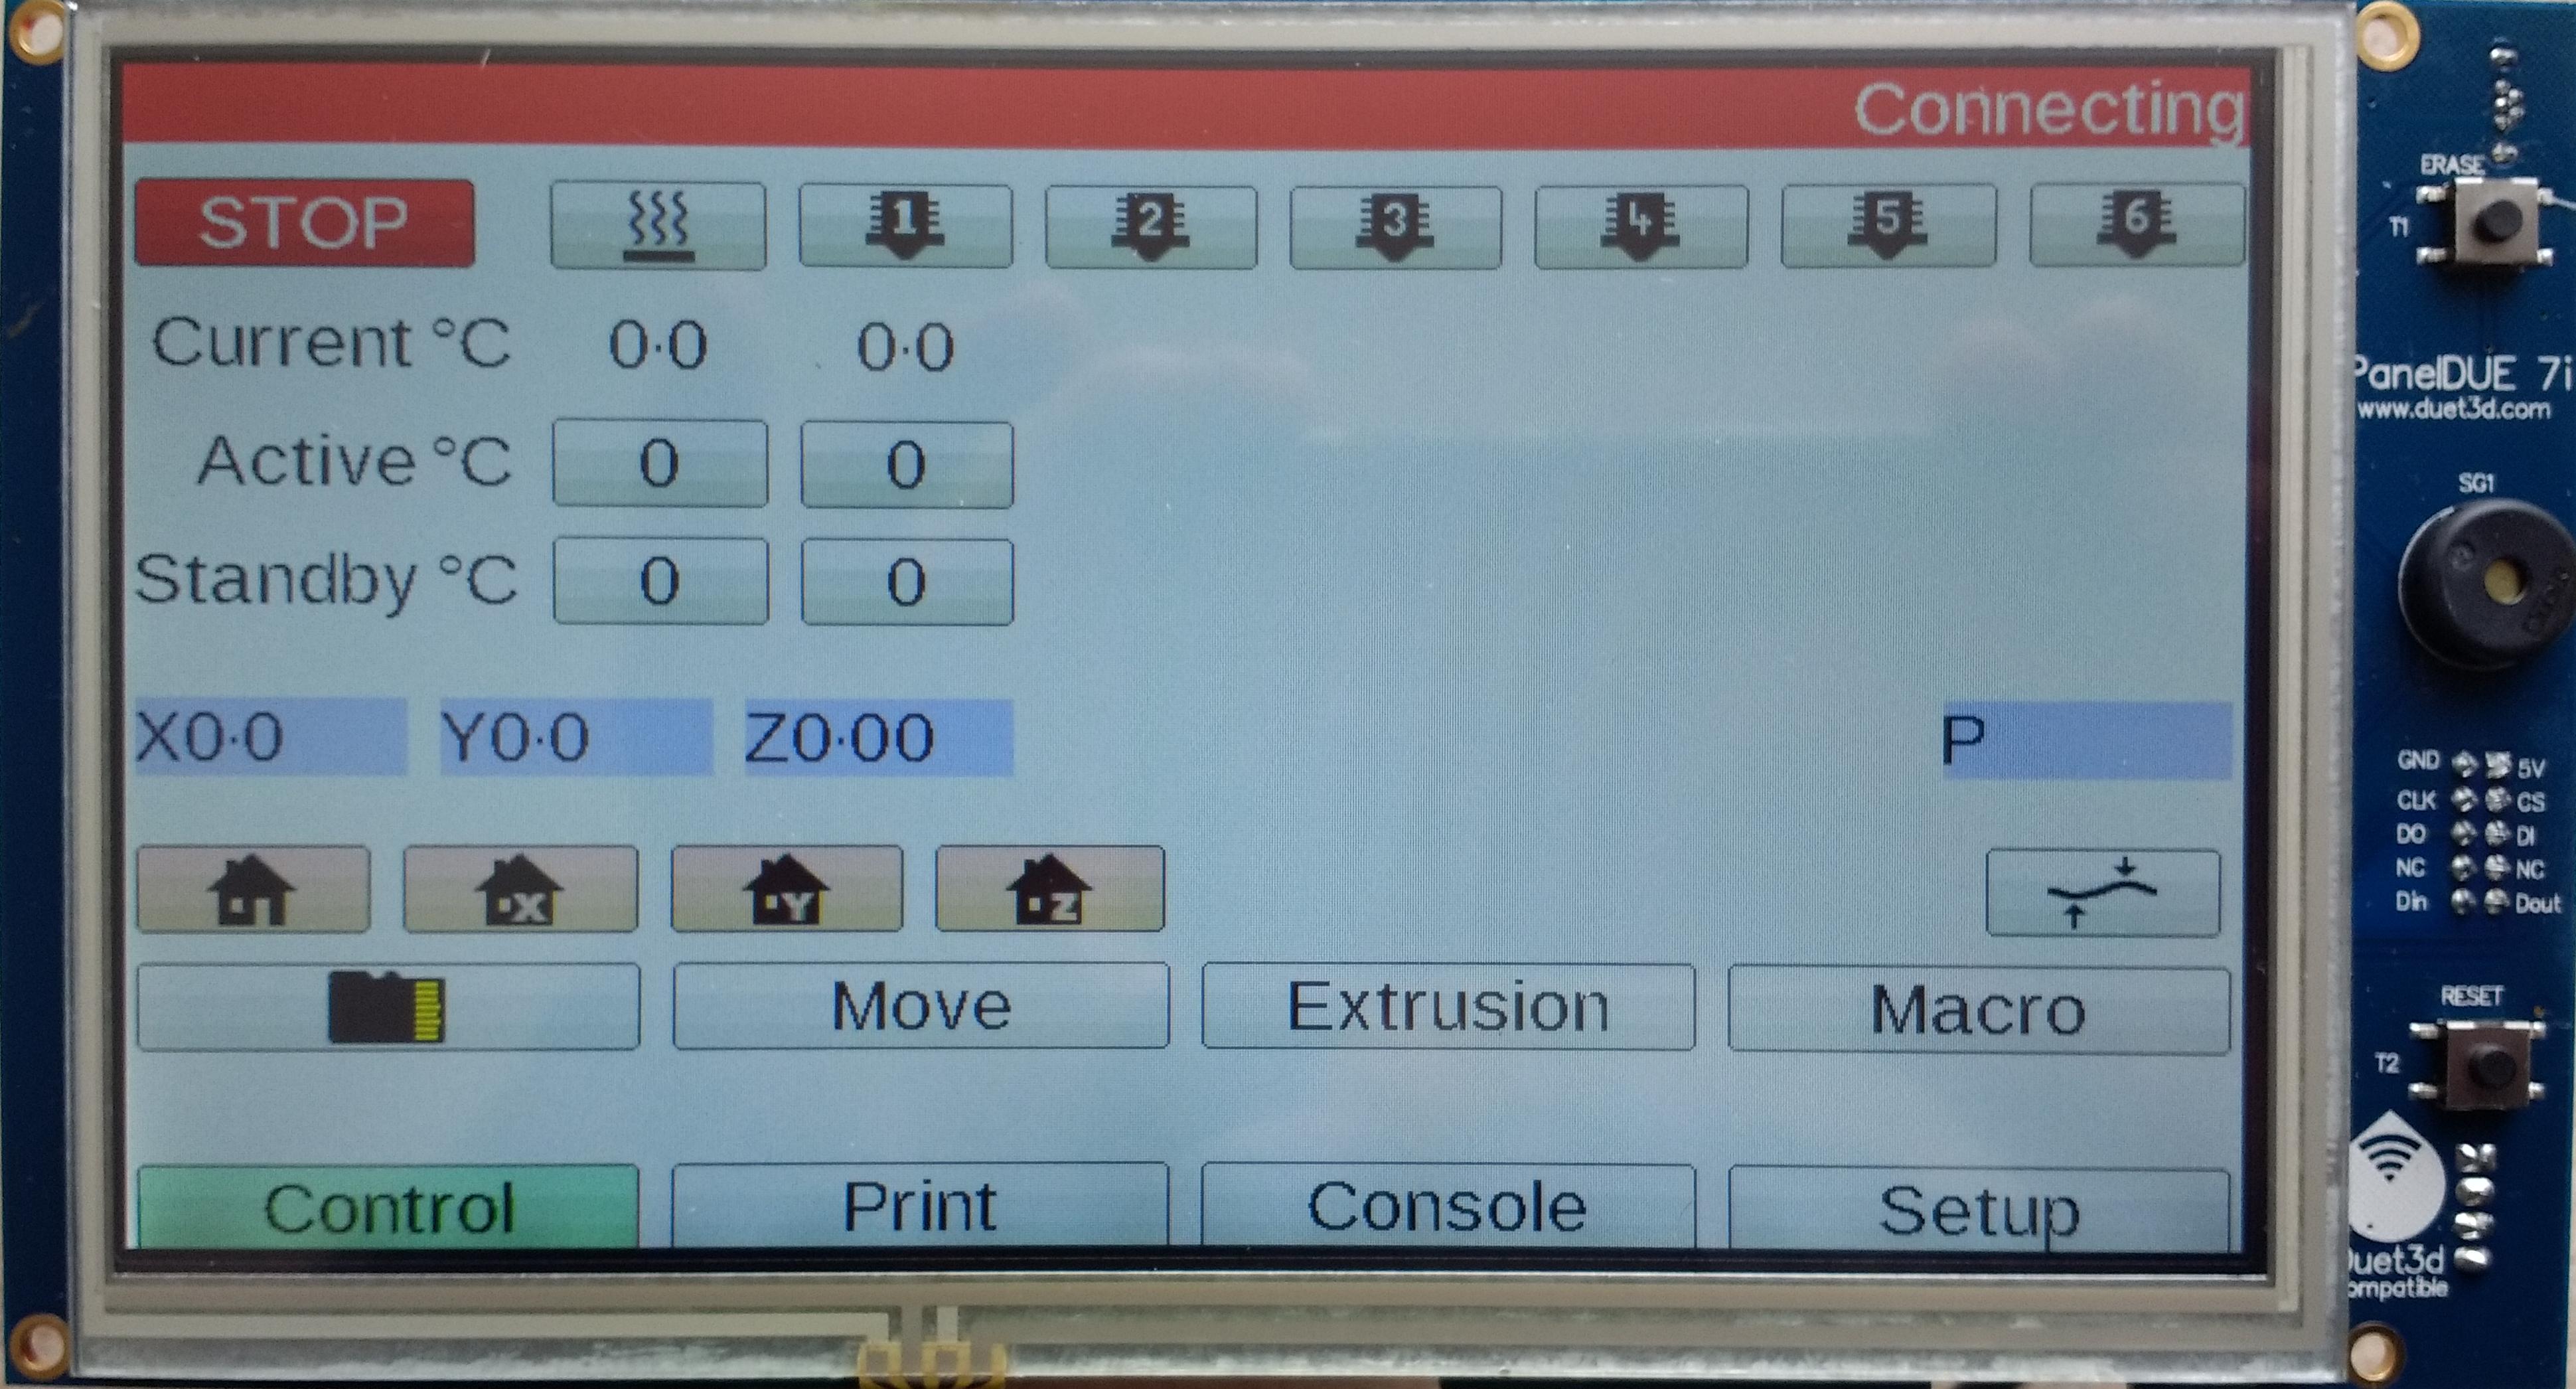
The PanelDue is a colour touch screen controller for the Duet and other 3D printing electronics that support it. There are versions a number of versions:
PanelDue 5i and PanelDue 7i have a 5" or 7" TFT LCD panel with the PanelDue Controller (by David Crocker) integrated on the LCD's PCB.
PanelDue Controller is a separate controller PCB that is not integrated into the LCD PCB. It supports a separate LCD of 4.3", 5" or 7" sizes.
¶ Features
- Resolution of 800×480 pixels on a 5 inch or 7 inch LCD.
- 5V power from host 3D printer controller.
- 2-wire async serial interface with 3.3V signal level (5V tolerant input). This is presented as a 4 pin header with 5V, Gnd and the two serial wires.
- Connections to the onboard micro SD card socket as well as the PanelDue serial and power connections are all available via a 10-way ribbon cable. A 300mm long ribbon cable is the maximum recommended length.
- PanelDue can display 7 tool/bed/chamber heaters in total on 5" and 7" screens.
- Maximum ambient temperature: 50°C

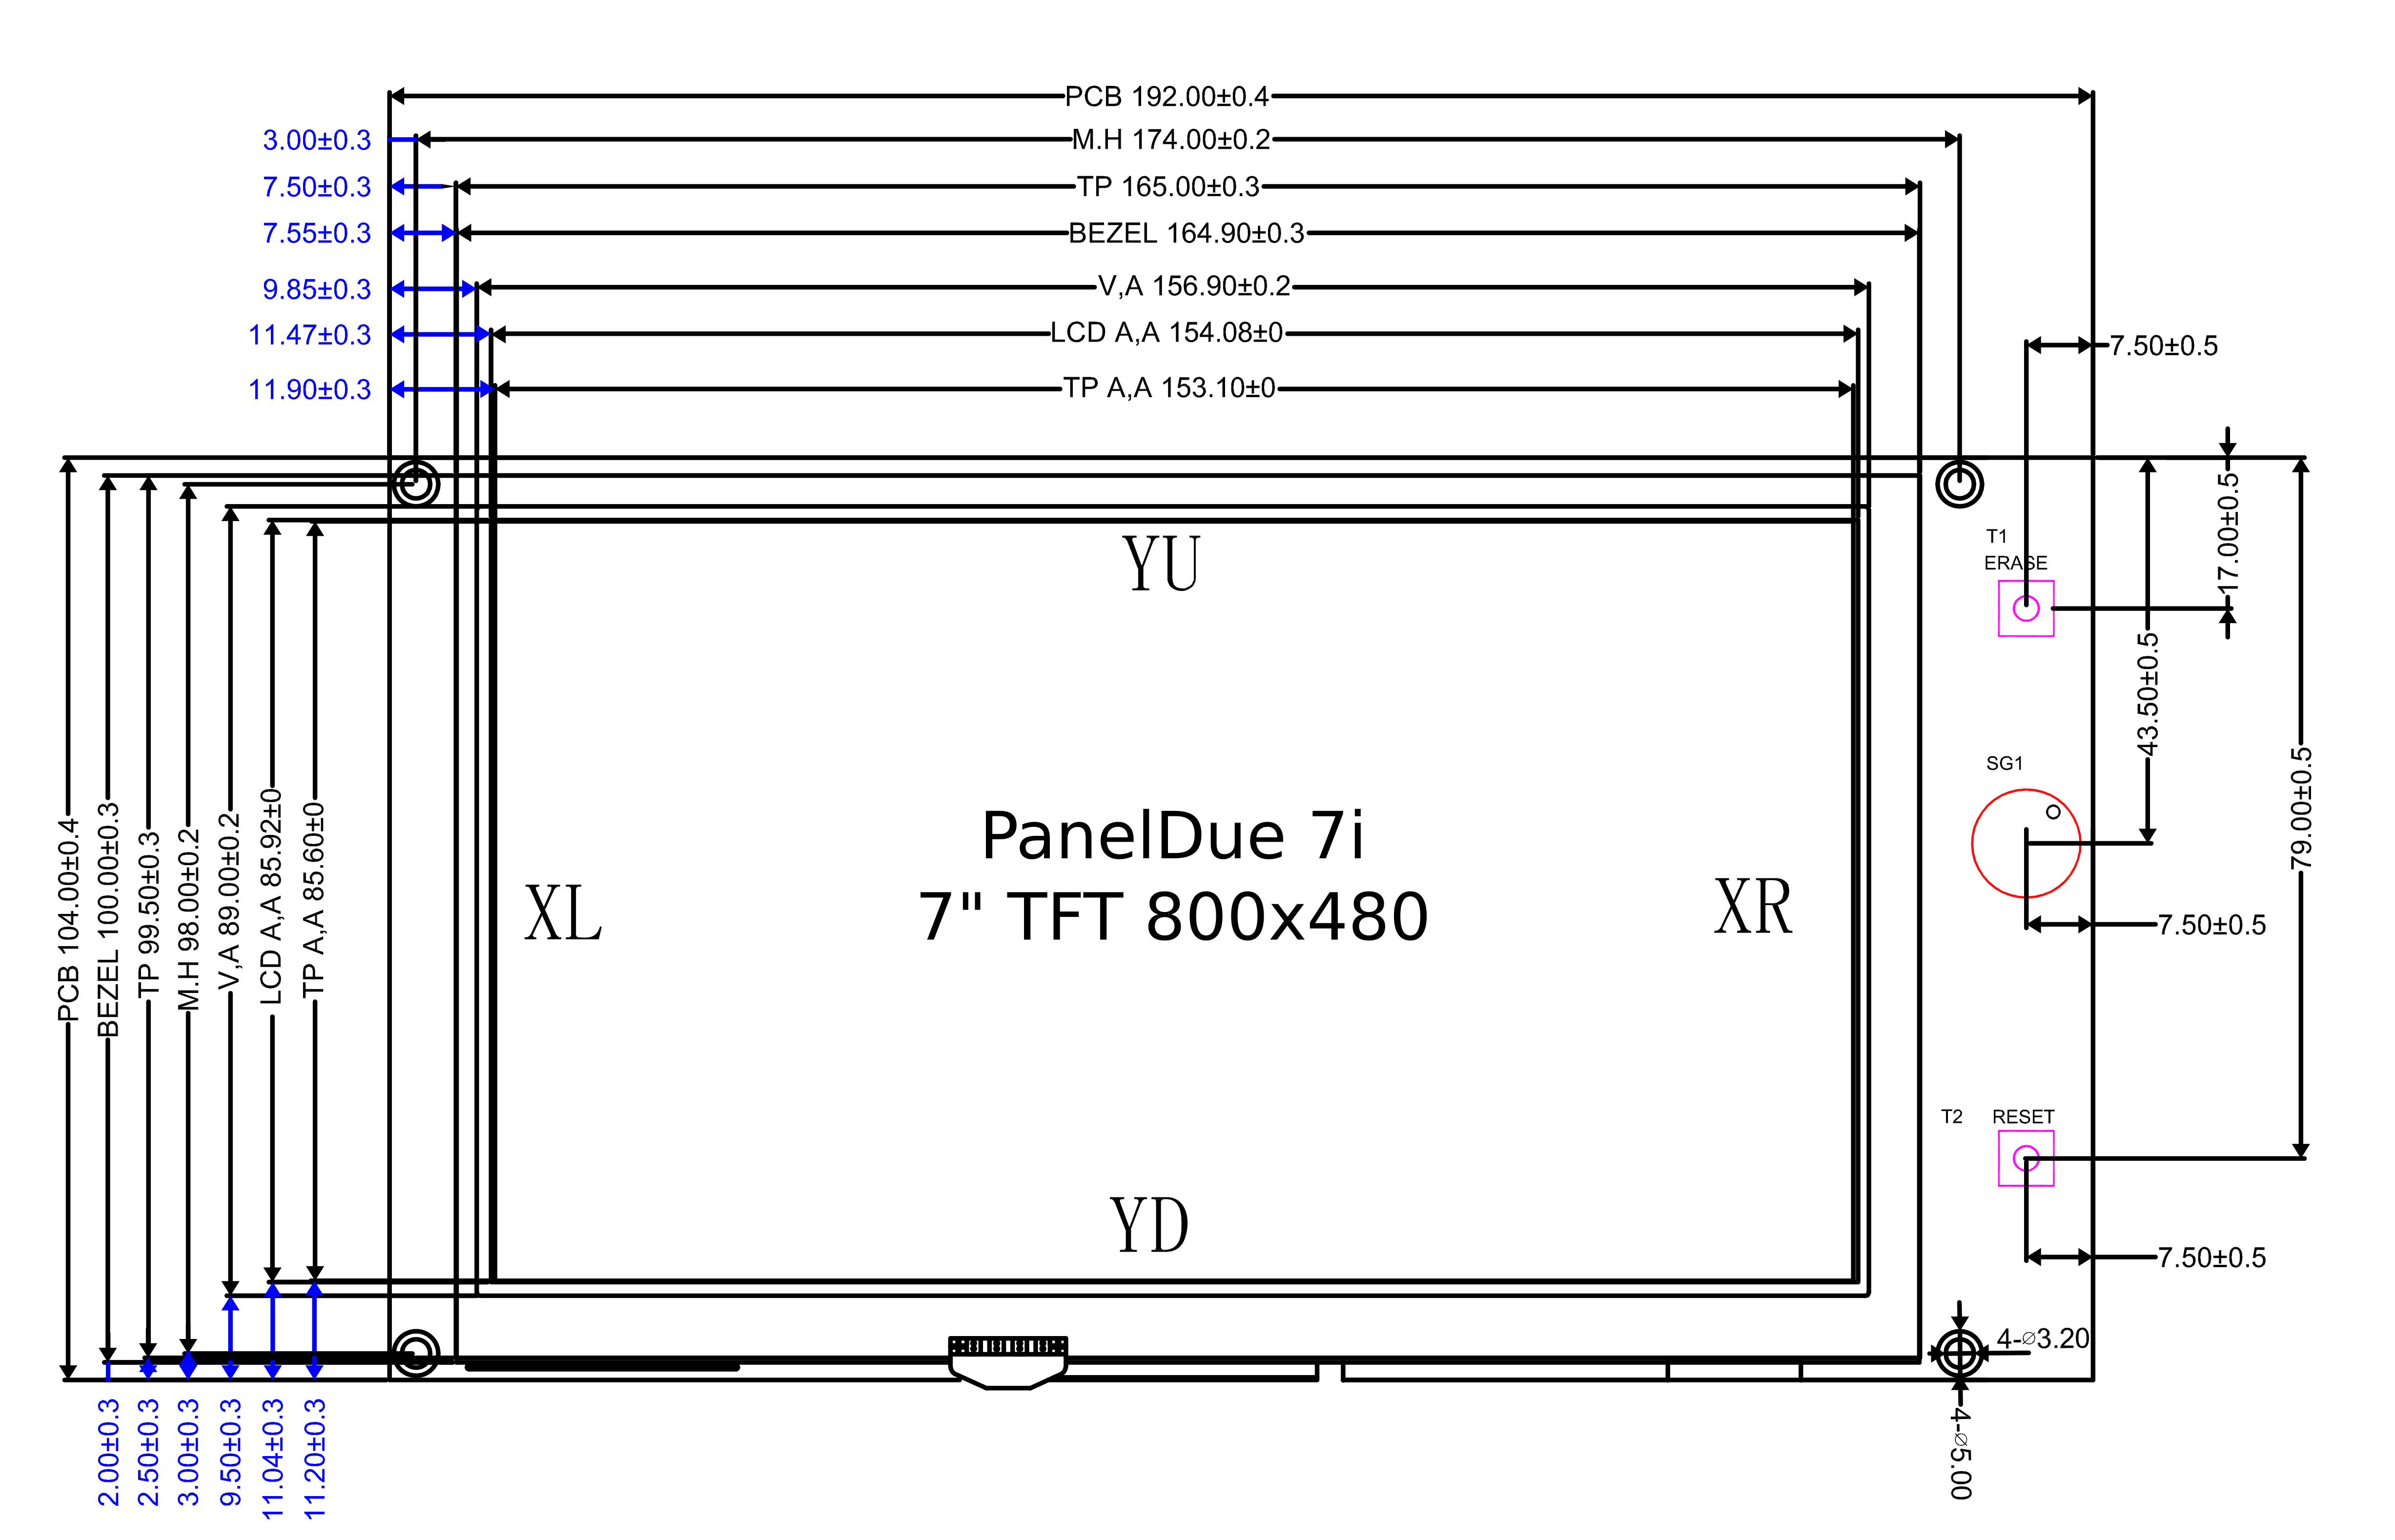
PanelDue 7i
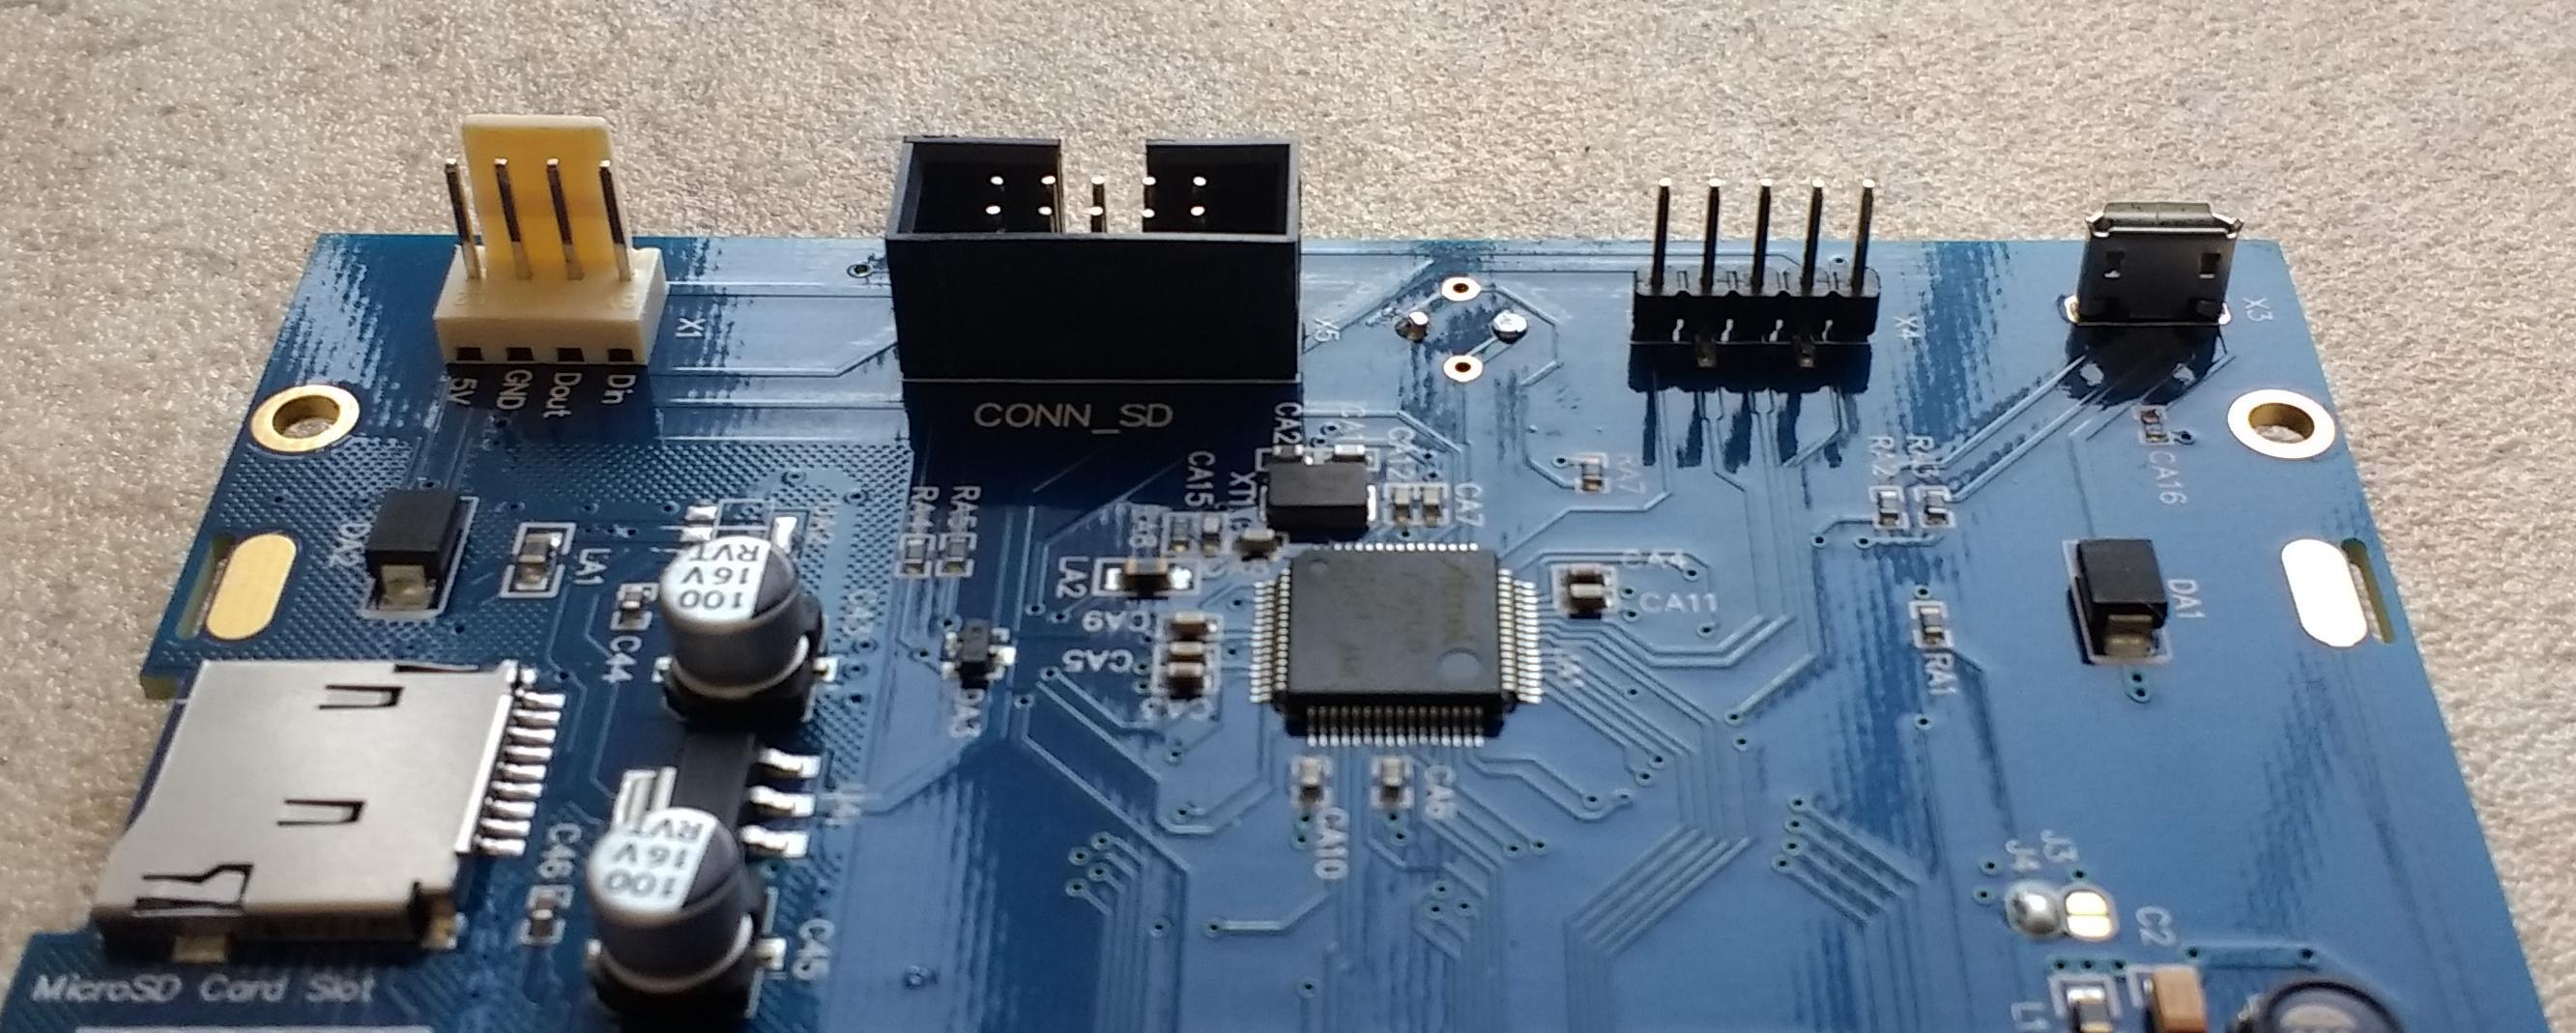
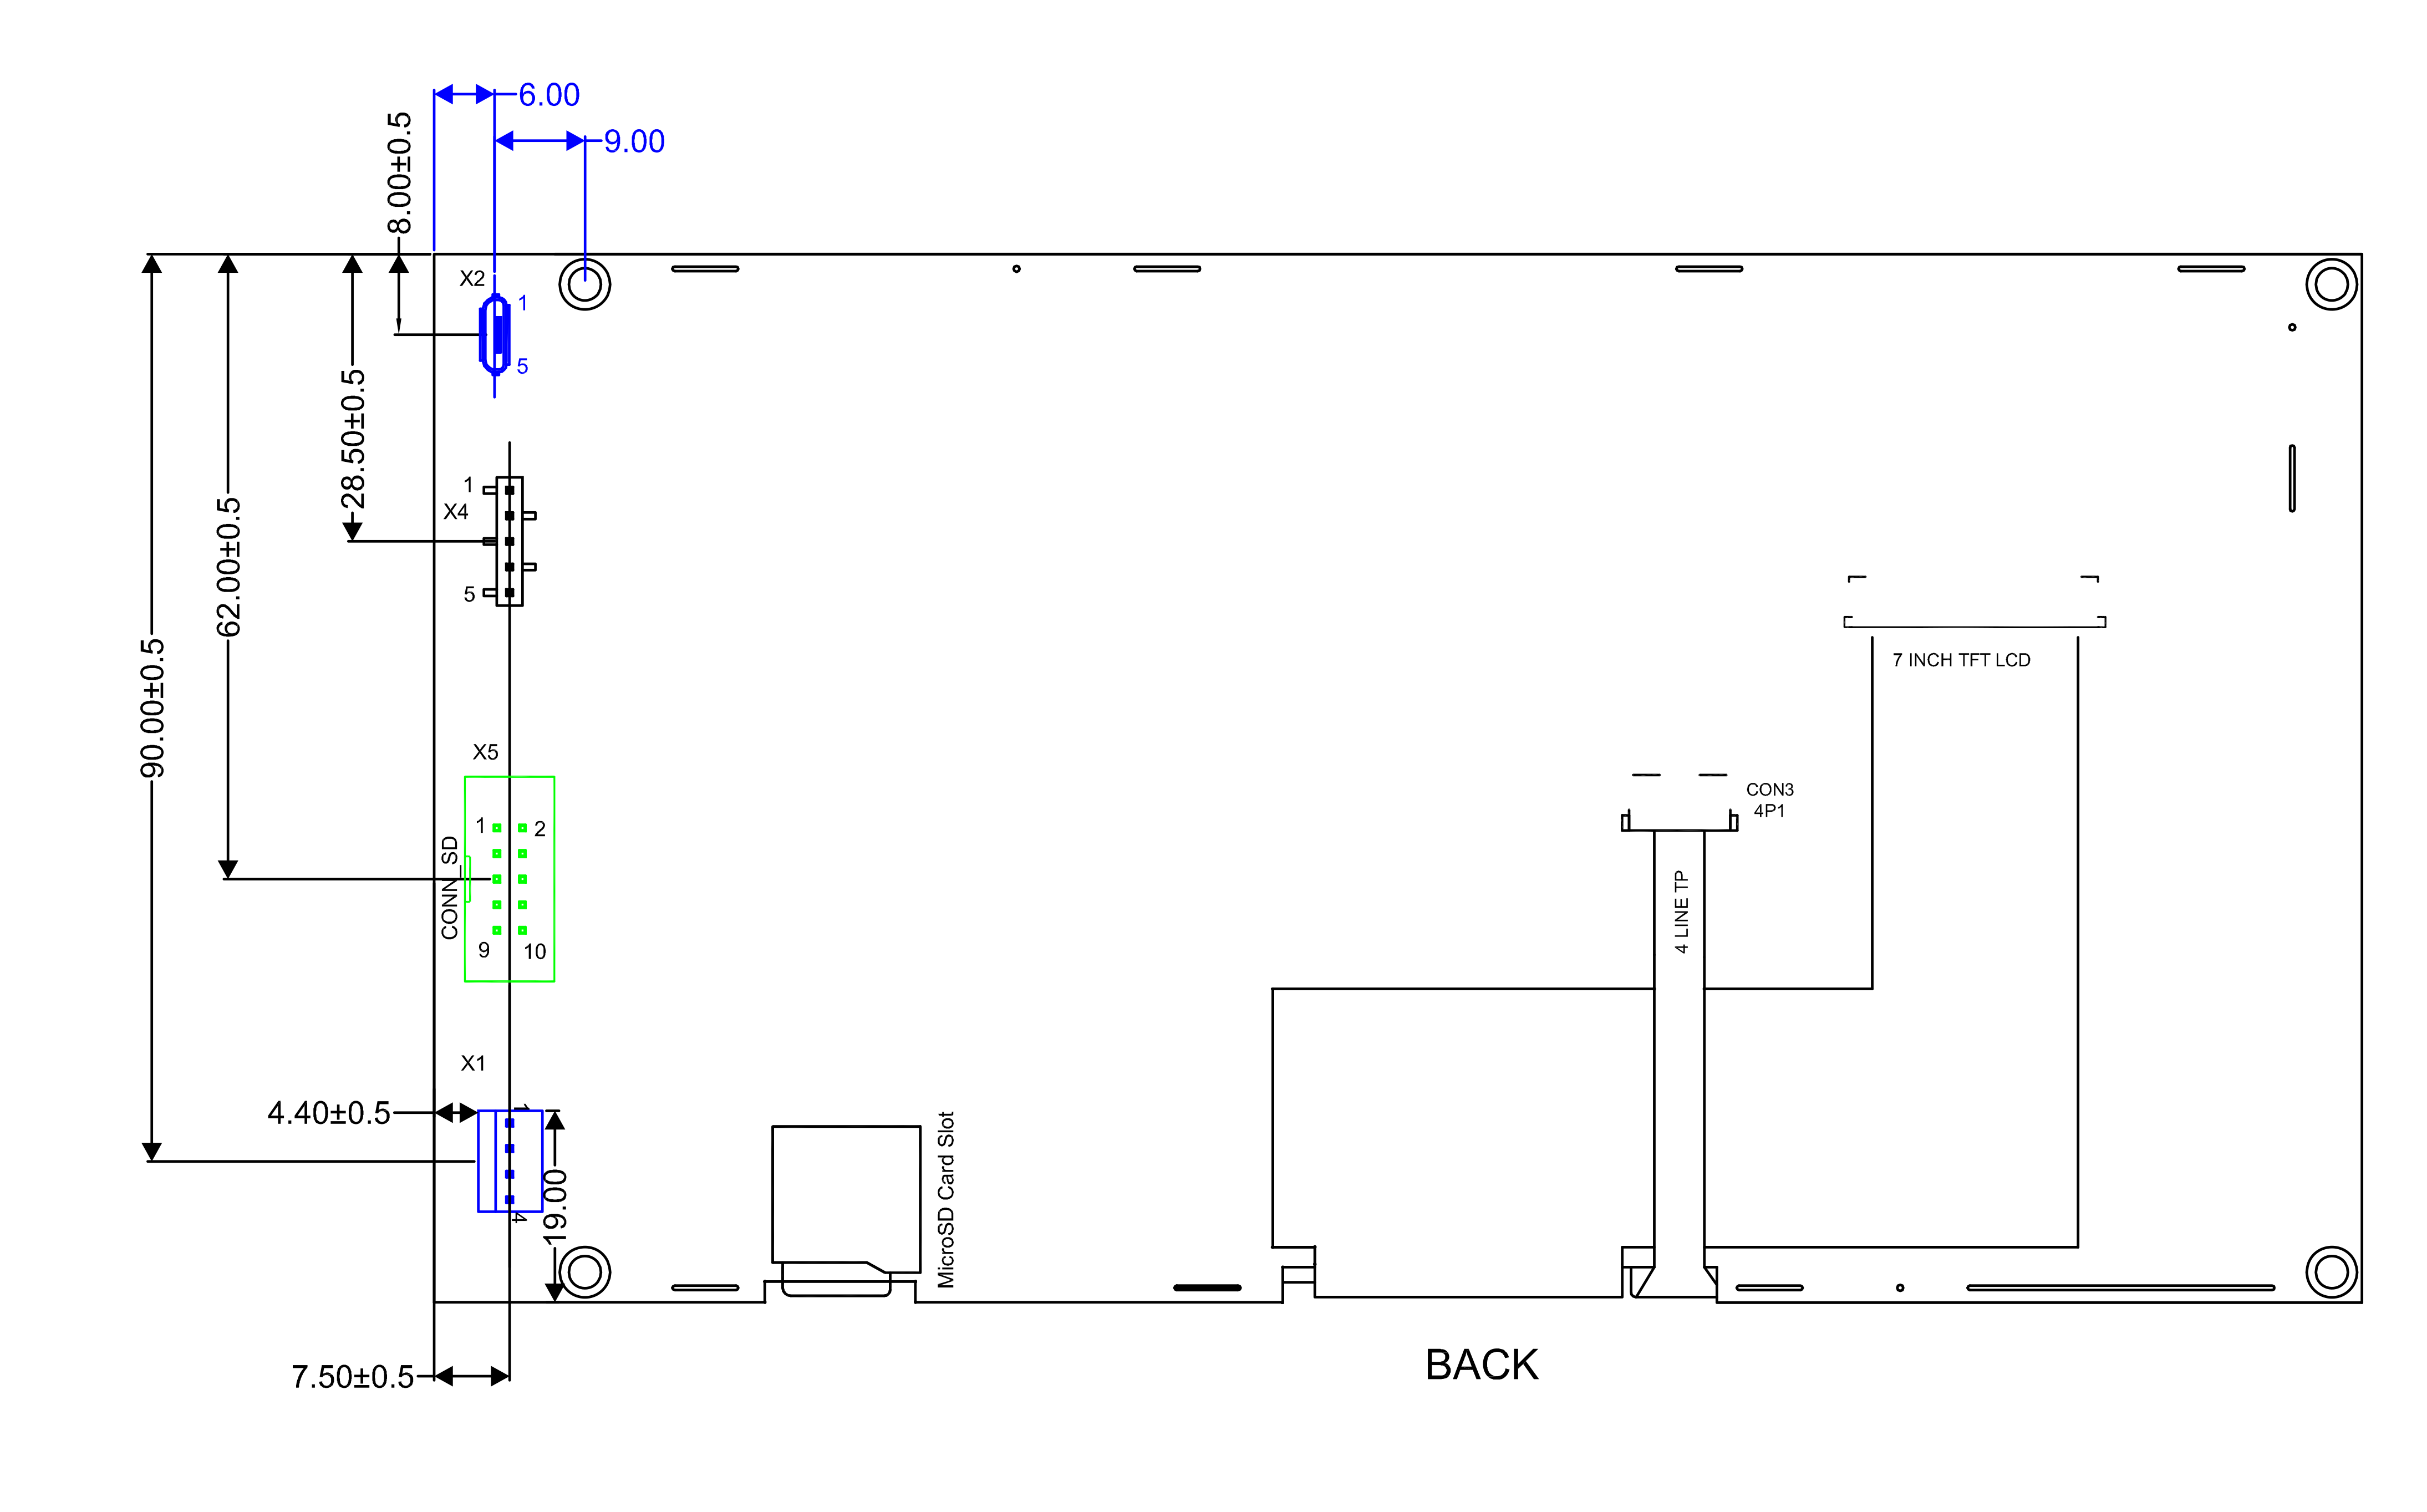
PanelDue 7i connections
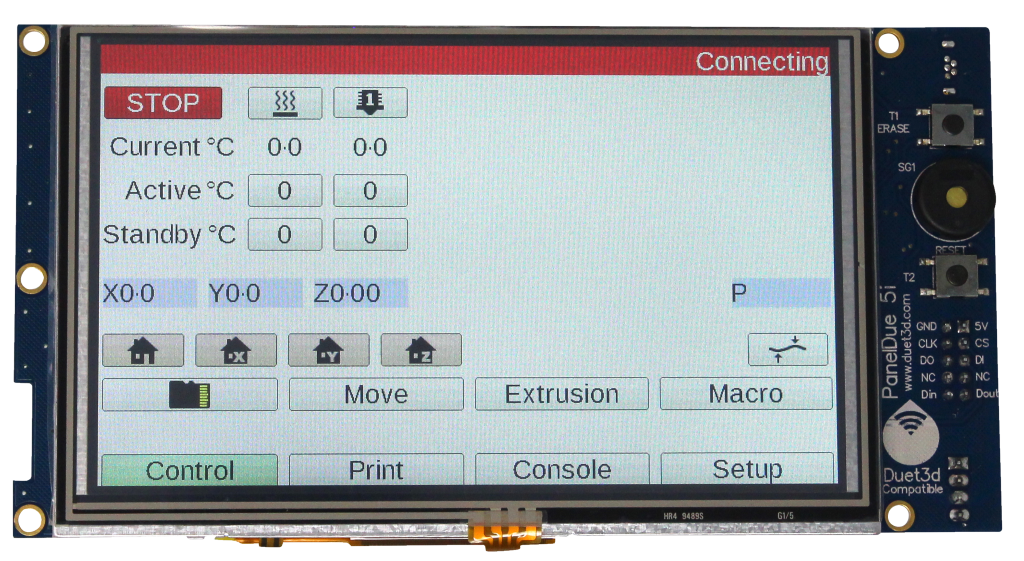
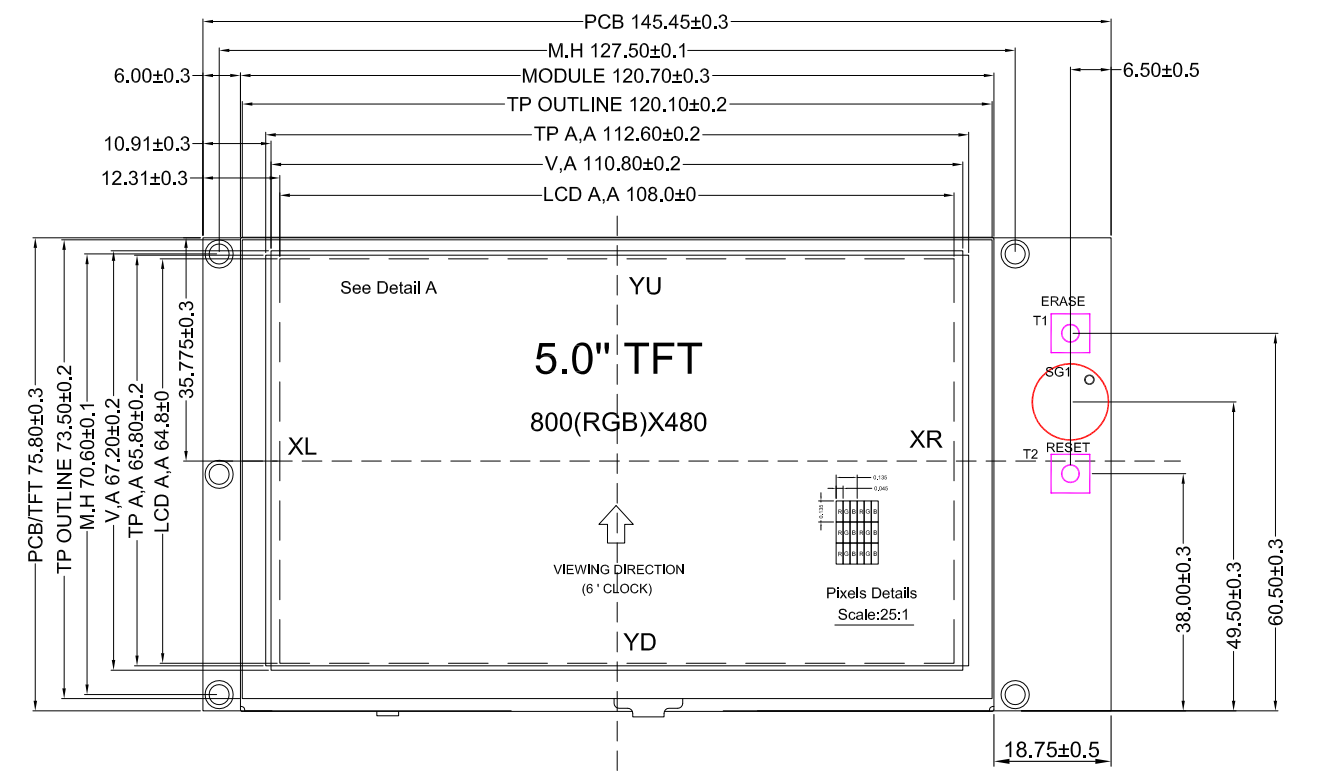
PanelDue 5i
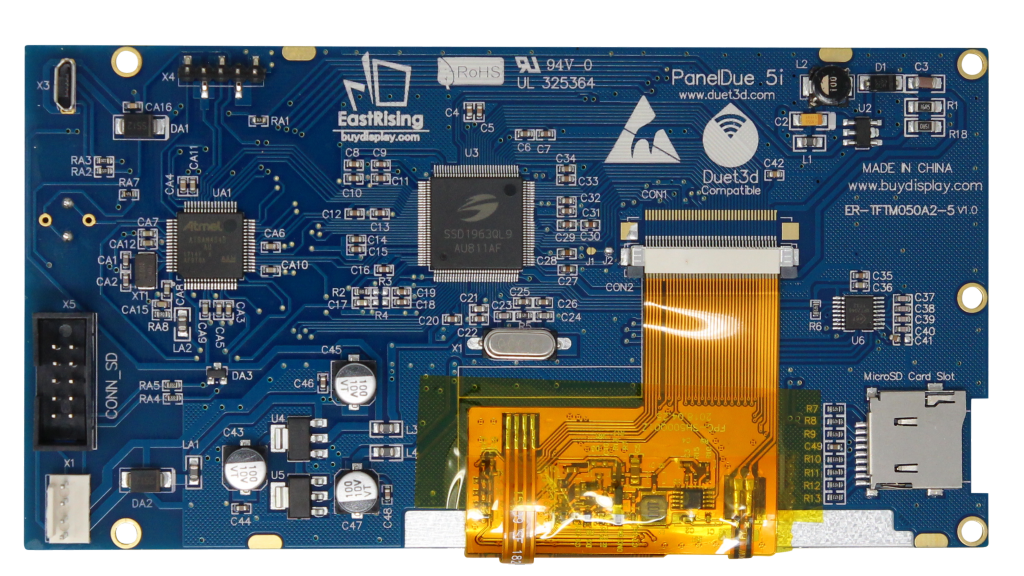
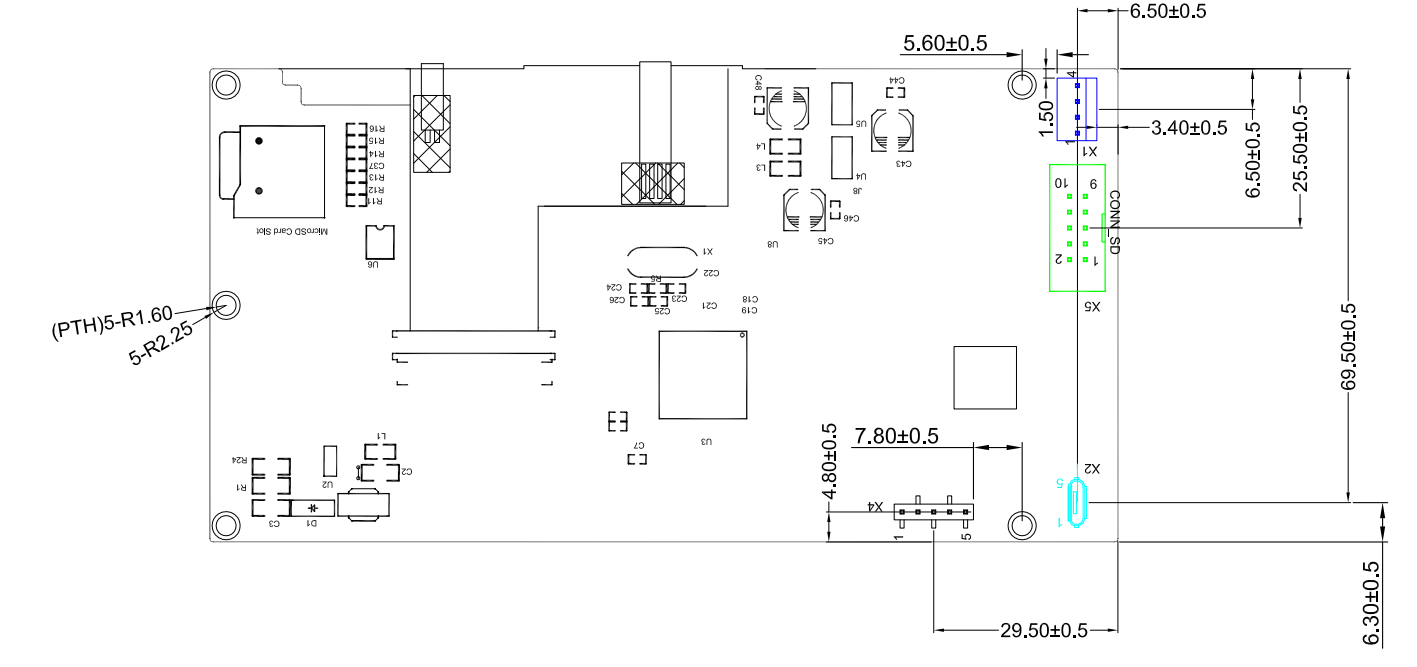
PanelDue 5i - reverse side
The original version of the PanelDue was a controller board that plugged into a separate LCD. It has gone through a number of revisions, with versions 1.0, 1.1, 2.0 and 3.0.
- The control board and firmware support 3 screen sizes: 4.3", 5" and 7", at two resolutions: 480×272 (4.3-inch displays) or 800×480 pixels (5- and 7-inch displays).
- Compatible screens:
- TFT displays using a SSD1963 controller,
- Resistive touch panel using a XPT2046 or compatible chip
- have a 2×20 2.54mm pitch connector.
- 5V power from host 3D printer controller.
- 2-wire async serial interface with 3.3V signal level (5V tolerant input).
- Connections to the external SD card socket that is included on most compatible displays is available via a 10-way ribbon cable connector on version 2.0 PanelDue boards.
- 4-wire cable to connect the PanelDue to your controller board for the serial and power connections.
- PanelDue can display 7 tool/bed/chamber heaters in total on 5" and 7" screens, and 5 heaters on 4.3" screens.
- Maximum ambient temperature: 50°C
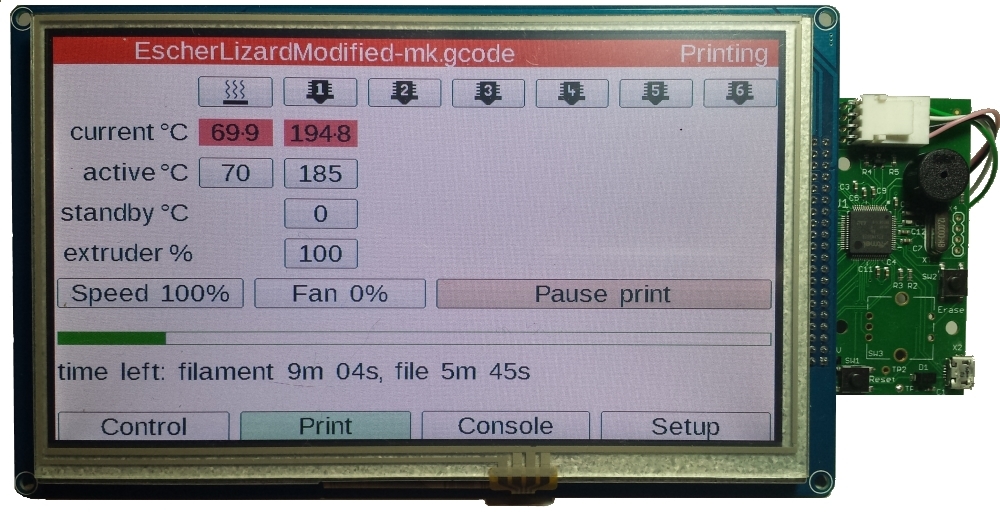
A PanelDue v1.1 with a 5" screen:
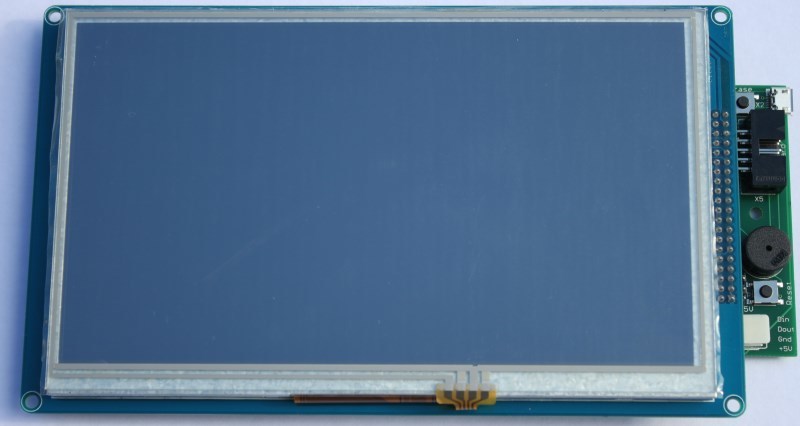
PanelDue v2 with a 7" screen:
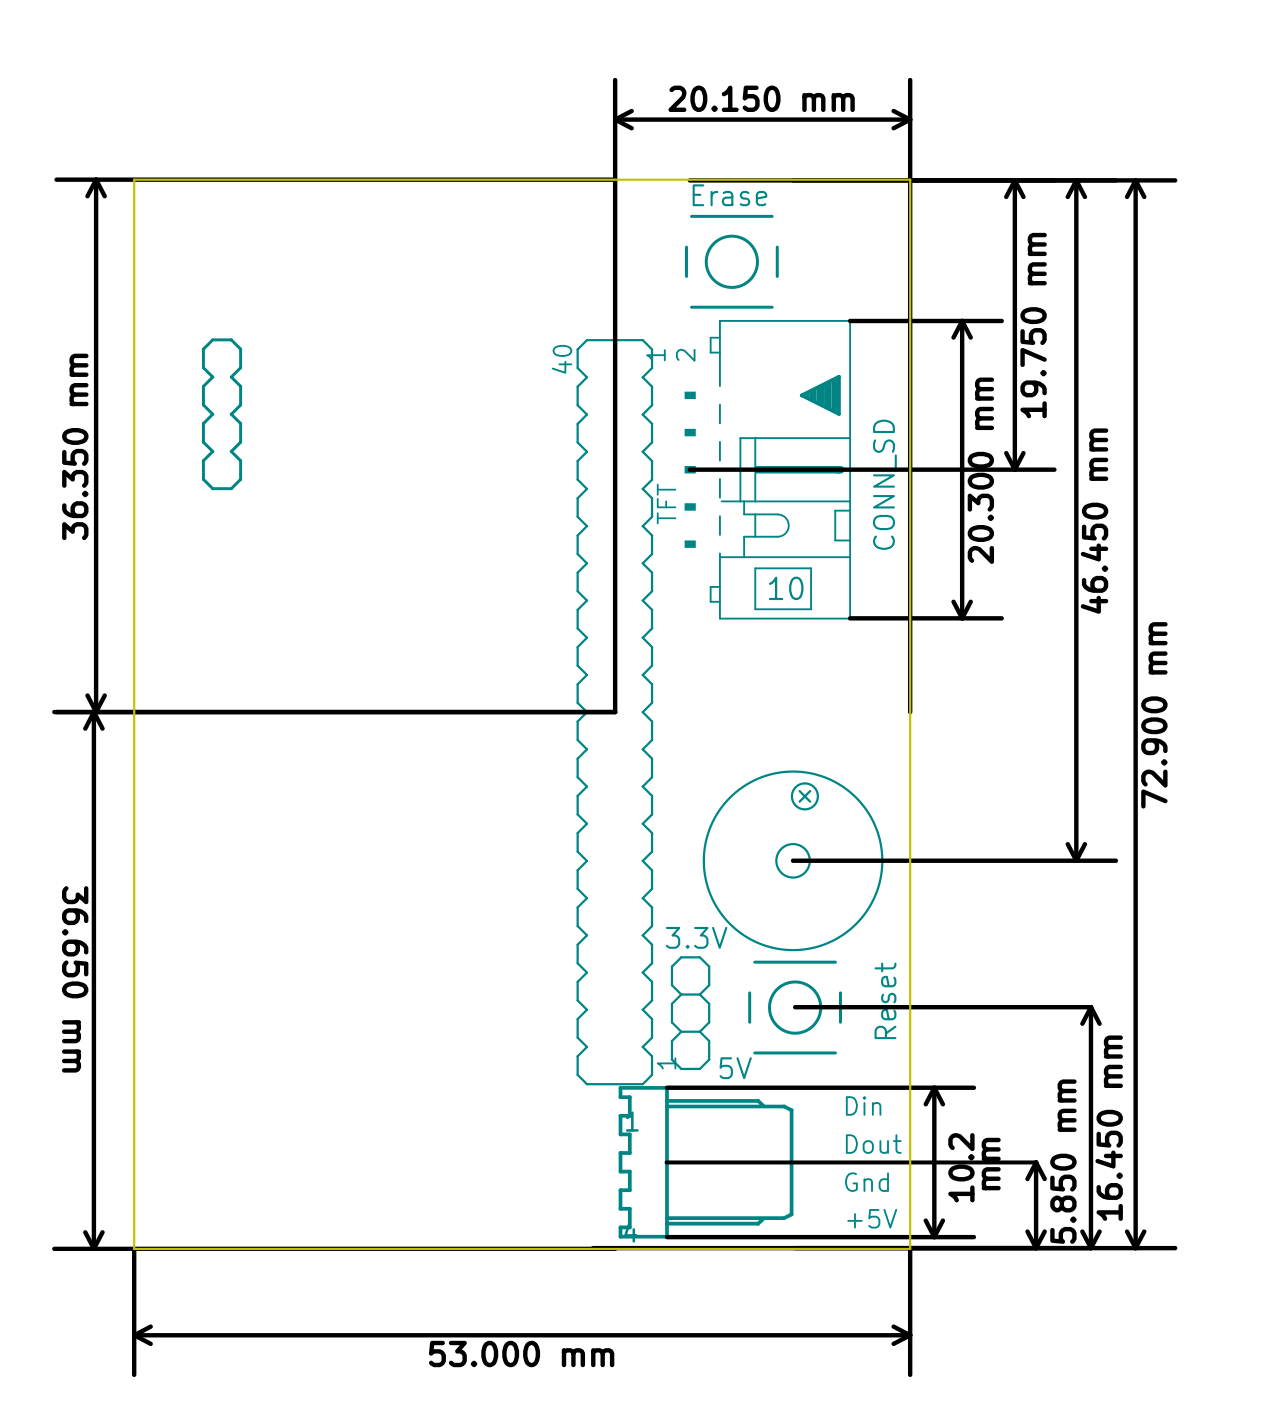
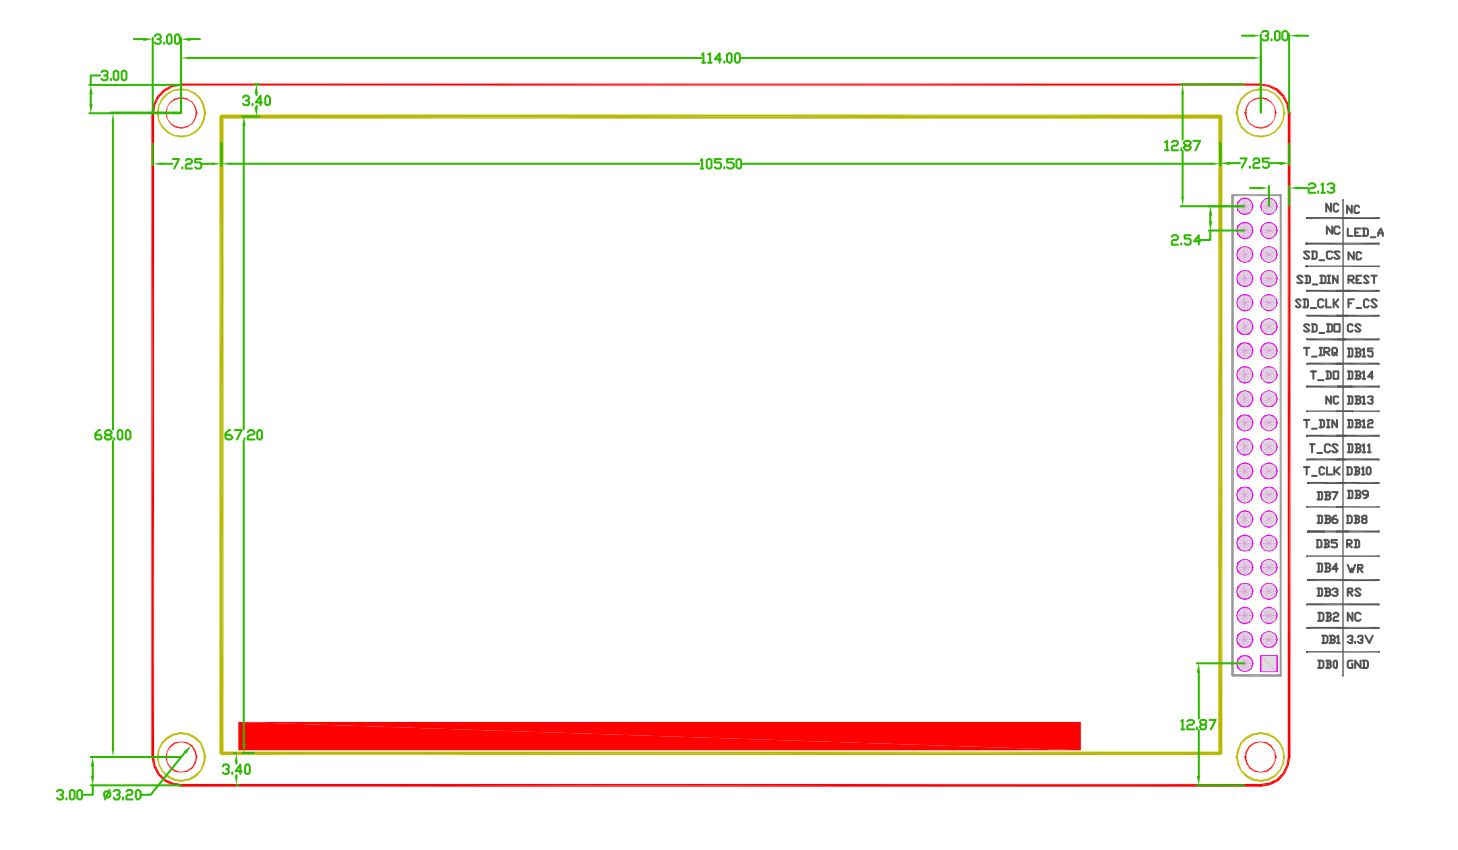
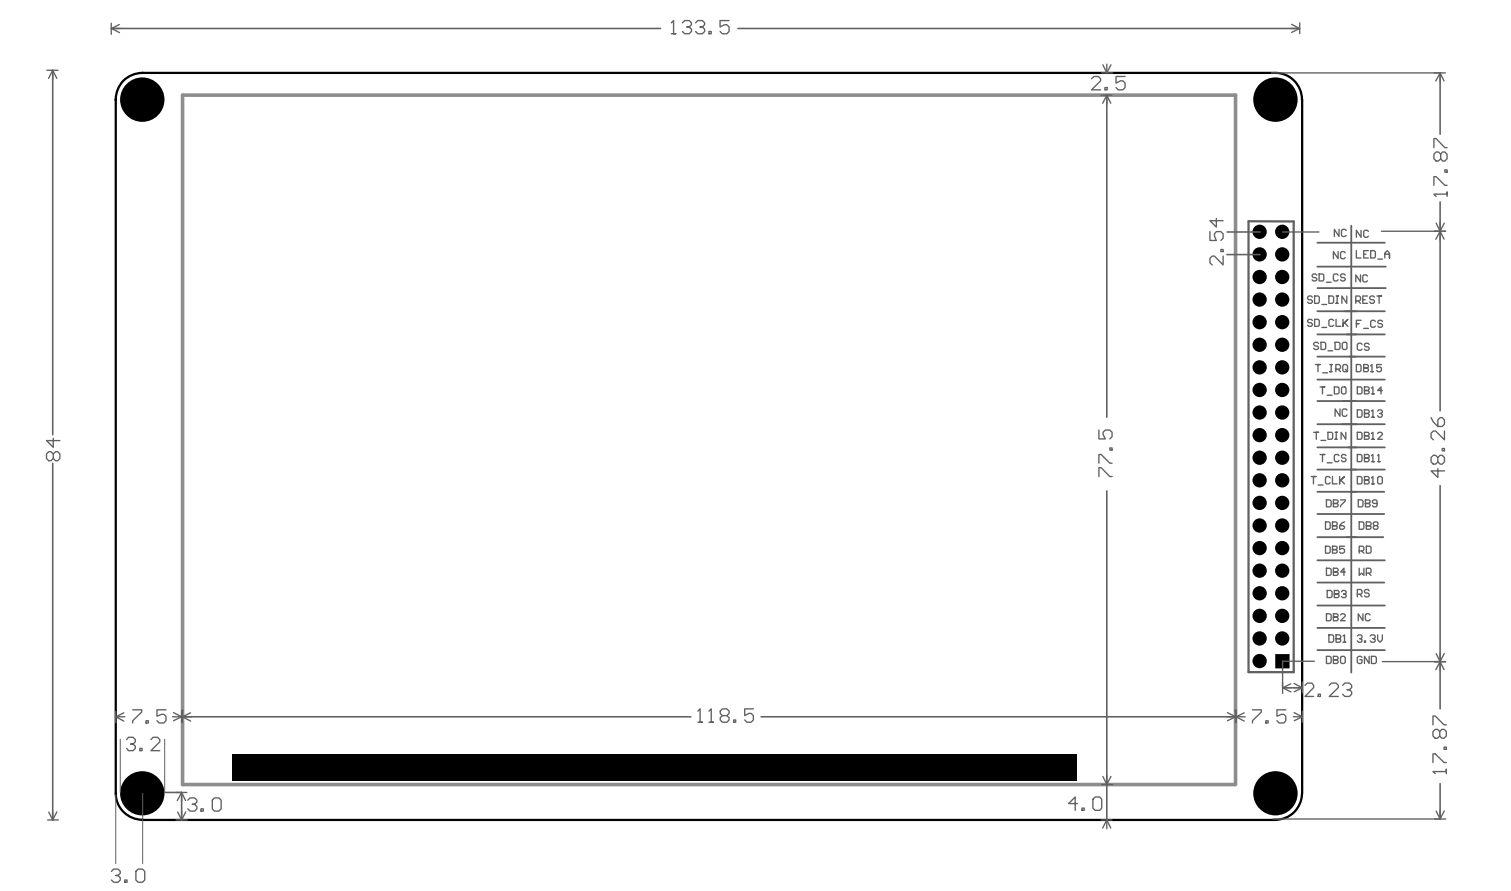
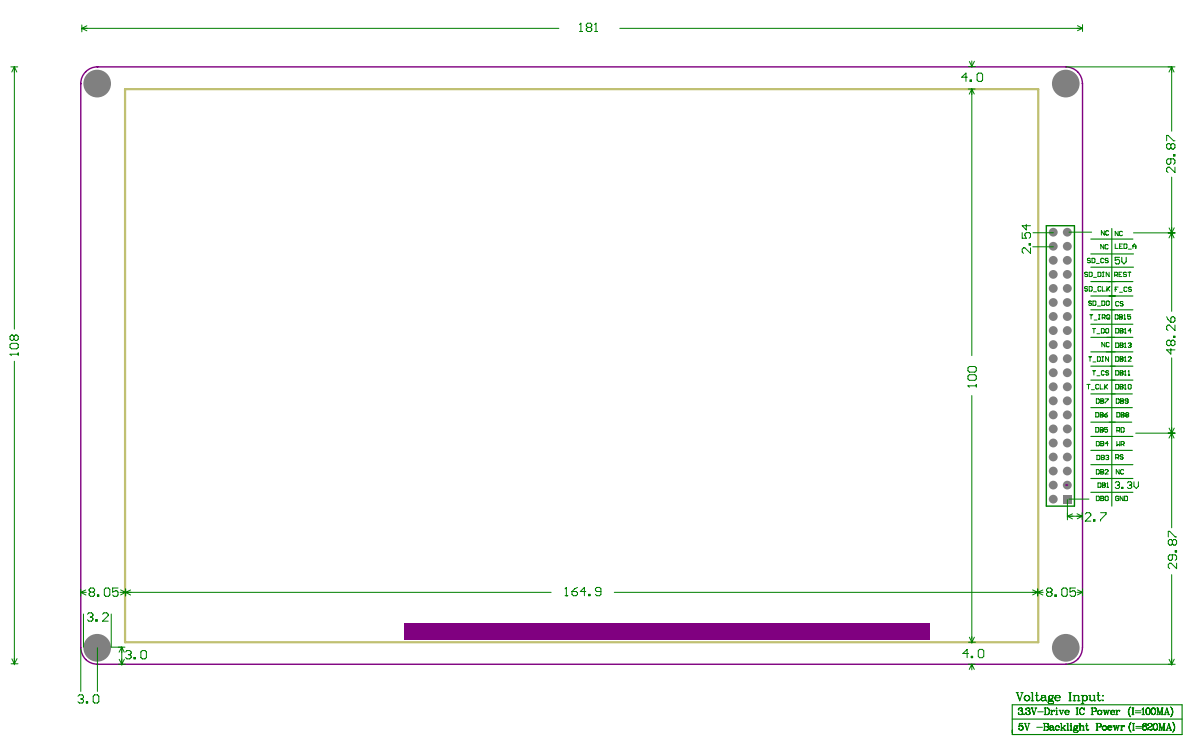
¶ Dimensions
¶ Enclosures
¶ PanelDue 5i and 7i
User "LumberjackEngineering" has published an enclosures on thingiverse for both 5i and 7i.
Mark Rehorst has this enclosure for the 7i which includes a model of the 7i itself.
¶ PanelDue Controller
DC42's OpenSCAD enclosure design that is configurable for the different options is available on Thingiverse here.
Forum user cyoung made this model of the PanelDue 3.0 + 7 inch screen
¶ Connecting a PanelDue
¶ Warnings
Caution! Do not use an SD extender cable from the SD socket on the PanelDue. Some types of SD card extender cable have been found to damage the SD card socket. Damage to the SD card socket from using an extender cable is not covered by the warranty.
¶ Wiring
Below is a brief description to show connecting a PanelDue to a Duet mainboard. There is more detailed information here, including using a ribbon cable to allow access to the PanelDue SD card socket: Connecting a PanelDue.
Information for connecting older versions of the PanelDue is available here: DC42's PanelDue web page.
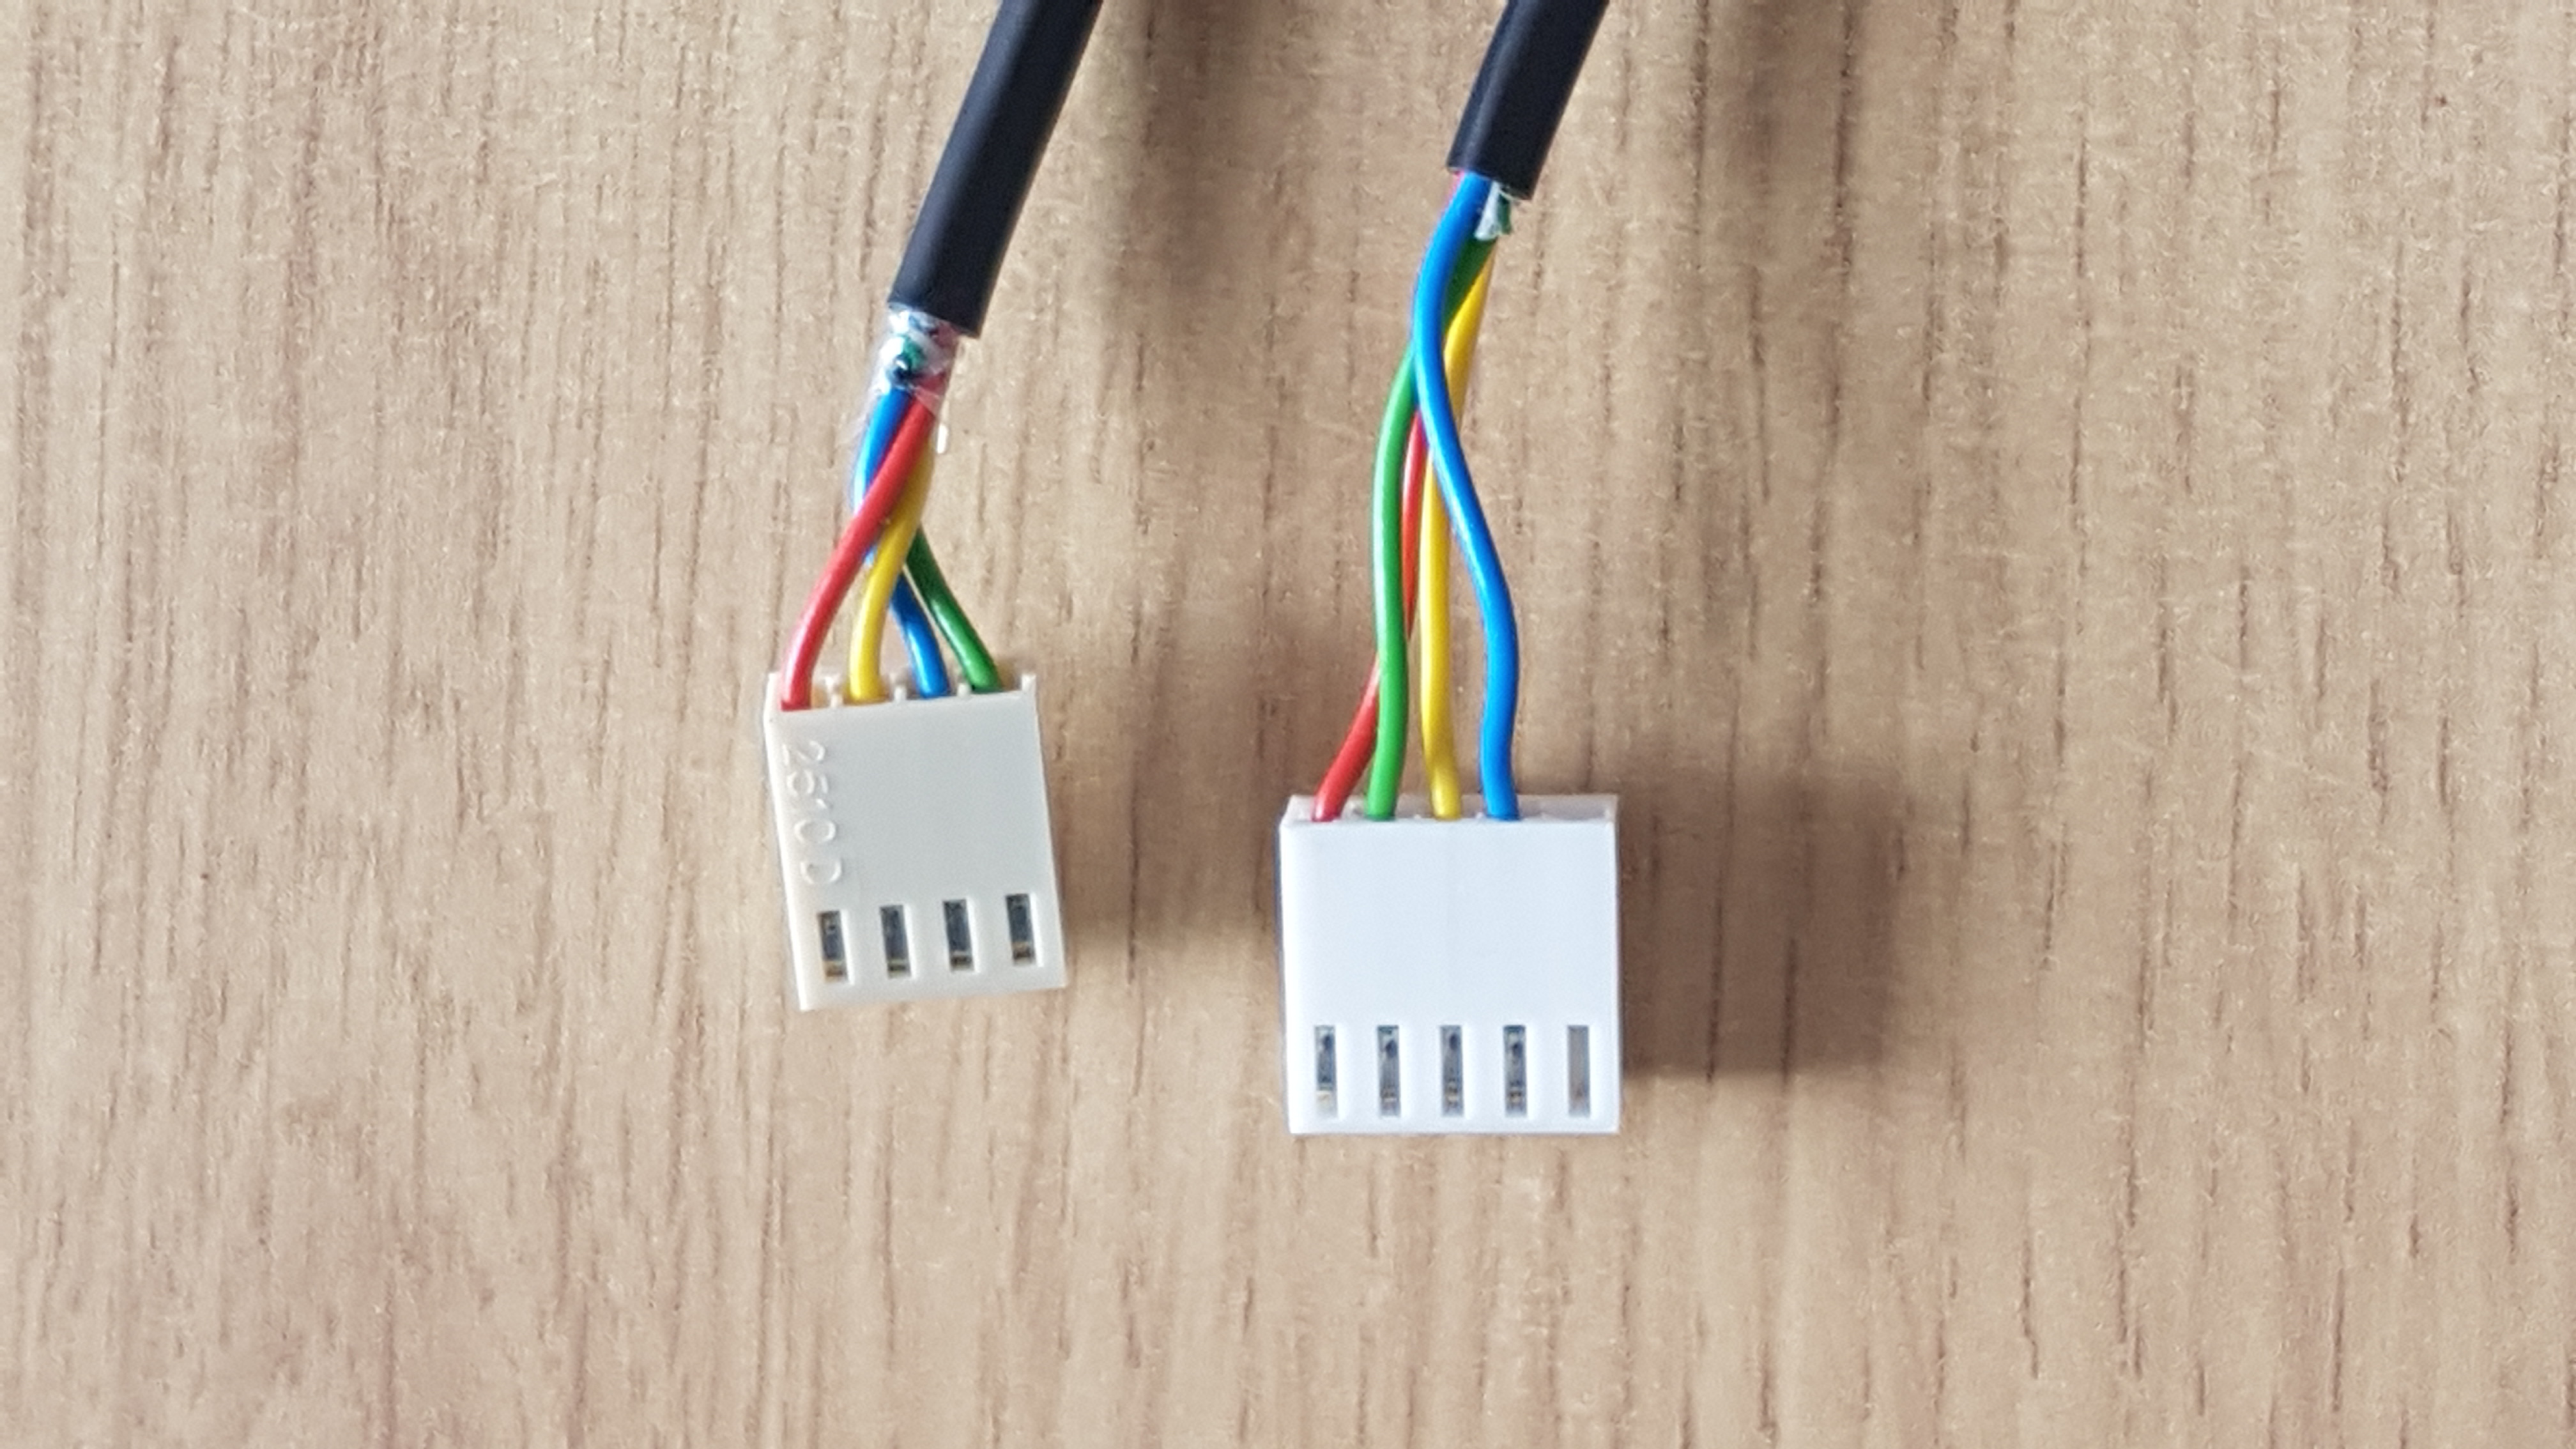
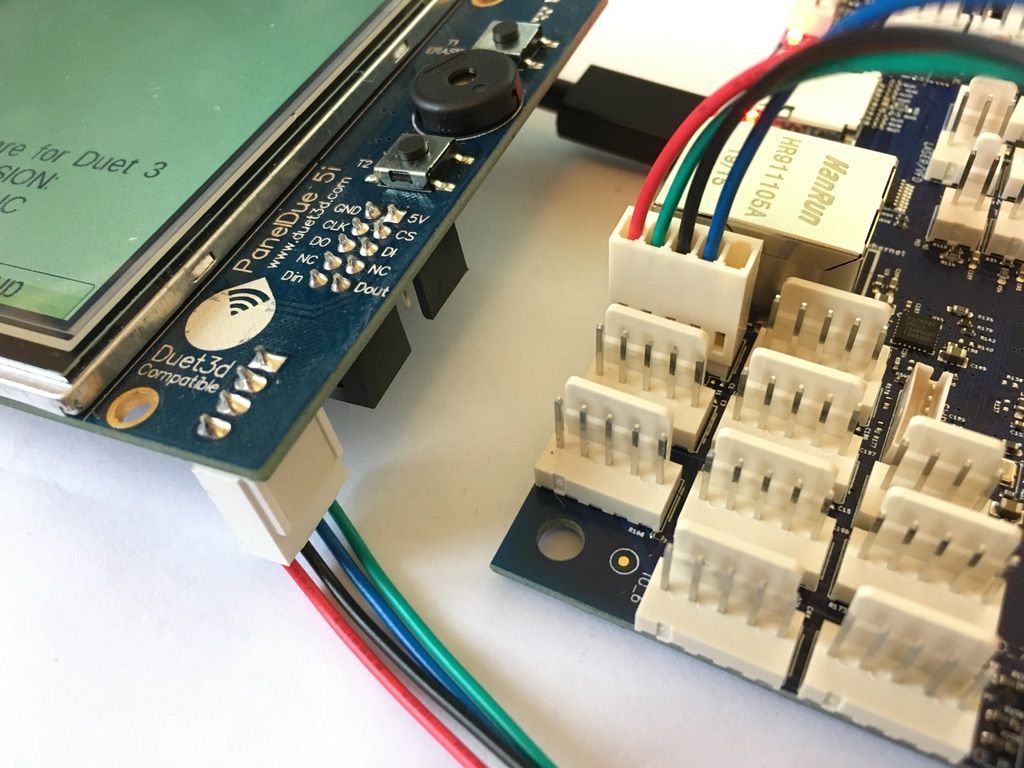
A PanelDue can be connected to connector IO_0 using a 4-core cable wired like the one shown in the images below. The 4-wire cable supplied with the PanelDue has a 4-way Molex KK connecter on each end, but is supplied with a 5-way Molex KK connector for use with Duet 3. You will need to rewire one end. The 4-wire cable does not allow access to the SD card socket on the PanelDue.
NOTE: the Duet 3 pin order in the table below is not the physical order. See the diagram for the physical pin order.
| PanelDue pin | Wire colour | Duet 3 IO_0 pin | |
|---|---|---|---|
| +5V | Red | 5V_EXT (pin 5) | 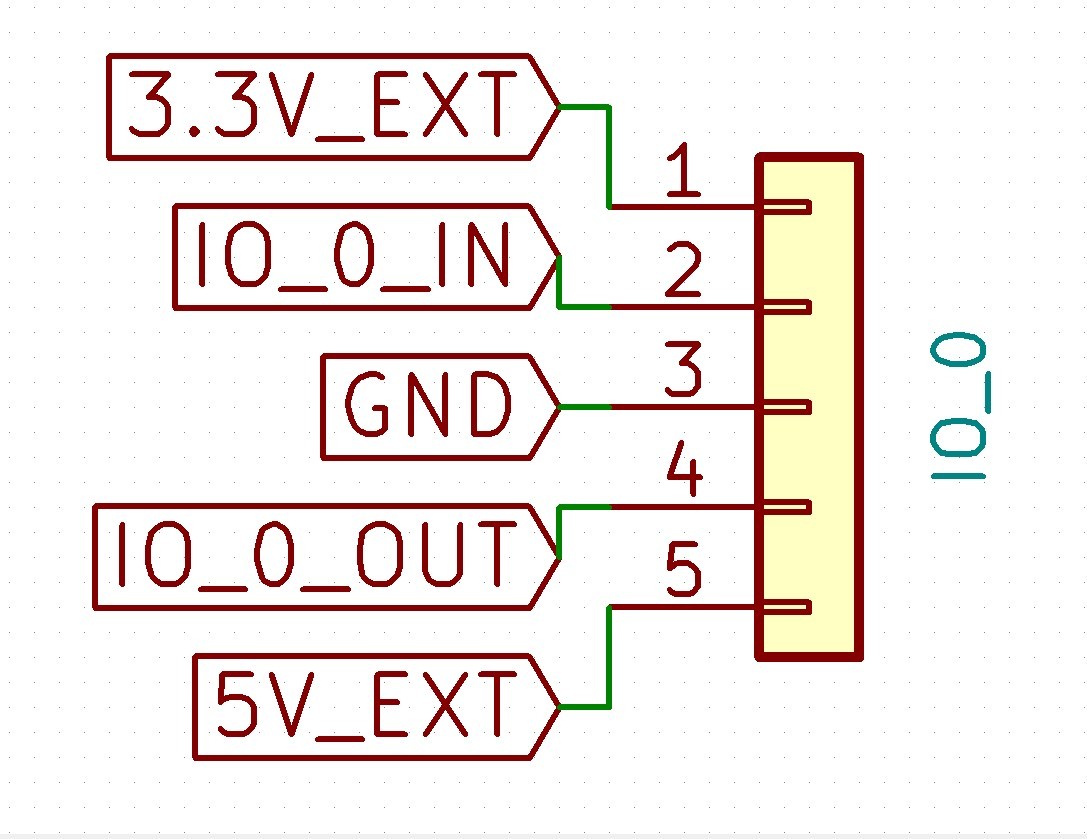 |
| GND | Black/yellow | GND (pin 3) | |
| Dout | Blue | IO_0_IN (pin 2) | |
| Din | Green | IO_0_OUT (pin 4) |
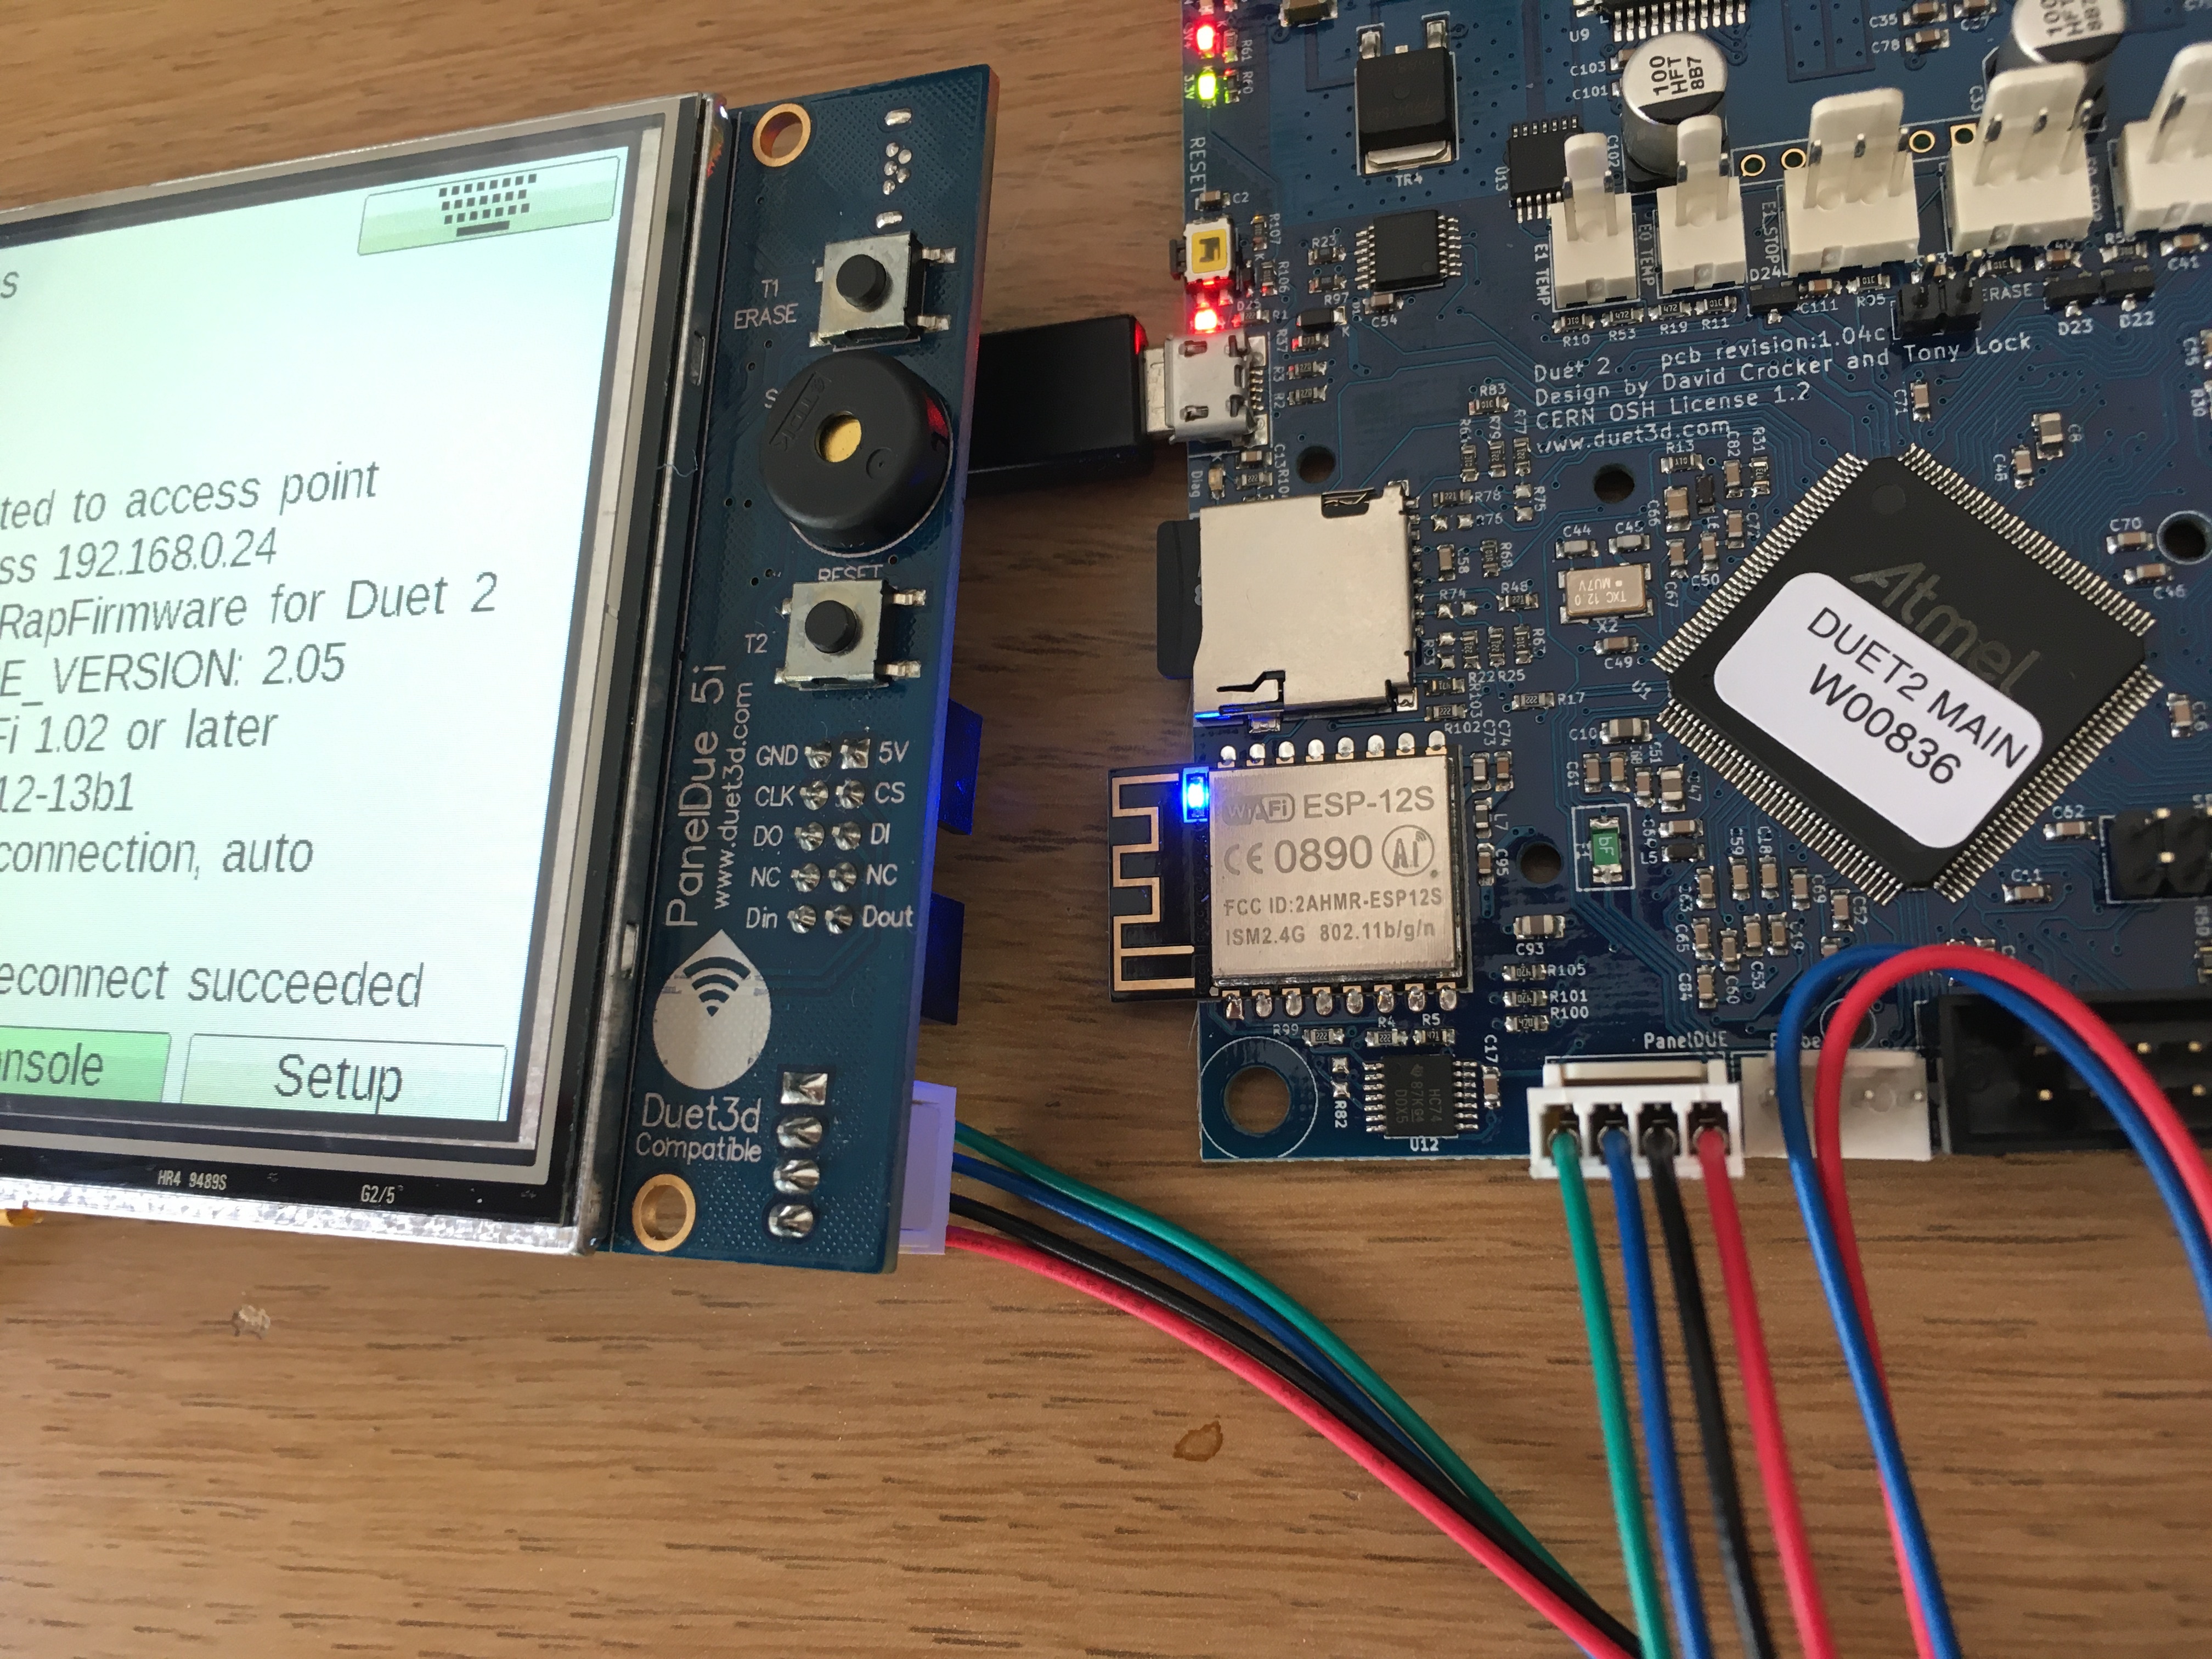
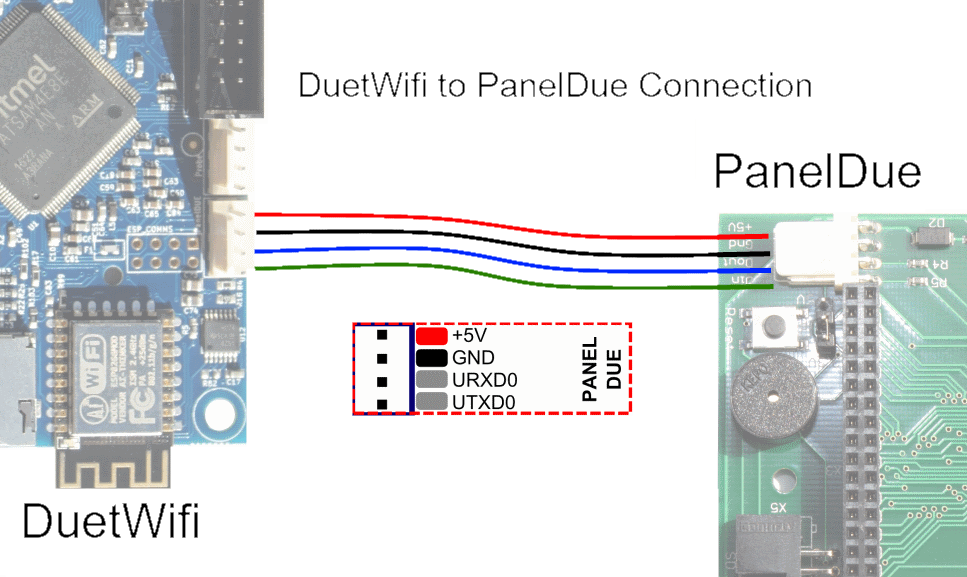
| PanelDue pin | Wire colour | Duet 2 PanelDue connector |
|---|---|---|
| +5V | Red | +5V |
| GND | Black/yellow | GND |
| Dout | Blue | URXD0 |
| Din | Green | UTXD0 |
For PanelDue 5i and 7i, connect the supplied 4-wire cable as shown.
PanelDue V2
¶ Configuration
RepRapFirmware 3.x and later: Using a PanelDue with Duet 3 and Duet 2 and RRF3 will require M575 P1 S4 B57600 being present in config.g. Older versions of RRF and PanelDueFirware required M575 P1 S1 B57600 but although this will still work with more recent firmnwares, it doesn't provide the same degree of protection against interference as the command that uses S4.
RepRapFirmware 2.x and earlier: In RRF2 the command above was assumed as the default, so no additional configuration is required.
¶ Updating PanelDue Firmware
¶ Version History
The PanelDue design has been updated over time, the key change being the processor model used.
ATSAM4S4B processor, 120MHz, 64kB RAM, 256kb flash.
Manufactured from August 2016
ATSAM3S4B processor (64MHz, 48kb RAM, 256kb flash).
ATSAM3S2B processor (64MHz, 32kb RAM, 128kB flash)
