¶ Introduction
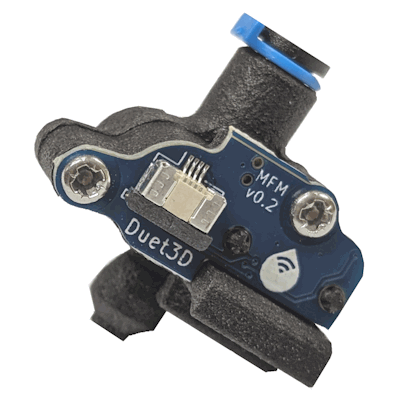
Duet3D filament monitors sense filament movement and so can indicate that filament has run out, jammed or has been ground in the extruder. In addition skipping extruder motor steps can be detected. This version is a derivative of the Duet3D Magnetic Filament Monitor, shrunk down and designed to fit in the sensor module slot on the E3D Revo Roto. It uses a rotating magnet to very accurately detect filament movement and is mechanically very tightly coupled to the Revo Roto extruder. Electronically it is directly connected to the Duet 3 Roto Toolboard.
¶ Hardware
| Magnetic Encoder | AS5601 |
| Comms | Direct I2C connection with the Roto Toolboard processor |
| Input power voltage | 3.3V |
| Max Ambient Temperature | 70C, limited by the Roto Toolboard |
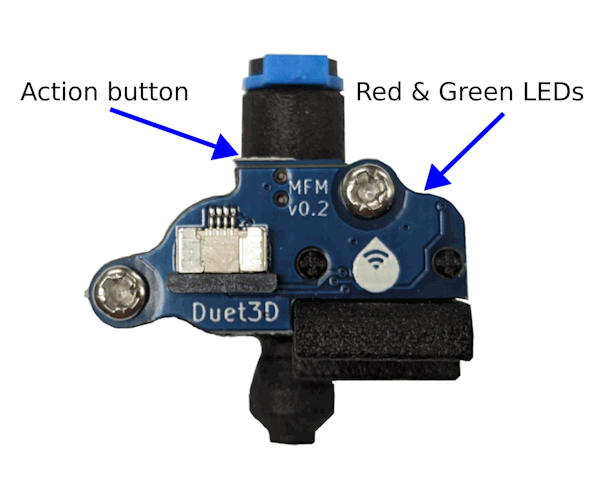
| LEDs | Red and Green LEDs for state indication |
| Button | Button to trigger macros |
¶ Mounting
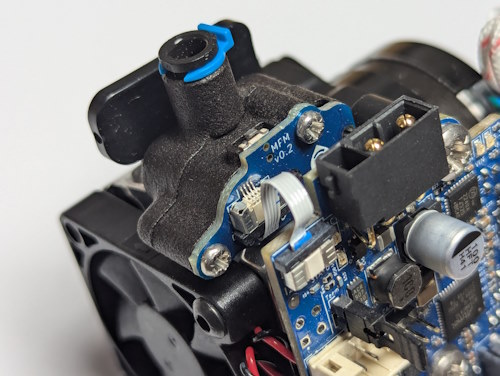
The monitor is installed directly into the E3D Revo Roto sensor slot, replacing the filament presence sensor (if fitted).
¶ Preparation
Follow the E3D documentation to remove the heatsink cooling fan and the existing sensor module if fitted.
Mount Roto toolboard to the Revo Roto extruder if not already fitted.
¶ FFC to Roto Filament Monitor
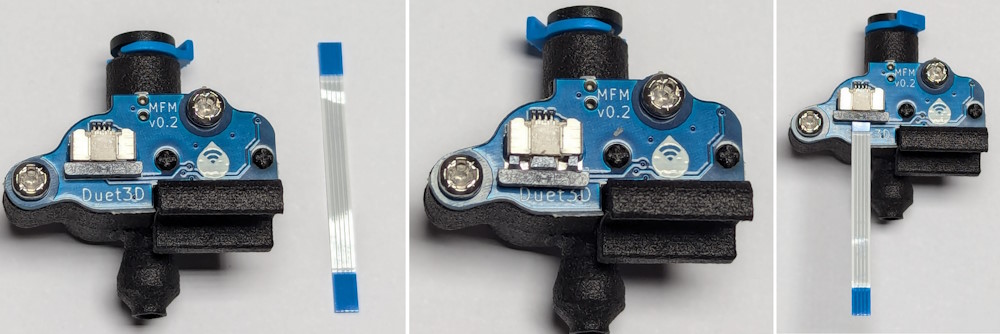
Fit the Flat Flexible Cable (FFC) to the Roto MFM connector:
- VERY Carefully open the connector by sliding the plastic lock out from the connector by ~1mm. This is very easy to break and takes very little force to open
- Place the FFC connector into the connector, contacts facing down
- Gently slide the plastic lock back into place
¶ FFC to Roto Toolboard
Following the same process to open the Roto FFC connector carefully, connect the other end of the FFC to the I2C header on the roto toolboard, contacts facing down:
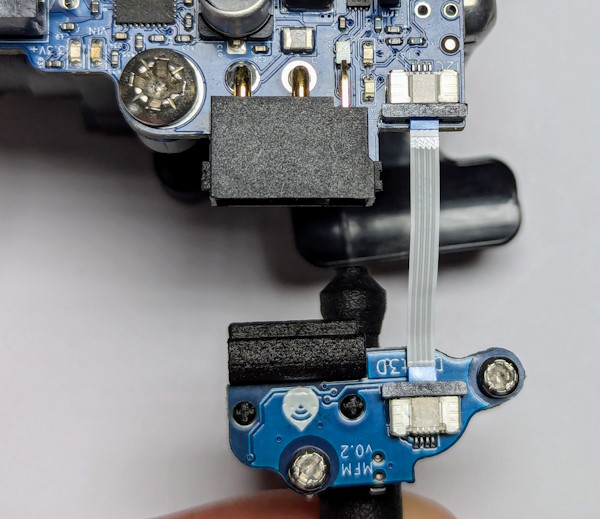
¶ Fit the Filament Monitor to the Revo Roto
Insert the Roto FM into the sensor slot, so the FFC will forms an "S" bend.
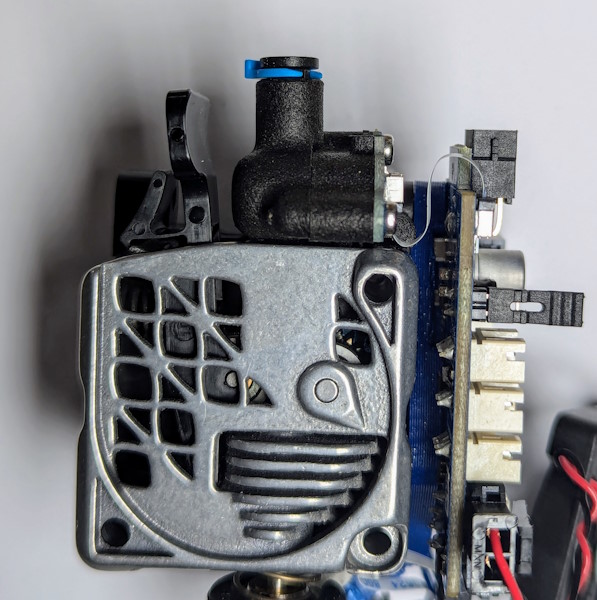
Complete the reassembly of the E3D Revo Roto, referring to the e3d documentation as required.
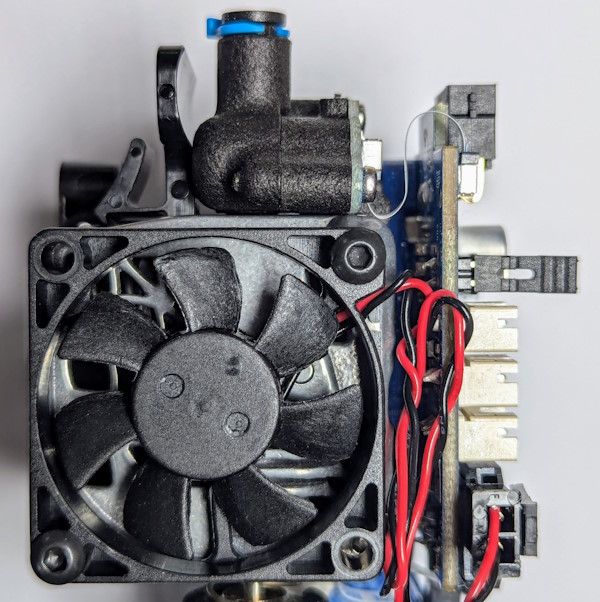
¶ Wiring
The FFC connector can only fit correctly with the contacts down. do not use a longer FFC than supplied (30mm)
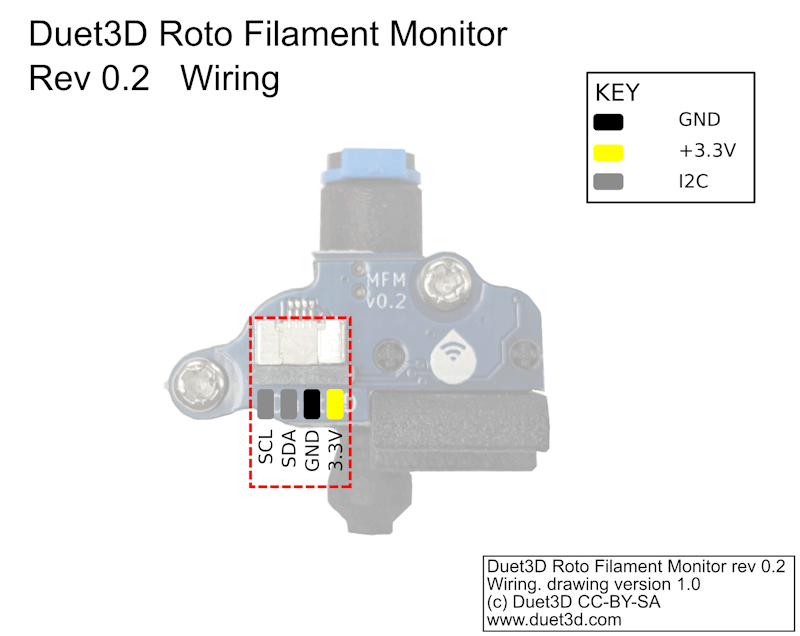
¶ Configuration
¶ Configuring the Filament Monitor
The filament monitor virtual pin name is "<board_id>.i2c.mfm" so a typical configuration command would be:
M591 D0 P3 C"121.i2c.mfm" E3 S1 L25.2 R70:120
For further information on Filament Monitor firmware configuration, commissioning and troubleshooting, see Connecting and configuring filament-out sensors.
¶ Configuring the action button
The filament monitor action button virtual pin name is "<board_id>.i2c.mfm.button" so a typical configuration command would be:
M950 J2 C"121.i2c.mfm.button"
That would set the button up as input #2. You can then use that input to trigger a macro as described here.
So for example, this button mapped to input #2 can then be used to trigger a macro:
M581 P2 S0 T2 R2 ; trigger2.g will be called by the Roto MFM button only when a file is not printing
and trigger2.g can contain the logic required for loading filament.
¶ Revisions
Initial release.