¶ Introduction
This document is relevant to: Duet 2 WiFi / Ethernet, Duet 2 Maestro, and Duet 3 MB6HC and Mini 5+ WiFi / Ethernet in standalone mode.
Firmware versions: All versions
Difficulty: Moderate
Time Required: 10 to 15 minutes
This guide covers getting a basic USB connection to your Duet, setting it up to be connected to your network, and connecting to the Duet Web Console using a browser. If you are setting up a Duet 3 with connected Single Board Computer (SBC, eg Raspberry Pi), please see SBC setup for Duet 3 documentation.
If you have any problems with your Duet when using this guide, rather than posting comments, please use our support forum: https://forum.duet3d.com/
¶ 1. Unboxing
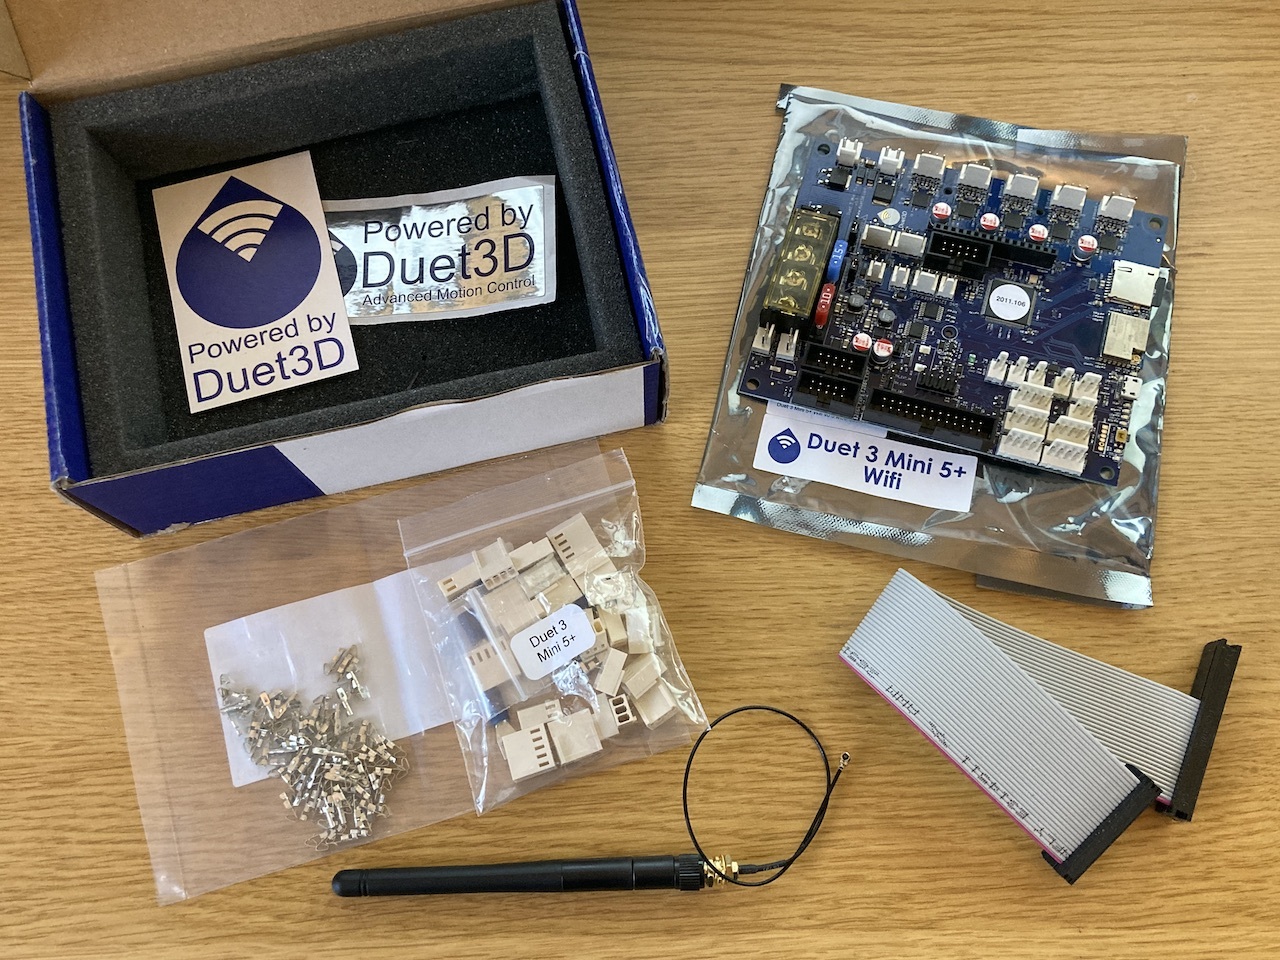
- 1 x Duet 3 Mini 5+ (WiFi or Ethernet)
- 1 x Connector kit, including:
- Würth Elektronic WR-WTB series connectors (Molex-KK compatible)
- Fork crimps for power input and bed heater
- JST VH connectors and crimps for hotend heaters.
- Plastic washers for isolation when mounting.
- 100 x crimps for connectors (Molex-KK compatible)
- 1 x micro SD Card
- 1 x Single Board Computer (SBC) ribbon cable
- 1 x External antenna (WiFi version only)
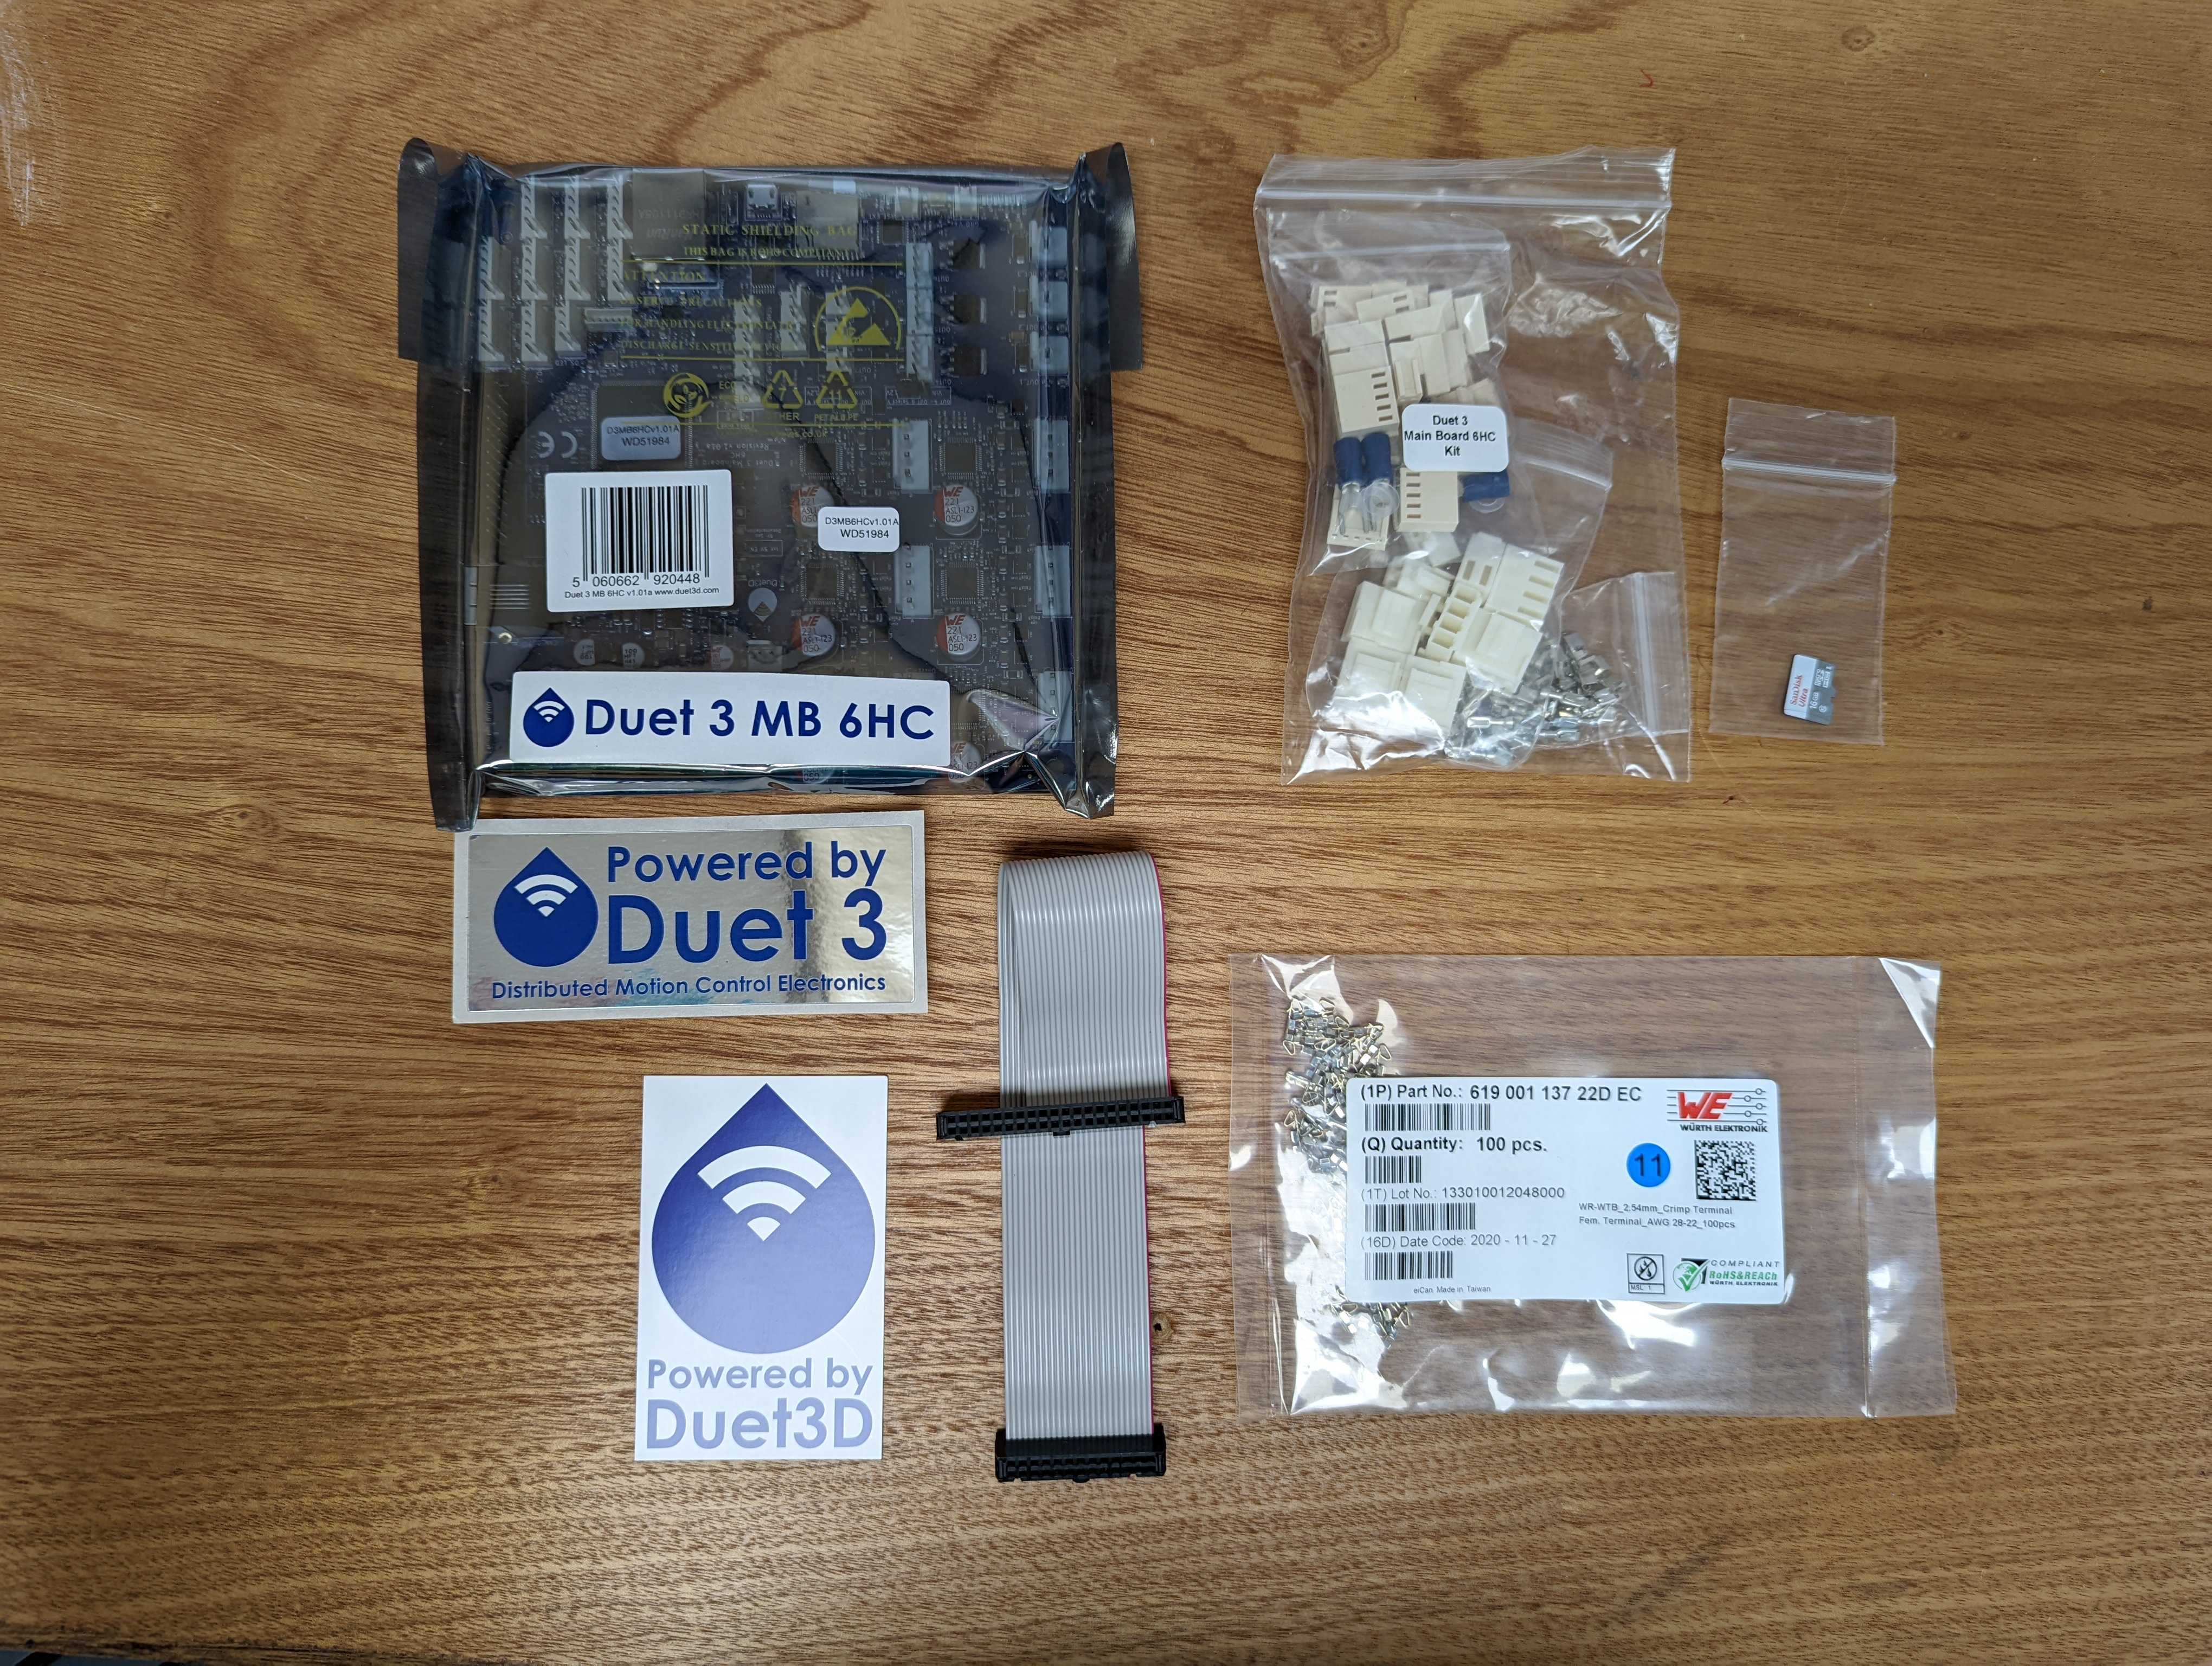
- 1 x Duet 3 Mainboard 6HC
- 1 x Connector kit, including:
- Würth Elektronic WR-WTB series connectors (Molex-KK compatible)
- Fork crimps for power input and bed heater
- JST VH connectors and crimps for stepper motors and hotend heaters.
- Plastic washers for isolation when mounting.
- 100 x crimps for connectors (Molex-KK compatible)
- 1 x micro SD Card
- 1 x 26/40 Single Board Computer (SBC) ribbon cable
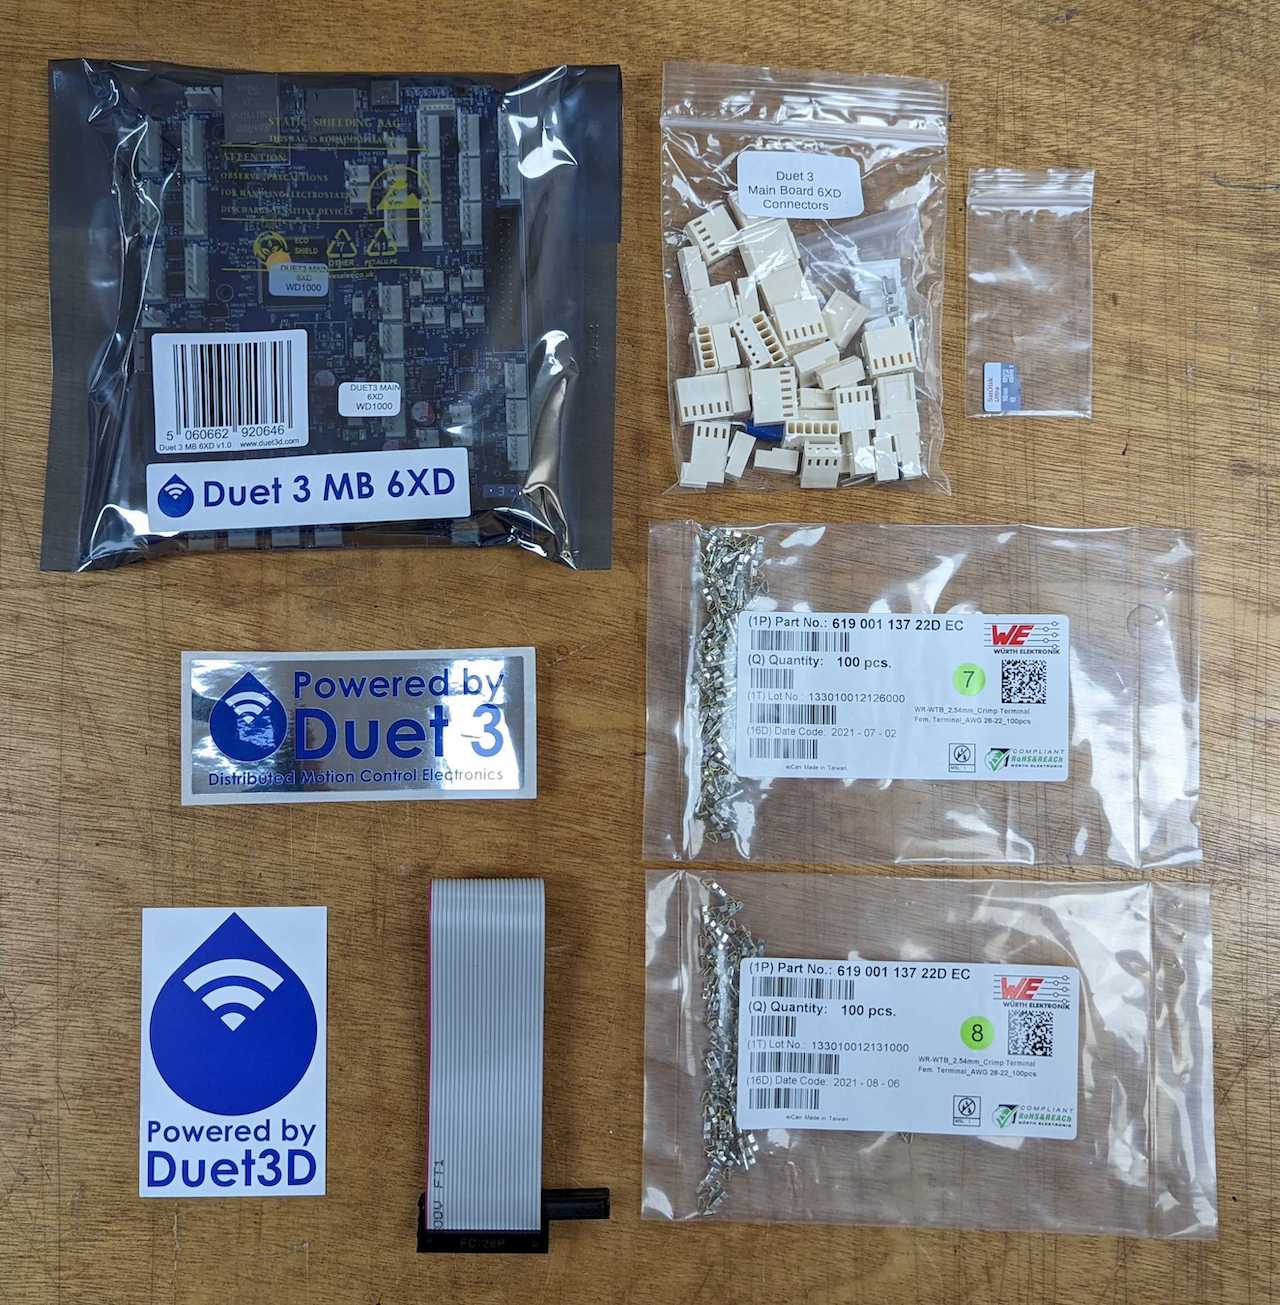
- 1 x Duet 3 Mainboard 6XD
- 1 x Connector kit, including:
- Würth Elektronic WR-WTB series connectors (Molex-KK compatible)
- Fork crimps for power input and bed heater
- JST VH connectors and crimps for hotend heaters.
- Plastic washers for isolation when mounting.
- 200 x crimps for connectors (Molex-KK compatible)
- 1 x micro SD Card
- 1 x 26/40 Single Board Computer (SBC) ribbon cable
- 1 x Duet 2 WiFi / Ethernet
- 1 x Connector kit, including:
- Würth Elektronic WR-WTB series connectors (Molex-KK compatible)
- Ferrules for power input, bed heater, and hotend heaters.
- Plastic washers for isolation when mounting.
- 100 x crimps for connectors (Molex-KK compatible)
- 3 ft. USB Cable
- 1 x micro SD Card
- 1 x External antenna (external WiFi version only)
- 1 x Duet 2 Maestro
- 1 x Connector kit, including:
- Würth Elektronic WR-WTB series connectors (Molex-KK compatible)
- Ferrules for power input, bed heater, and hotend heaters.
- Plastic washers for isolation when mounting.
- 100 x crimps for connectors (Molex-KK compatible)
- 3 ft. USB Cable
- 1 x micro SD Card
¶ 2. Connect your Duet via USB
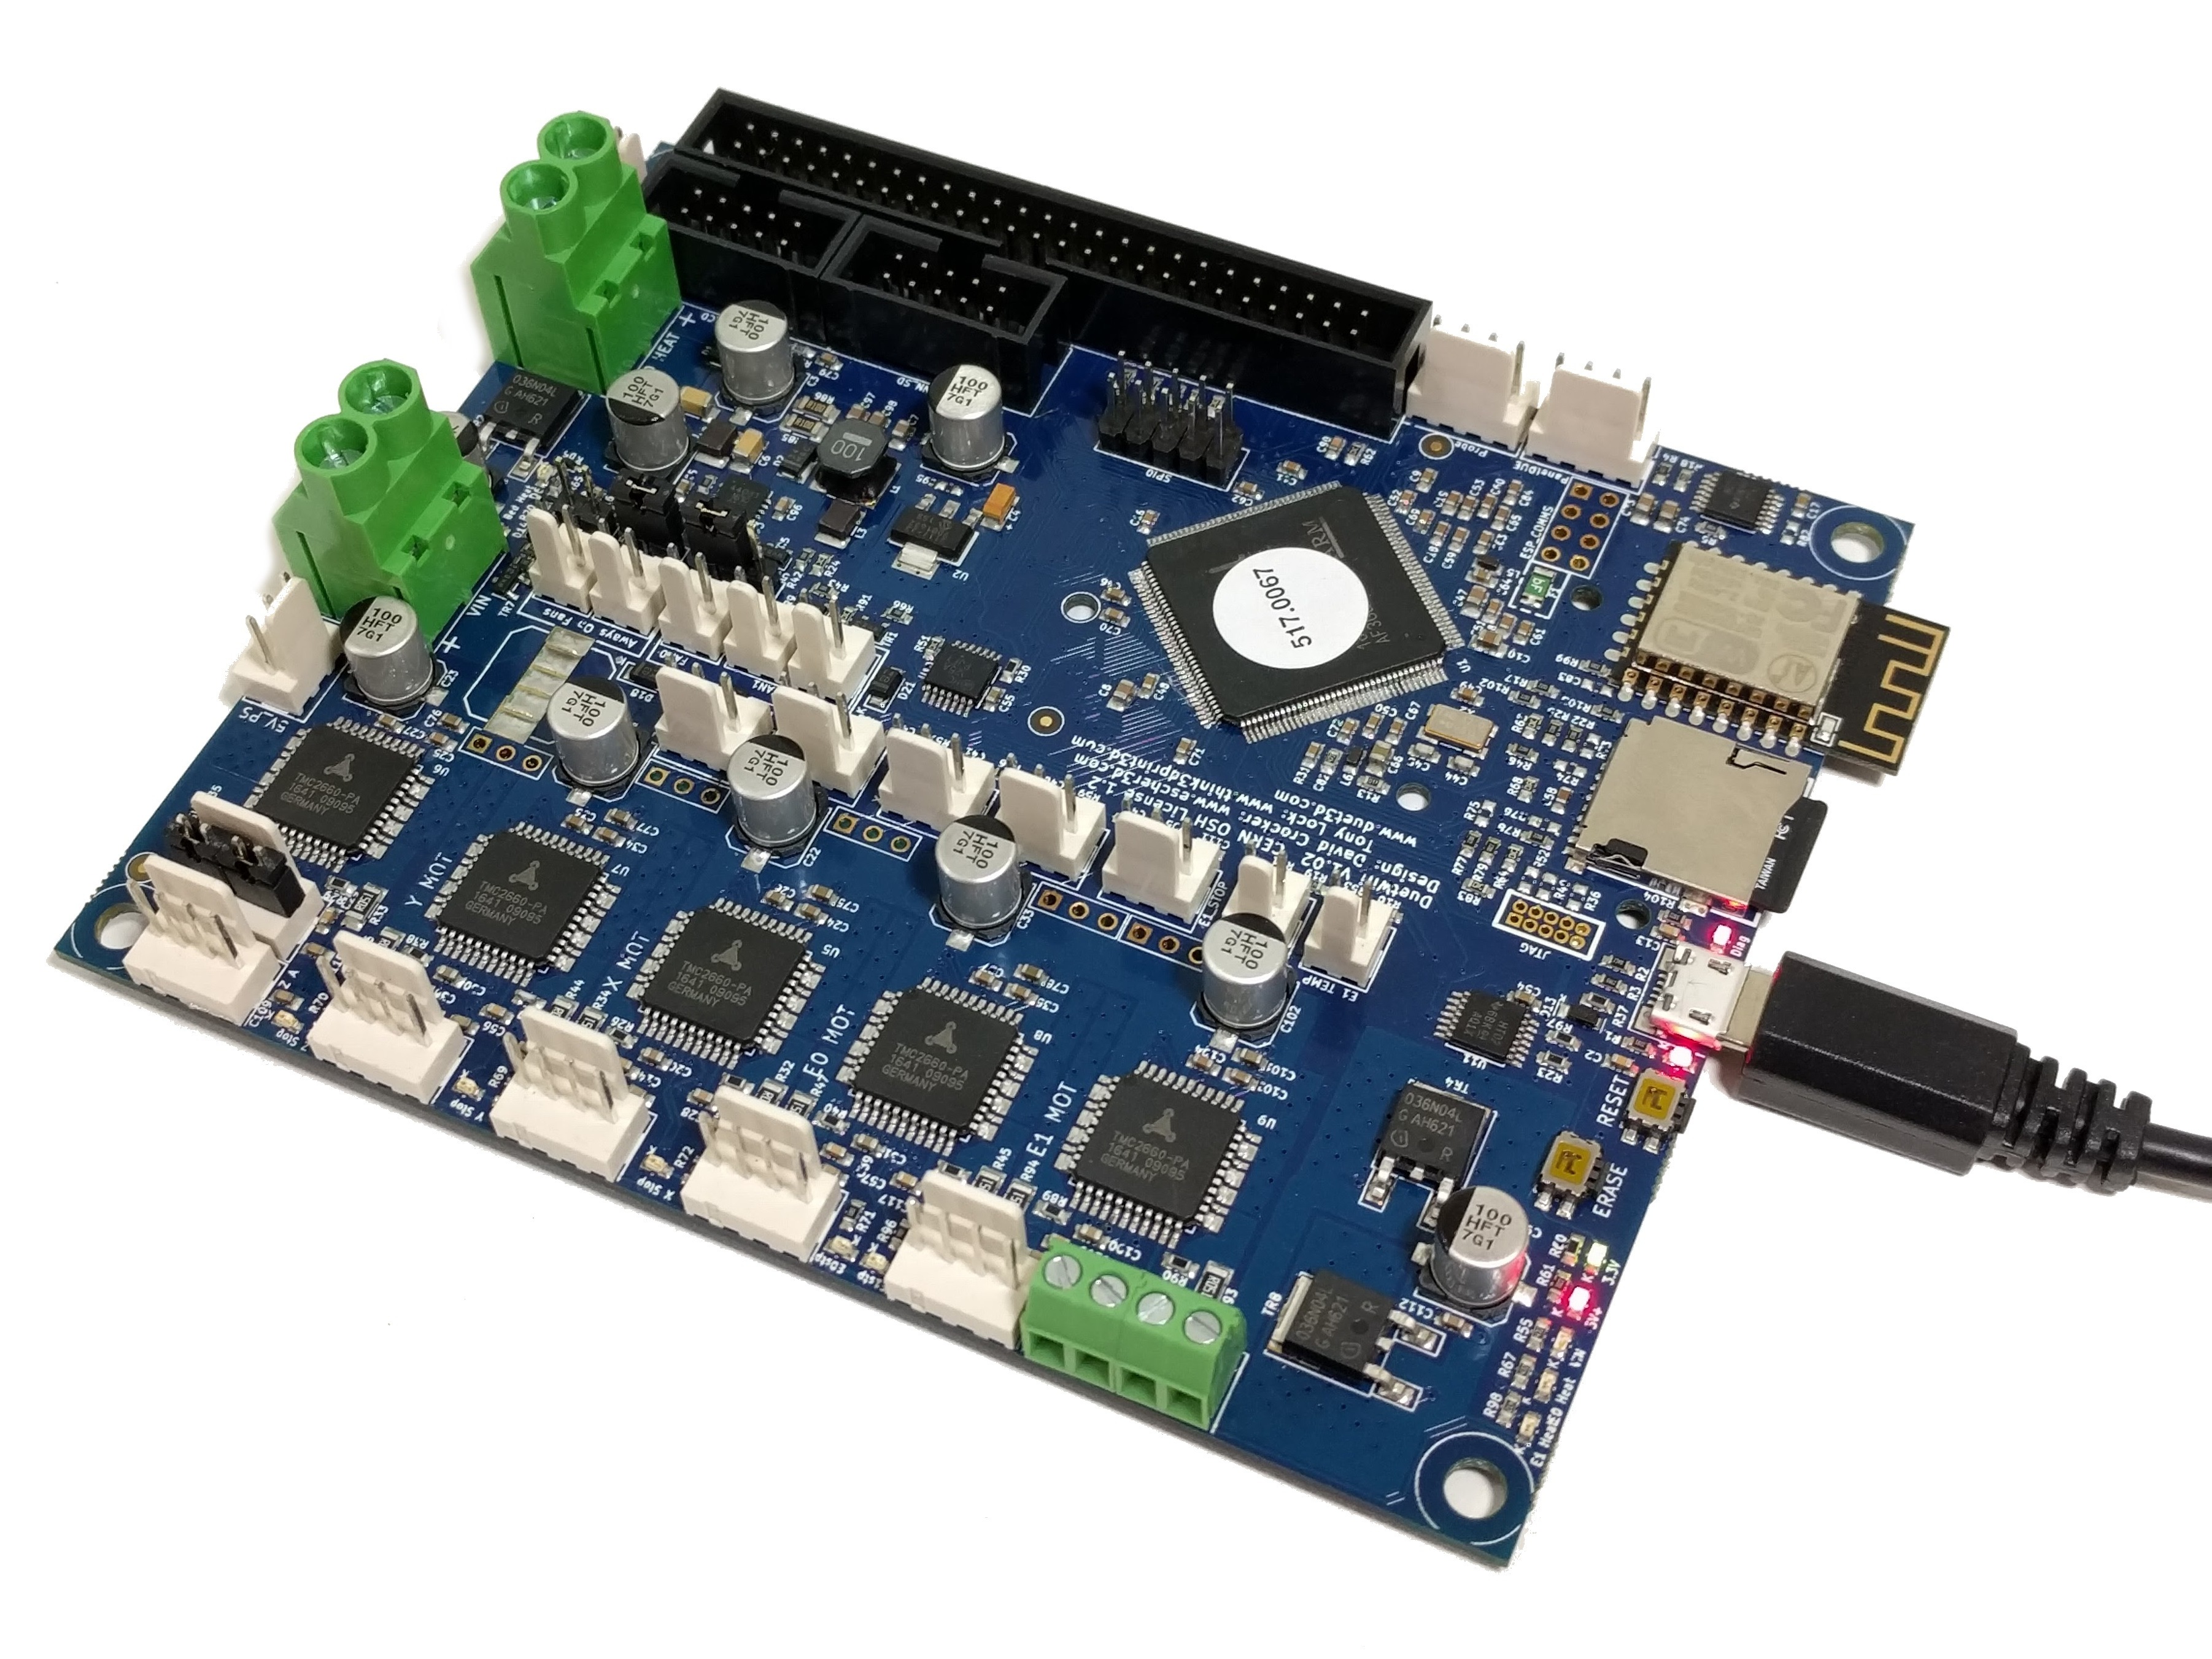
This guide applies to all Duet 2 Wifi / Ethernet / Maestro boards, and Duet 3 boards running in standalone mode (no connected Raspberry Pi). The picture of the board may be different from yours.
¶ Plug in USB lead
- Connect the Duet to your PC with the USB cable provided. Do not connect other power supplies at this stage.
¶ Install drivers
- Download the USB drivers for Duet here and extract the files to a suitable location.
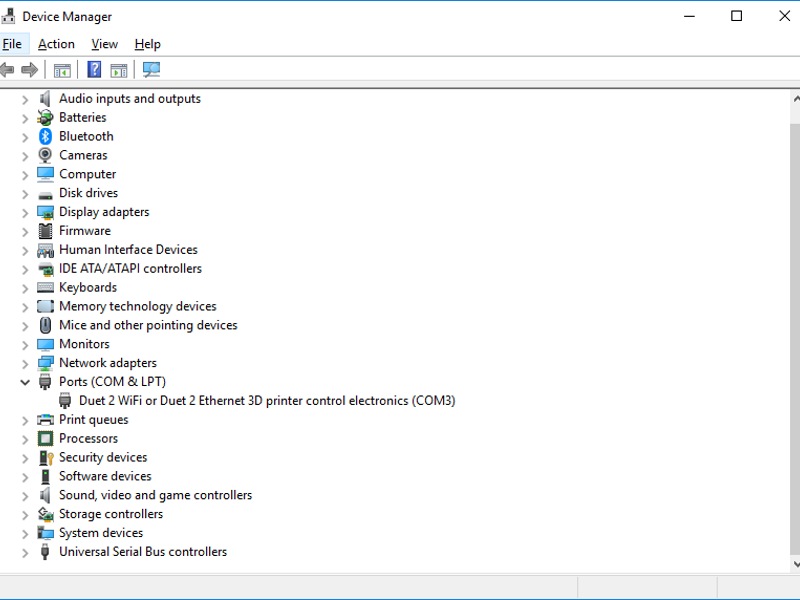
- To install drivers, open Device Manager by pressing Windows Key + R and type devmgmt.msc, or launch from the Start menu by typing "Device Manager". On Windows 10, you can right-click on the Start icon and click on "Device Manager".
- Look for any devices with a yellow triangle, or for any "Generic USB" devices which would indicate that the Duet driver is not installed.
- If a USB device does show the yellow triangle, or as a Generic USB device, right click on the device. Click Install Driver and browse to the location of the driver that was downloaded at the beginning of this step. Continue setup by clicking "Next" until the device driver has been installed.
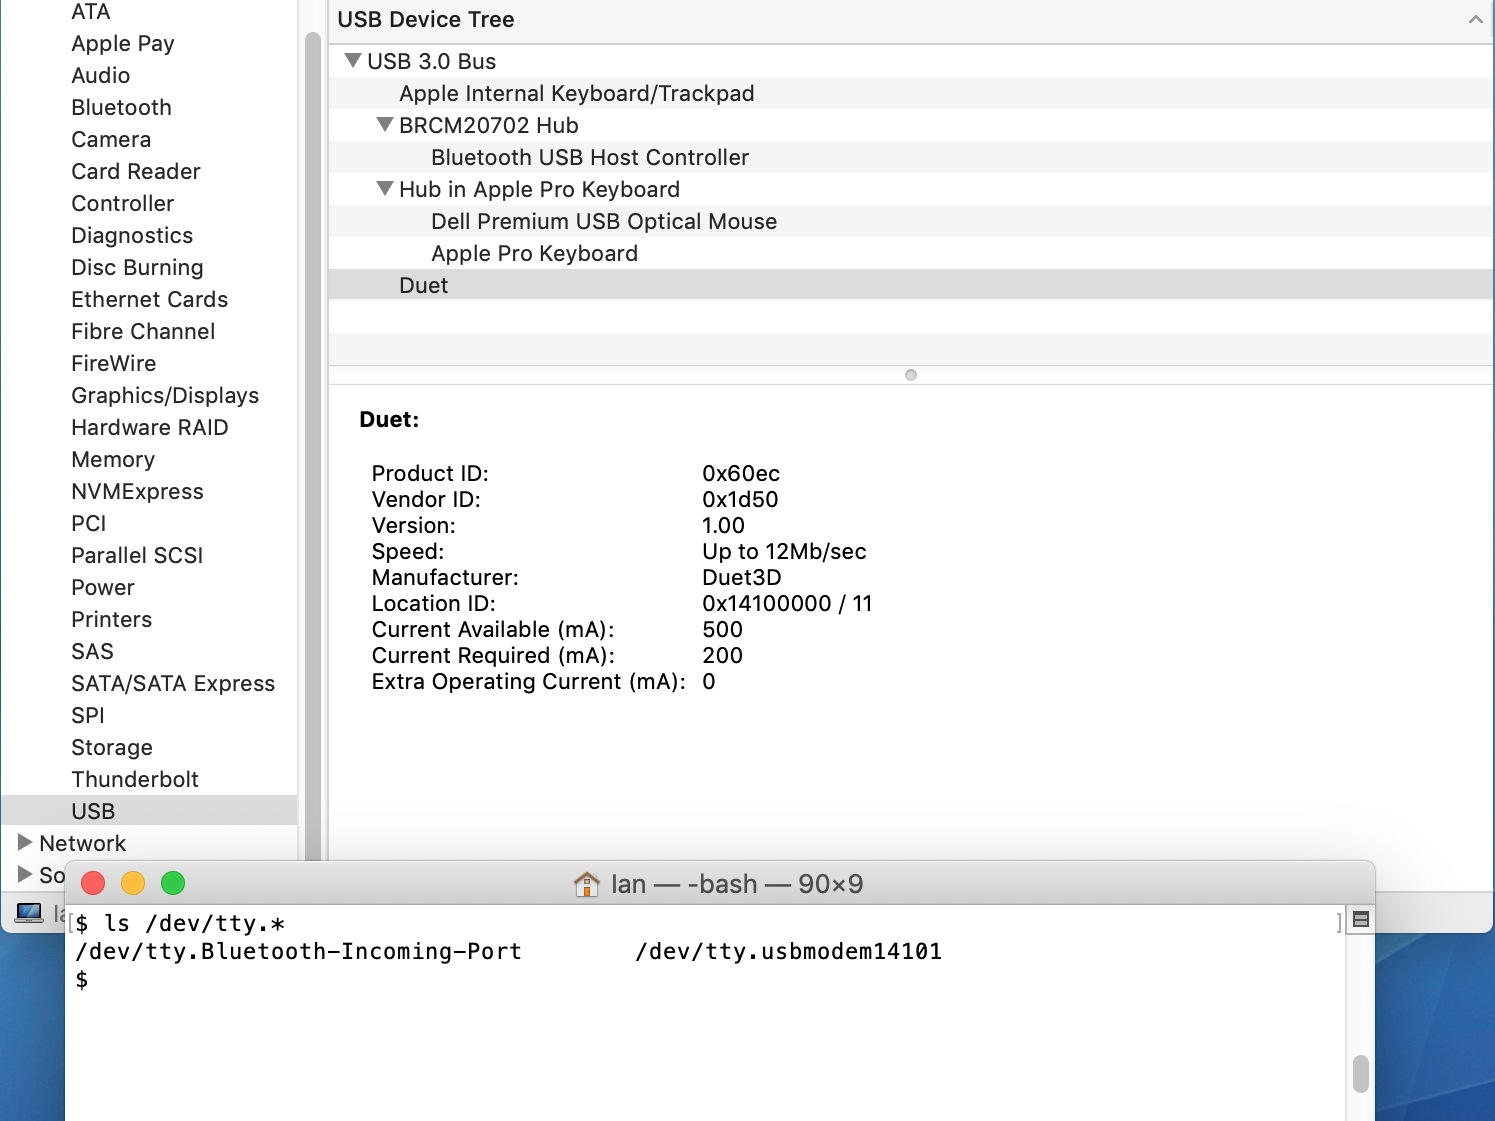 macOS users have no drivers to install.
- To check the Duet is recognised open Applications > Utilities > System Information, under Hardware > USB for a 'Duet' entry. It may also show as a 'Communication Device' if connected through a USB hub.
- For the Serial Port name, open Applications > Utilities > Terminal, then run
ls /dev/tty.*The Duet uses a port with USB in the name, e.g./dev/tty.usbmodem1411
¶ 3. Connect to Duet
To set up the network connection on the Duet, we must use a terminal emulation program to talk to the Duet via the USB cable.
We have recommendations for what software to use on Windows, macOS and Linux. This is because 3D printer host programs (such as Pronterface) and other terminal emulation programs may send all characters in uppercase, which causes problems when making changes to WiFi settings, as the SSID and password are case sensitive.
¶ Install YAT
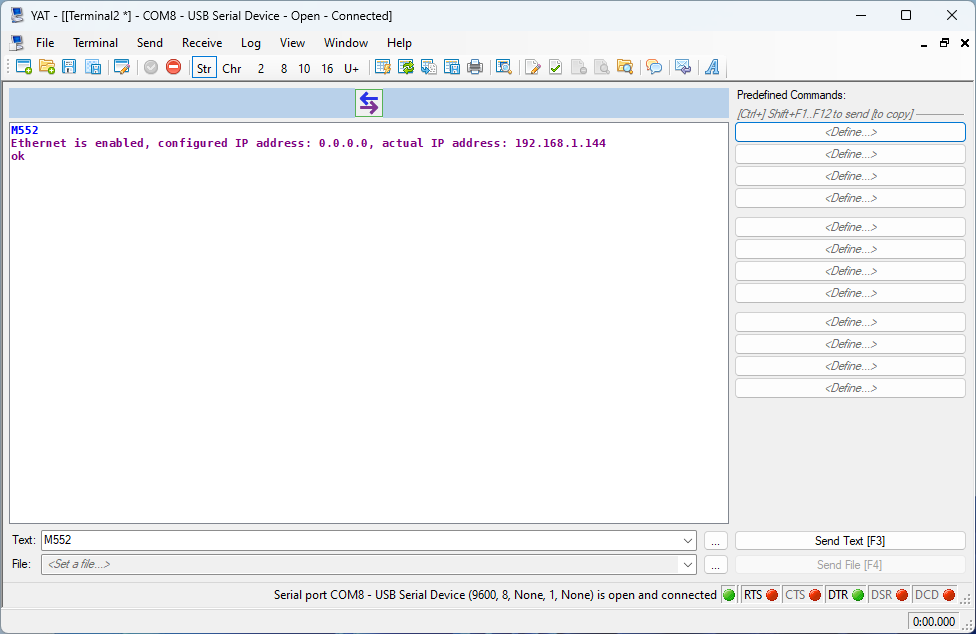 We recommend downloading YAT. Other terminal emulation programs may work, eg PuTTY, but we've found YAT the most reliable.
Download YAT here. Install YAT using default options, then open it.
Some users have reported issues with YAT under Windows 8 not connecting properly. If YAT does not work, try Pronterface to confirm the computer can talk to the Duet
¶ Select the COM port
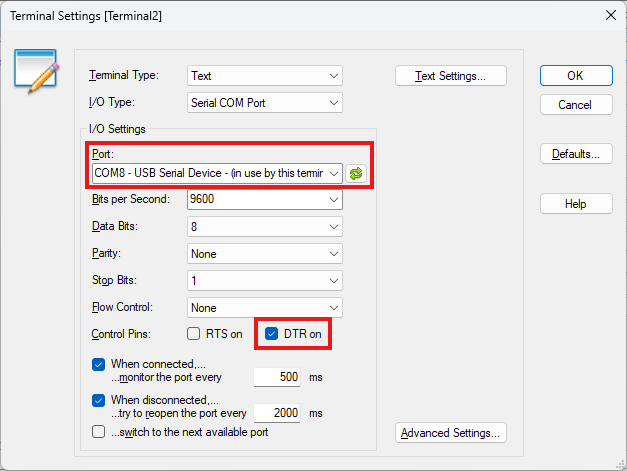 If the "Terminal Settings" screen doesn't open automatically, select "Terminal" menu, then "Settings".
Select the correct COM port as the Serial Port.
If unsure of the COM port number, press Windows Key + R on your keyboard and type devmgmt.msc. Your Duet will be listed under Ports (COM & LPT) as USB Serial Device (COM#) or similar. Use COM# as the Serial Port in YAT.
Select "DTR on"
For newer versions of RepRapFirmware (3.6 and later), on Duet 3 boards, the terminal emulator must raise the DTR line, otherwise RRF will not transmit data.
Older versions of YAT don't have this option, but DTR can be enabled on the connection screen. For older versions of RRF, it doesn't matter if this is enabled or disabled.
The rest of the default values, eg for Bits per second etc, should work.
¶ YAT settings
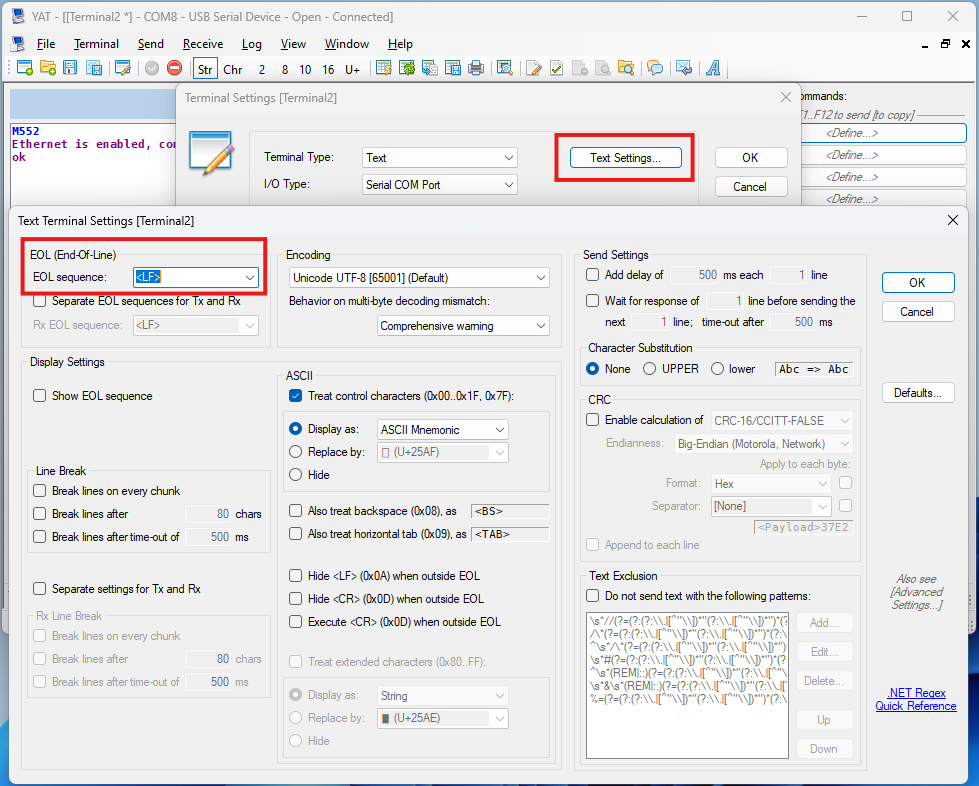 Set YAT to use <LF> as the end of line character
This will improve the readability of the messages coming from the Duet. Click "Text Settings" in the "Terminal Settings" and change "EOL sequence:" to <LF>. Click "OK" to close Text Settings. Click "OK" again to close Terminal Settings.
¶ Connect to Duet
 Select "Terminal" menu, then "Open/Start" to connect to your Duet. Or click the green tick in the tool bar.
If you didn't click "DTR on" in the Terminal Settings, click on the 'DTR' button with the red radio button, which should then turn green.
If you are connecting to a Duet 2 WiFi or Duet 3 Mini 5+ WiFi, you may see lots of "WiFi reported error: no known networks found" messages. Don't worry, that's normal, and it means that the Duet is working!
¶ CoolTerm
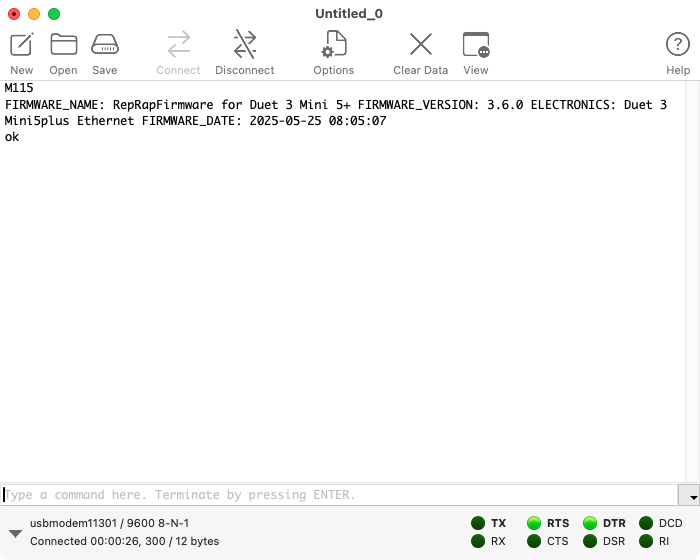 We recommend using CoolTerm from https://freeware.the-meiers.org/.
Go to Options > Serial Port and select the Duet from the 'Port:' drop down menu; it will be named something like "usbmodem1411". Baud rate can be set to 115200.
Go to Options > Terminal > 'Line mode', which sends your command line when you press return rather than character by character ('raw mode'), and turn on 'Local Echo' so it shows the command you have sent.
Click 'OK' to save the options, then click 'Connect'. For newer versions of RepRapFirmware (3.6 and later), on Duet 3 boards, the terminal emulator must raise the DTR line, otherwise RRF will not transmit data. CoolTerm should enable this automatically; check that the radio button next to 'DTR' is green, and click it if it is not. For older versions of RRF, it doesn't matter if this is enabled or disabled.
¶ SerialTools
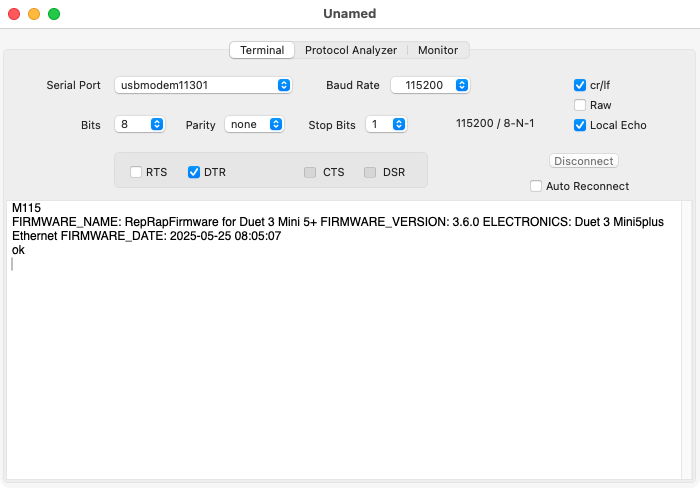 If you prefer to use an app from the Appstore, try SerialTools.
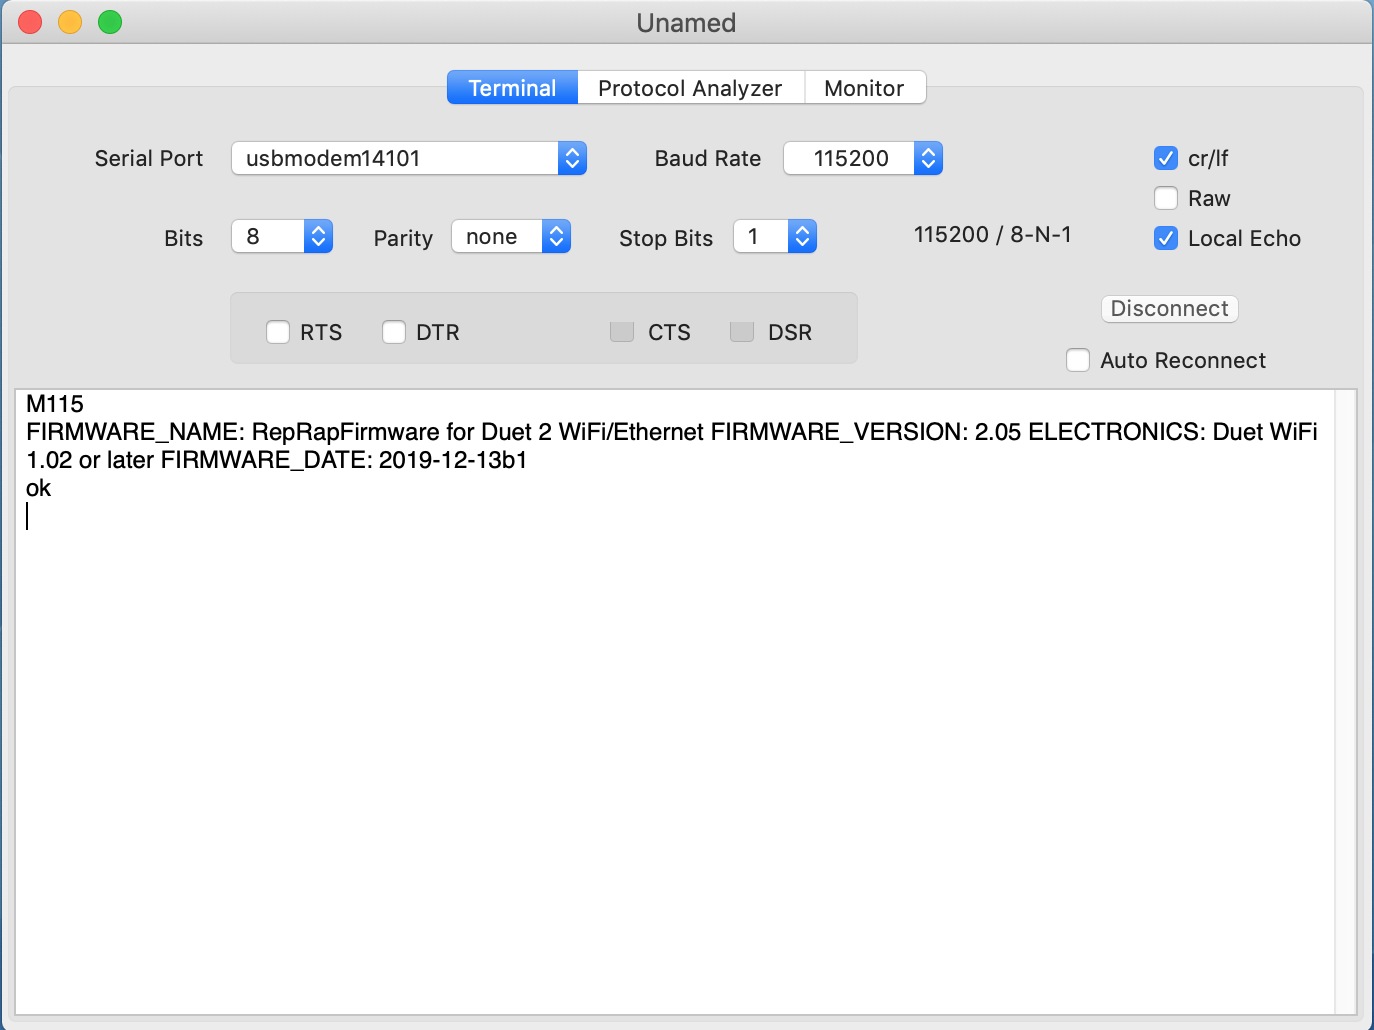
Install SerialTools and run it. Select the Duet from the 'Serial Port' drop down; it will be named something like "usbmodem1411". Baud rate should be 115200, and Local Echo should be ticked. Click 'Connect' to connect.
For newer versions of RepRapFirmware (3.6 and later), on Duet 3 boards, the terminal emulator must raise the DTR line, otherwise RRF will not transmit data. Click the checkbox next to "DTR". For older versions of RRF, it doesn't matter if this is enabled or disabled.
SerialTools is a bit finicky about text input; you have to get the Gcode command correct, without pressing delete or cursor keys. It sends each character to the Duet as you type them (raw mode), rather than when you press return. If you navigate away from SerialTools to another application, and then back, in the middle of writing the command, the command won't work. You should get an 'ok' when a command goes through correctly.
¶ Screen
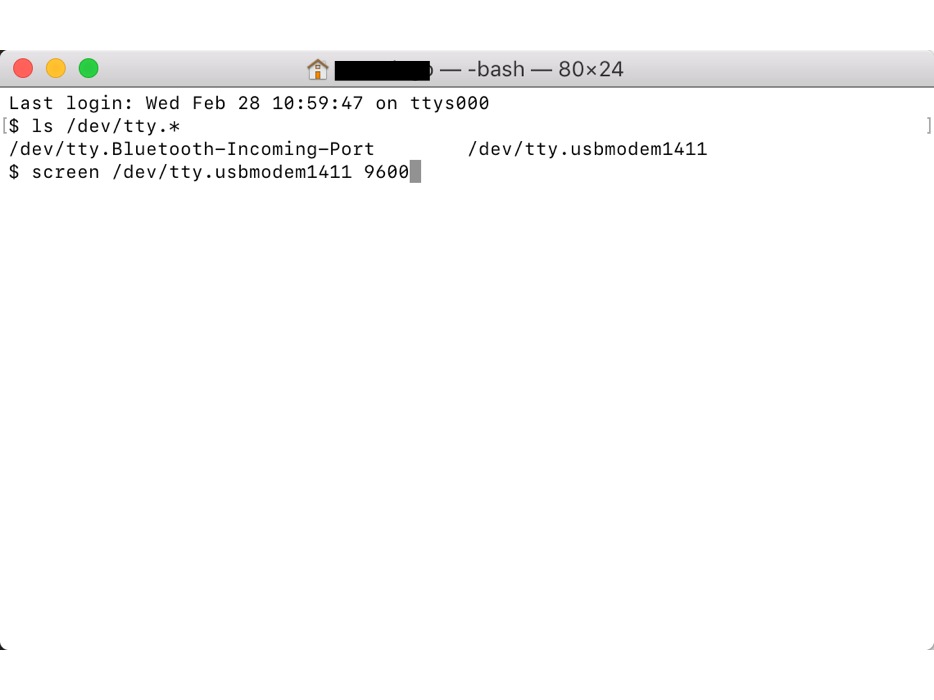
 It is also possible to use the built-in 'screen' terminal application. However, you cannot see the commands you type in, and the responses from the Duet are not formatted nicely on the screen.
If you want to use 'screen', open Applications > Utilities > Terminal. Run screen /dev/tty.usbmodem1411 115200, replacing "usbmodem1411" with the Serial Port name for your Mac, if different (see Step 2).
You should see a blank screen, but see note on Duets with WiFi below. Hit enter and you should see OK returned. You are connected successfully. To disconnect and return to the Terminal, type 'Ctrl-a k'.
If you get an error, "Sorry, could not find a PTY." unplug the USB, plug it back in and try again.
No matter which connection method you use, if you are connecting to a Duet 2 WiFi or Duet 3 Mini 5+ WiFi, you may see lots of "WiFi reported error: no known networks found" messages. Don't worry, that's normal, and it means that the Duet is working!
At certain points in these instructions, you may need to use quote marks in commands. Any double quotation marks must be sent as straight double quotation marks. To enable straight double quotation marks go to System Preferences > Keyboard > Text. Then under the Double Quotes drop down, select straight double quotations.
¶ Add user to dialout
Most likely, the first thing you will need to do on a Linux installation is to add the user to the 'dialout' group, to allow permission to connect to the Duet. Do this by opening a Terminal window and sending sudo adduser [your_username] dialout. Following this, you will need to log out and back in, or possibly restart, to enable this.
¶ CuteCom
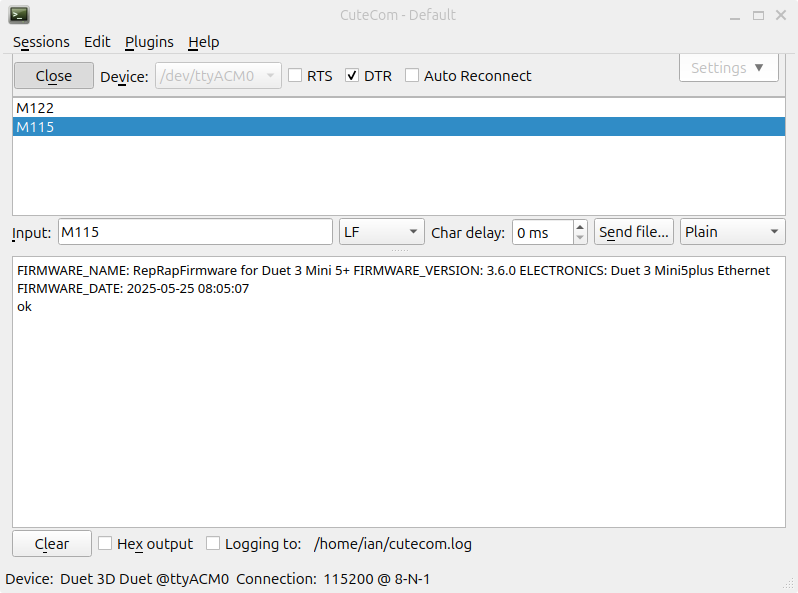 There are many options to connect using Linux. Our favourite is to use CuteCom, which is a GUI serial terminal.
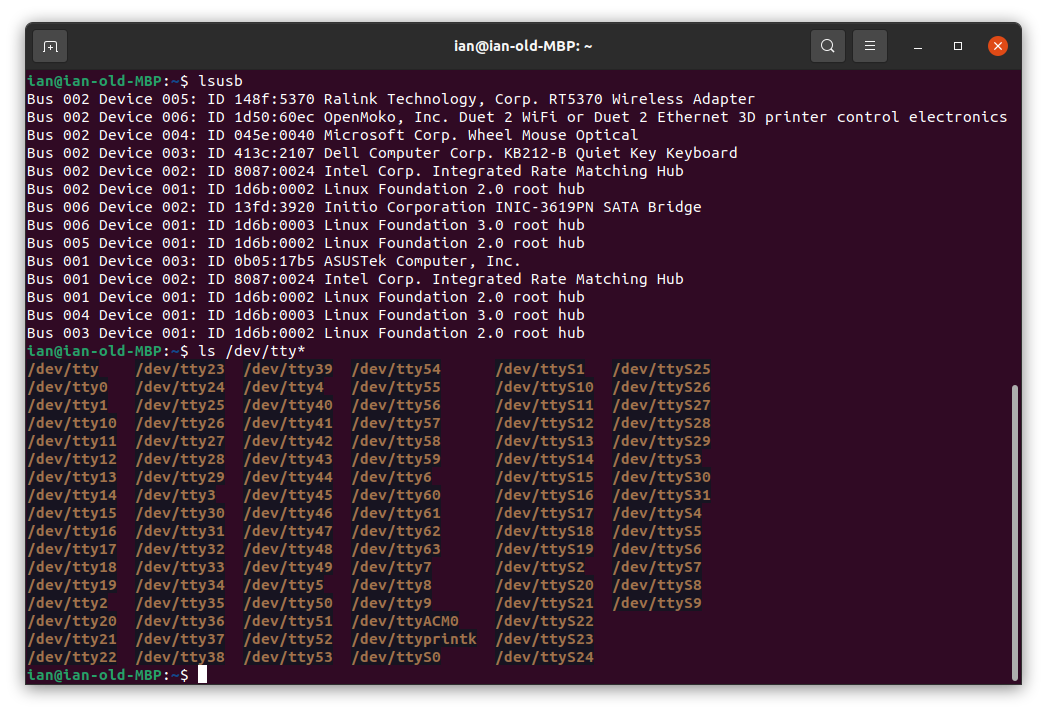
It's available in most package repositories, or install with sudo apt install cutecom. It should automatically detect the correct port (usually /dev/ttyACM0), and is configured correctly out of the box. Click 'Open' to connect.
For newer versions of RepRapFirmware (3.6 and later), on Duet 3 boards, the terminal emulator must raise the DTR line, otherwise RRF will not transmit data. Click the checkbox next to "DTR", or in Settings set 'Flow Control' to 'Hardware'. For older versions of RRF, it doesn't matter if this is enabled or disabled.
¶ Minicom
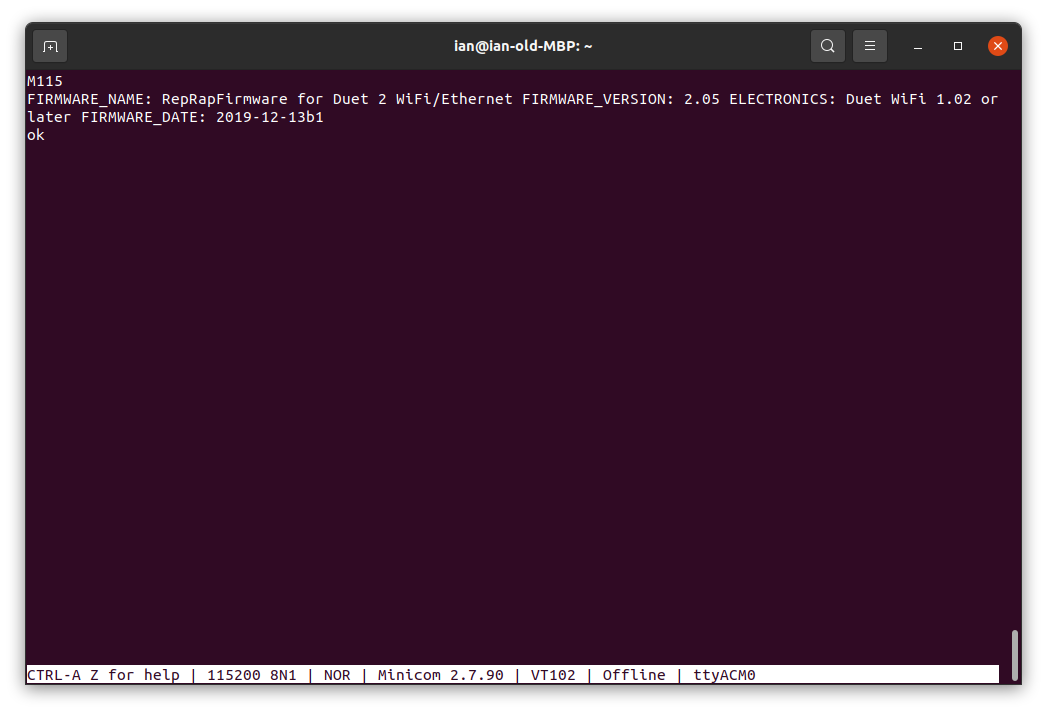 Alternatively, you can use a text-based serial terminal application such as Minicom. Install with
 sudo apt install minicom, and run from a Terminal window with minicom -s, which starts it in setup mode. Select 'Serial port setup', then 'A', and change the port to '/dev/ttyACM0' (or the port name from step 2). Press return twice, then 'Exit'. The terminal will start.
Press CTRL-A then W for linewrap, CTRL-A then U for CR at end of line, and CTRL-A then E for local echo. CTRL-A then X quits Minicom, releasing the port.
¶ Screen
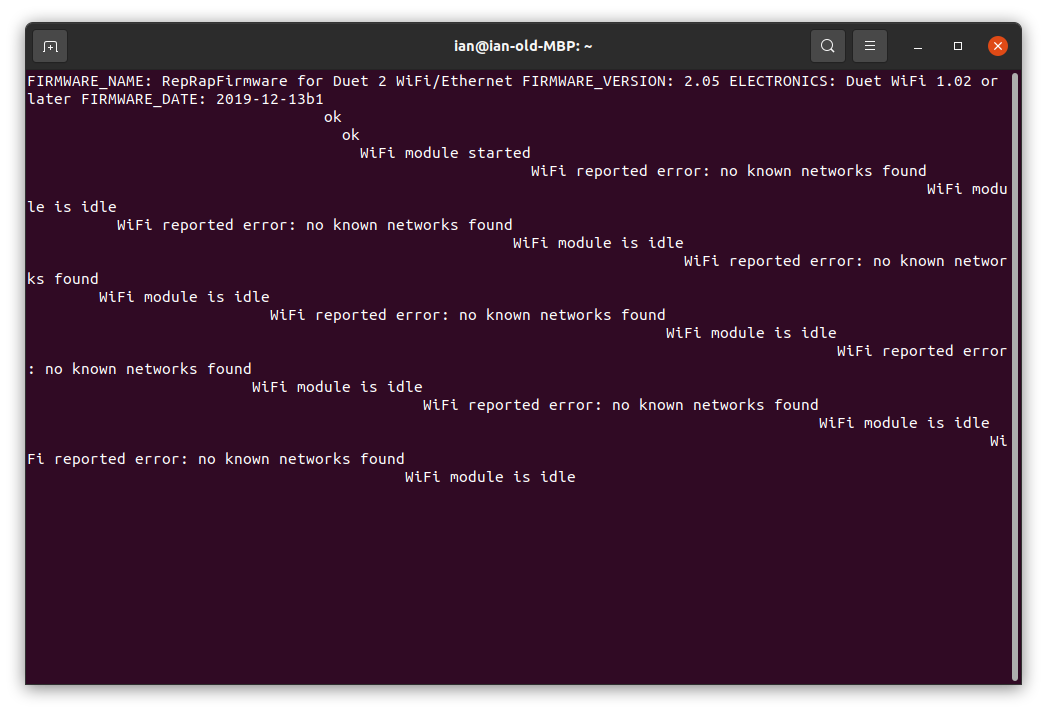 Finally, you can use the built-in 'screen' terminal. However, you cannot see the commands you type in, and the responses from the Duet are not formatted nicely on the screen. If you want to use 'screen', do this:
Run screen /dev/ttyACM0 115200. (Replace "ttyACM0" with the port name if it's different.) You should see a blank screen, but see note on Duets with WiFi below.
No matter which connection method you use, if you are connecting to a Duet 2 WiFi or Duet 3 Mini 5+ WiFi, you may see lots of "WiFi reported error: no known networks found" messages. Don't worry, that's normal, and it means that the Duet is working!
¶ 4. Check your Firmware Version
By this point, your computer should be connected and talking to your Duet. You may have received a number of messages from the Duet already; it's generally safe to ignore these for now. The Duet uses 'GCodes' to communicate and for all configuration. See the GCode dictionary here for a description and full list.
If you have a Duet 2 Wifi or Duet 3 Mini 5+ WiFi, you may find you are getting a lot of messages like "WiFi reported error: no known networks found". The default configuration turns on the WiFi, but it is not finding a network to connect to. To stop the WiFi, send M552 S-1 (see M552 in the GCode dictionary).
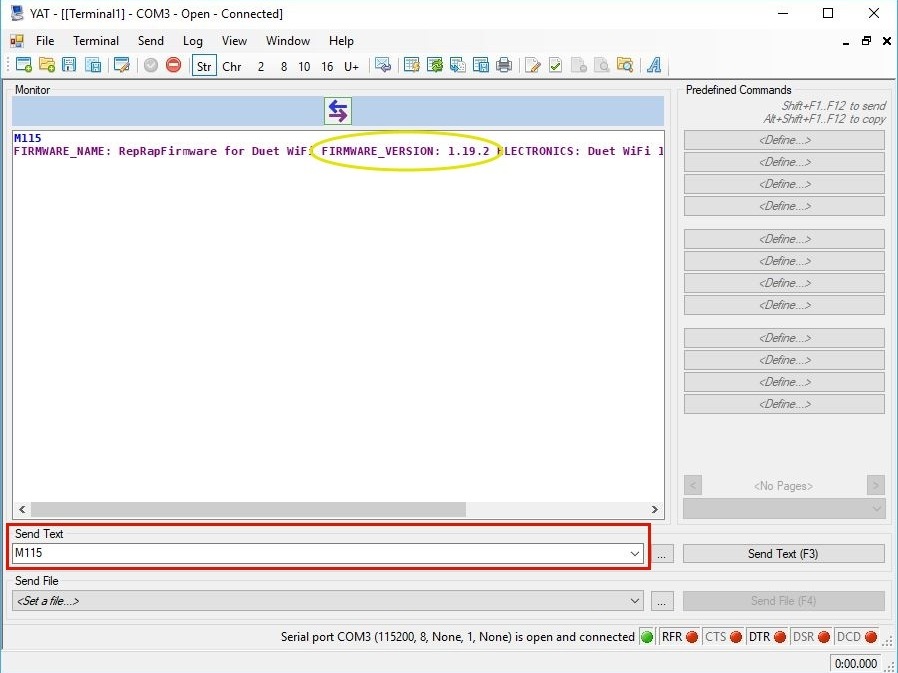
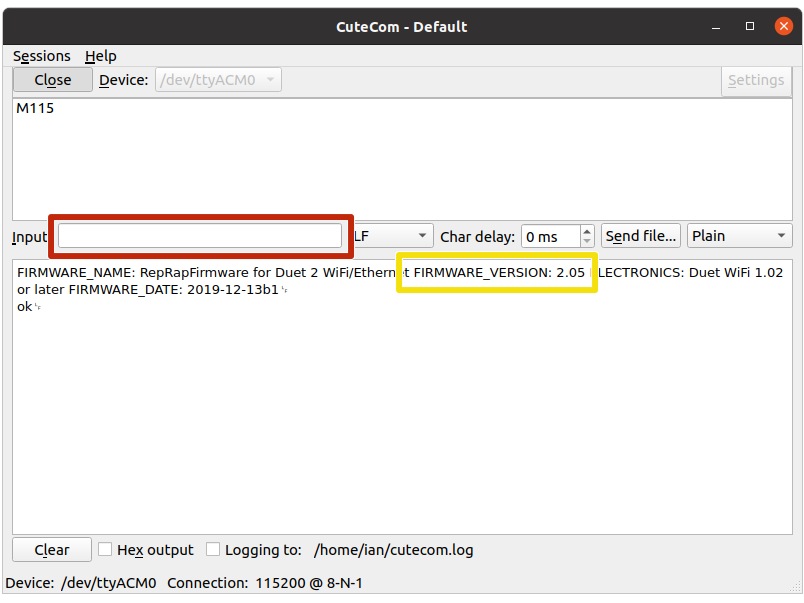
To check the Duet's firmware version, send command M115 to the Duet board (see M115 in the GCode dictionary). The Duet will respond with the firmware version being used.
¶ YAT
¶ SerialTools
¶ Screen
 macOS users using 'screen': You will not see characters appear on the screen as you type. For this reason, it is easiest to copy and paste the commands to ensure correct syntax.
Copy M115 and paste into terminal and then hit enter. You will see OK when a succesful command is received. Wait a few moments and the firmware version will be displayed.
¶ CuteCom
¶ Screen
 Linux users using 'screen': You will not see characters appear on the screen as you type. For this reason, it is easiest to copy and paste the commands to ensure correct syntax.
Copy M115 and paste into terminal and then hit enter. You will see OK when a succesful command is received. Wait a few moments and the firmware version will be displayed.
Once you know the firmware version your Duet is using, check for the latest version of the firmware in our Github repository here. Use the 'Latest release', not any 'pre-release', 'beta' or 'RC' version until you are familiar with Duet.
If your Duet is using an old firmware version, we recommend upgrading. See Installing and Updating Firmware documentation.
¶ 5. Connect Duet to Network
For Duets with WiFi: Duet 2 WiFi and Duet 3 Mini 5+ WiFi; both have internal and external antenna versions.
¶ WiFi status LED and antenna
Your Duet WiFi will either have a blue LED on the WiFi module, or a green LED next to the WiFi module. This flashes once when power is connected, flashes a number of times when enabled and searching for a network to connect to, and is lit permanently when connected to a WiFi network. Duet 2 WiFi with external antenna has no WiFi LED.
If you have a Duet with an external antenna, don't forget to plug the supplied external antenna into the U.FL connector on the WiFi module!
¶ Set WiFi to idle mode
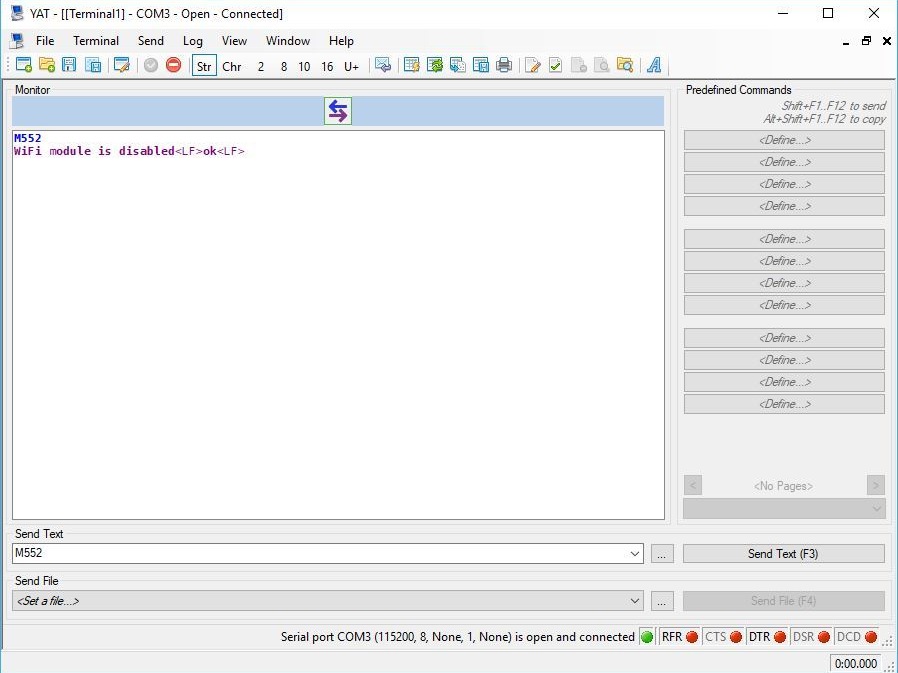
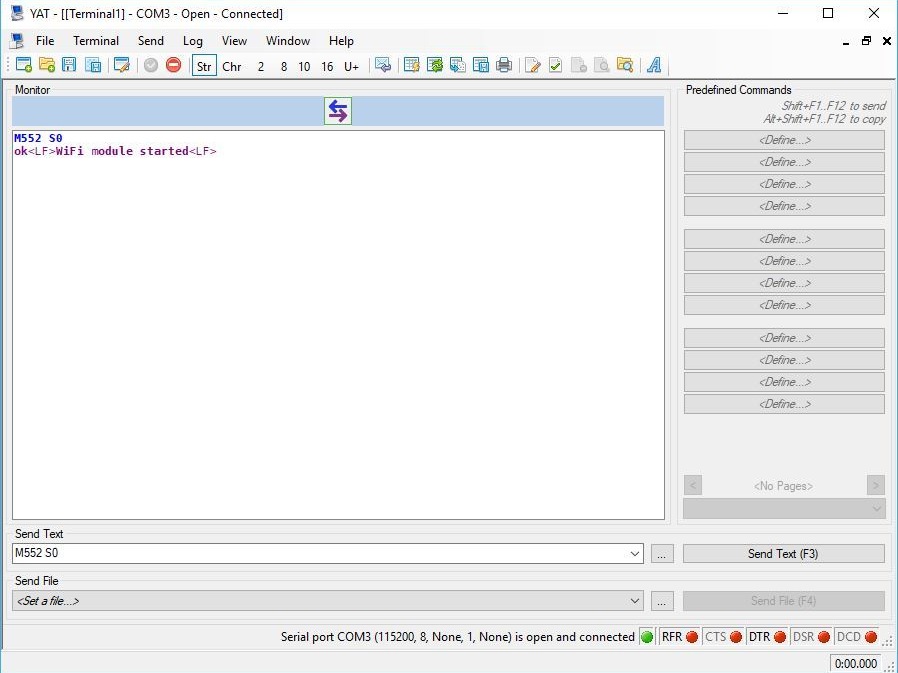 If you didn't turn off WiFi in Step 4, you may find you are getting a lot of messages like "WiFi reported error: no known networks found". The default configuration turns on the WiFi, but it is not finding a known network to connect to. The GCode command M552 controls the network interface.
- To stop the WiFi, send
M552 S-1. - Send
M552to check the status. It should say "WiFi module is disabled". - Now put it into idle mode by sending command
M552 S0. The response should be "WiFi module is started". - Send
M552again, and the Duet should reply with "WiFi module is idle".
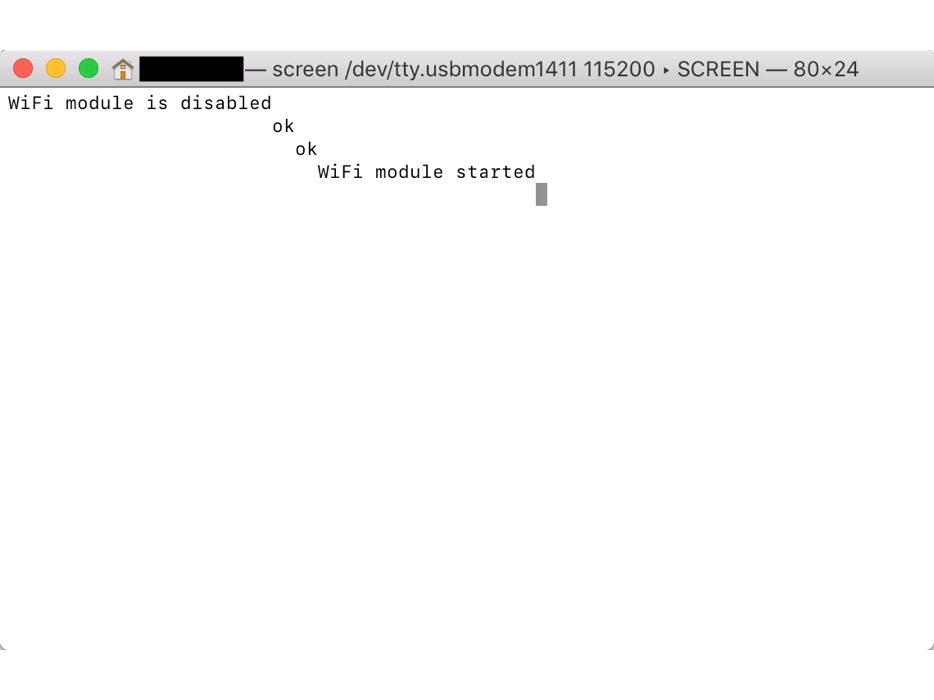 macOS and Linux users using 'screen': send the same commands as above, you just won't be able to see what you have sent.
¶ Configure network SSID and password
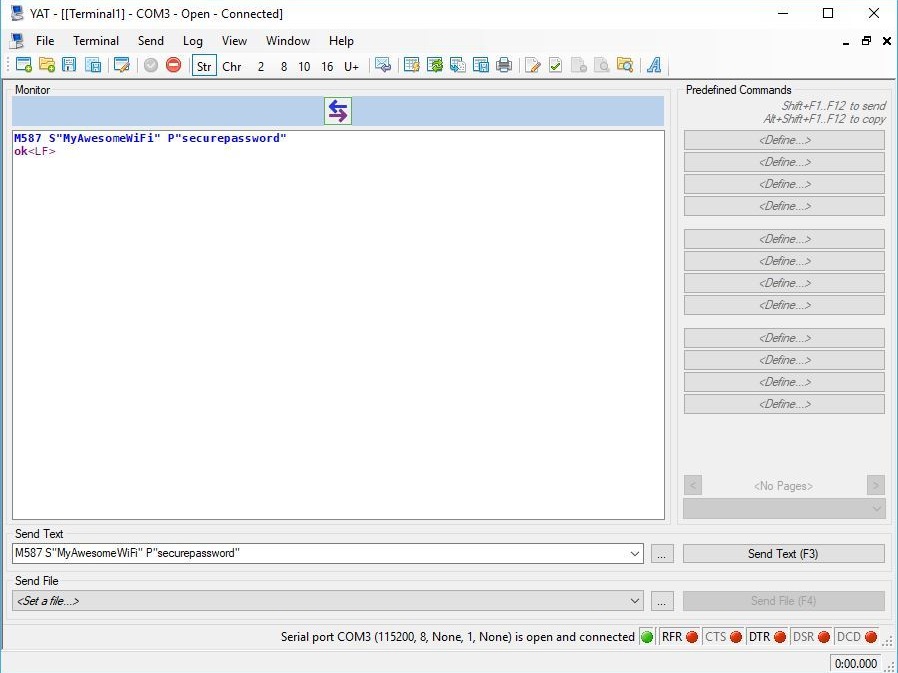 The M587 GCode command stores the network SSID and password, so the Duet can connect to it each time it is turned on.
Use the M587 as shown below. Substitute the SSID and WiFi password for those of your network. Enter the exact characters of your network SSID and password, in the correct case. The simple double quote characters (not curly quotes) are needed. Once you press enter, wait for the 'ok' response.
M587 S"your-network-ssid" P"your-network-password"
Check you have added the SSID by sending M587, which lists all the remembered SSIDs, but not the remembered passwords.
Any double quotation marks must be sent as straight double quotation marks. Curly double quotations will not work, and generate an error. Also, if you are not using our recommended software to communicate with the Duet and have upper and lower case letters or apostrophe characters in the SSID or password.
The use of special characters in the SSID and/or password, such as(@#$%^&*)cannot be guaranteed to work. If you are having trouble adding your SSID, you may need to edit your router SSID and/or password to use a simplified version, with only letters and numbers.
For workarounds, see the note in the Gcode dictionary entry for M587.
Make sure to connect to a 2.4GHz network; the WiFi module will not connect to 5.0GHz networks.
¶ Enable networking
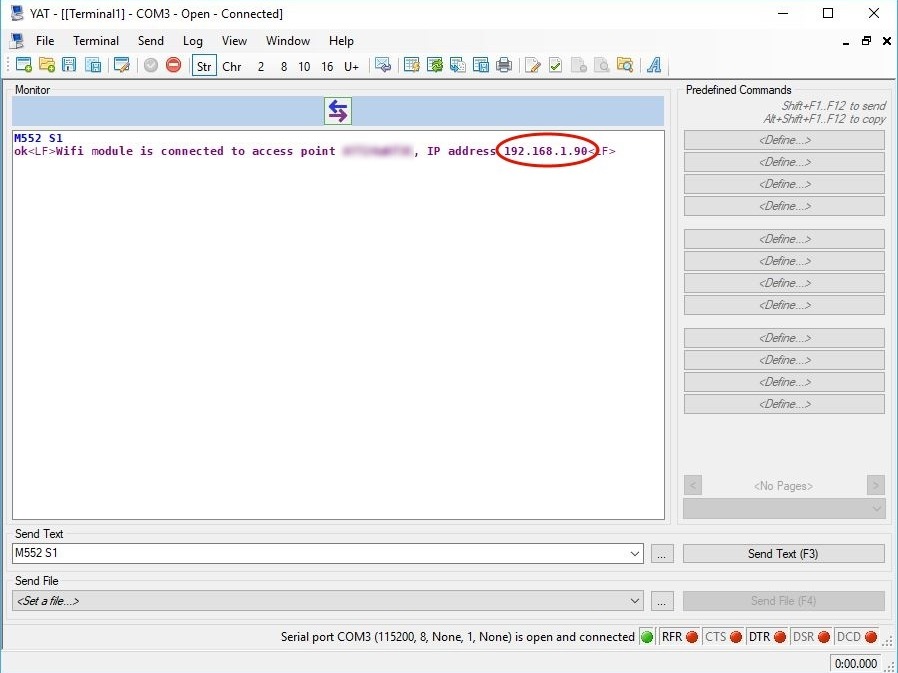
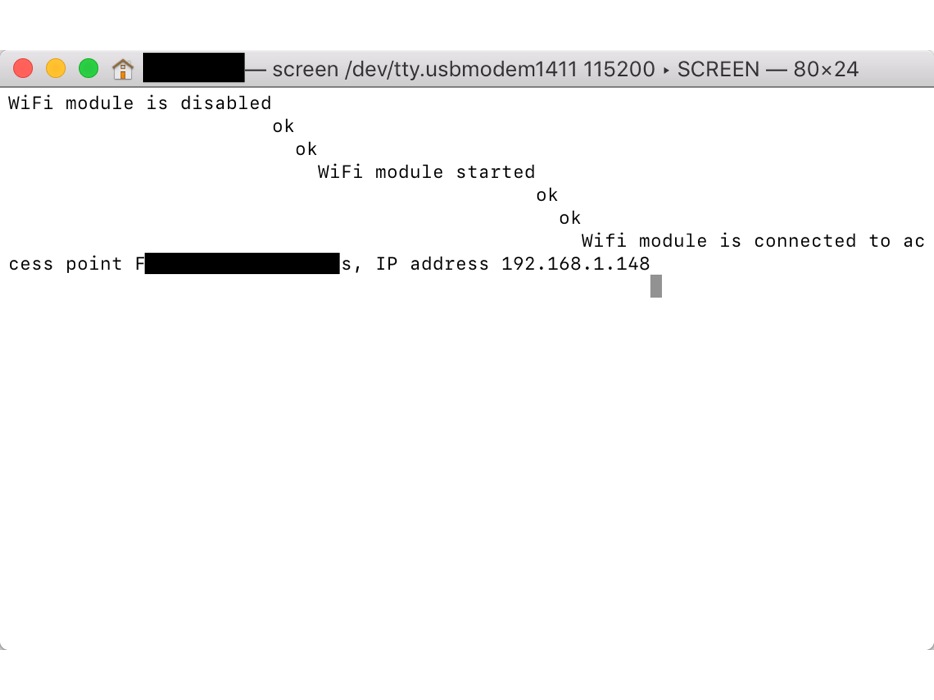 Send command
 M552 S1 to connect to WiFi. After a moment, the Duet will confirm the connection and the IP address of the Duet controller. The blue LED on the WiFi module will flash as it connects, then should be on constantly once connected.
macOS and Linux users using 'screen': send the same commands as above, you just won't be able to see what you have sent.
At this point your Duet should be on the WiFi network. To connect to the Duet Web Control (DWC) interface, continue to Step 6.
If you get an error, check the network SSID and password you entered with the M587 command. Make sure that the WiFi is in idle mode before sending M587, with M552 S0. Send M587 to get a list of remembered networks, though this does not show the password.
See WiFi connection troubleshooting for further steps to resolve WiFi connection issues.
M587 saves the SSID and password to the Duet 2 Wifi, and is persistent. You do not need to run this command every time the board is started. M552 S1 starts the network, and this command does need to be run every time the board starts (so ensure it is in config.g so it runs automatically - editing config.g will be covered later)
macOS users using 'screen': Press CTRL-A then CTRL-\ to exit screen and return to terminal.
Linux users using 'screen': CTRL-A then \ to exit screen and return to terminal.
You can safely close Terminal at this point.
For Duets with Ethernet: Duet 3 Mainboard 6HC, Duet 3 Mini 5+ Ethernet, Duet 2 Ethernet, Duet Maestro.
¶ Check network module status
Send M552 to check the network module status. It may report that the module is disabled or enabled. Put it into disabled mode by sending command M552 S0. Send M552 again to check it is disabled.
¶ Plug in network cable
Plug an ethernet cable into the Duet's ethernet port and connect the other end of the cable to a free ethernet port on your router/network hub.
¶ Enable networking
The Duet may come with a factory-configured fixed IP address for testing. This is unlikely to work for your setup!
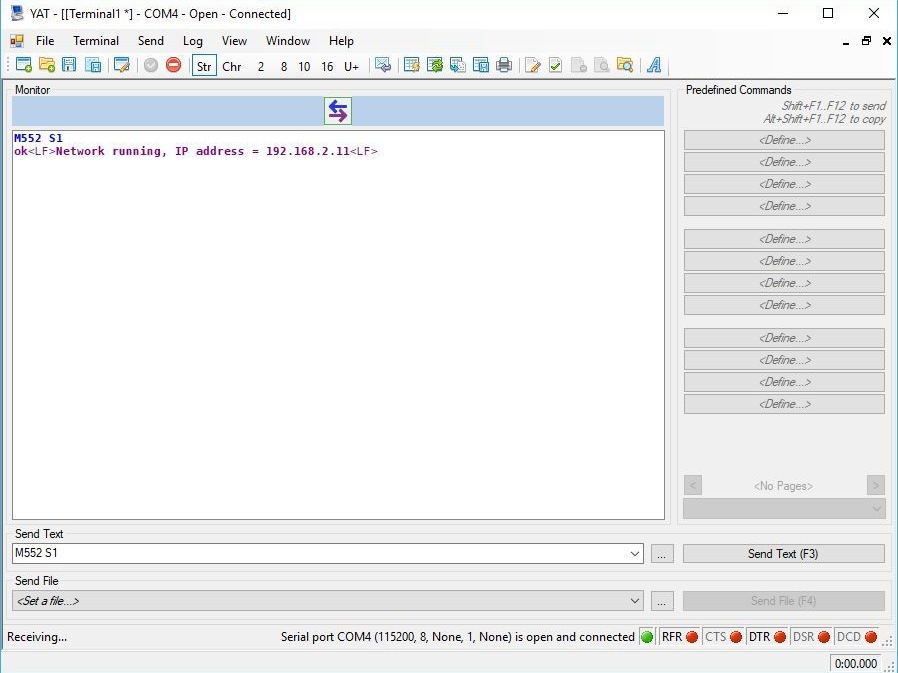 So you need to change the network settings. There are two options:
- DHCP: Most home routers are setup to assign IP addresses by DHCP. Send
M552 S0to disable networking, thenM552 S1 P0.0.0.0to enable networking and have your router assign an IP address. - Fixed Address: You can set the Duet to use a fixed IP address. Note that if you use a fixed address, care should be taken that it does not conflict with other devices on the network. Send
M552 S0to disable networking, thenM552 S1 Px.x.x.xto enable networking, where "x.x.x.x" is the IP address you want to use, eg 192.168.1.15.
In both cases, after 10-30 seconds the board should reply with Network running and the IP address the Duet is using. Send M552 to check the settings.
These network settings are temporary! They will be lost when you restart and will have to be re-entered. Step 7 will explain how to set it up permanently.
macOS users using 'screen': Press CTRL-A then CTRL-\ to exit screen and return to terminal.
Linux users using 'screen': CTRL-A then \ to exit screen and return to terminal.
You can safely close Terminal at this point.
¶ 6. Check Access to Duet Web Control
Duet Web Control (also known as DWC) is the user interface used over a network connection in a browser to configure and control a Duet. The manual for the use of the DWC is here: Duet Web Control Manual
Note that network connections to DWC are unsecured http sessions. Your browser may try to force using a more secure https session, and you may receive a warning when you try to connect to DWC. DWC in standalone mode does not support https connections. As the Duet is on your local network, it should be fine to ignore this warning and connect.
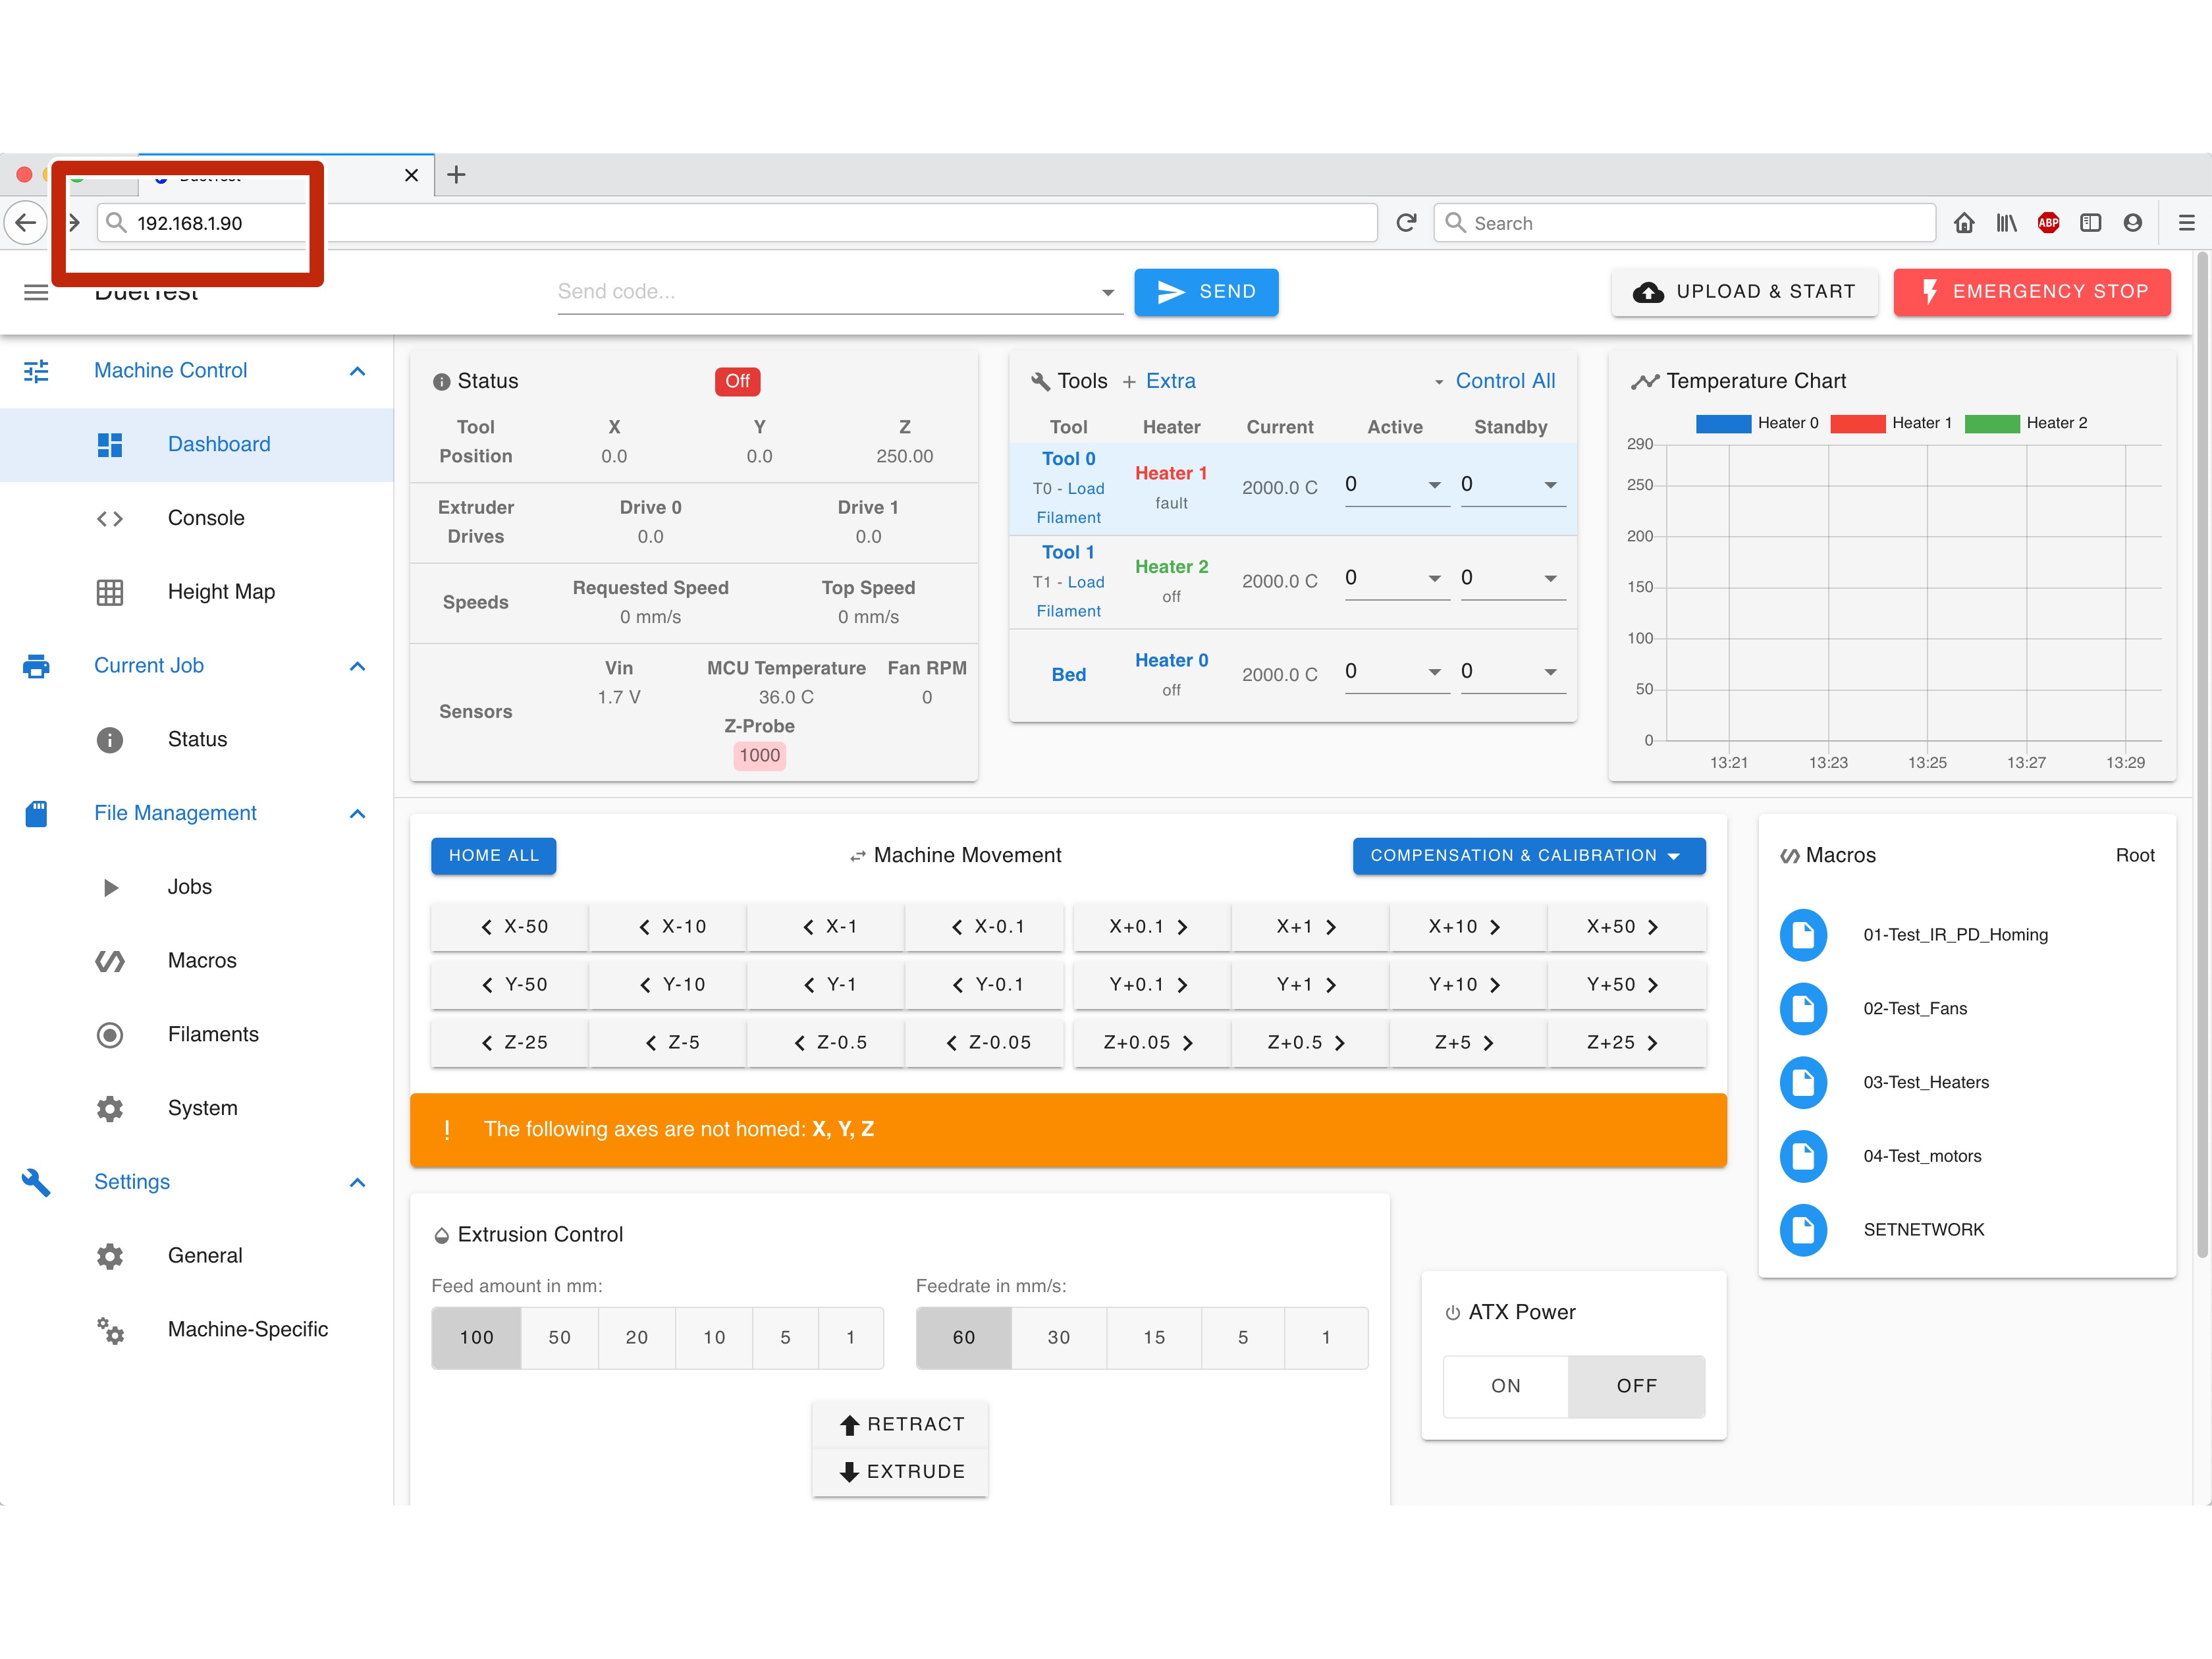
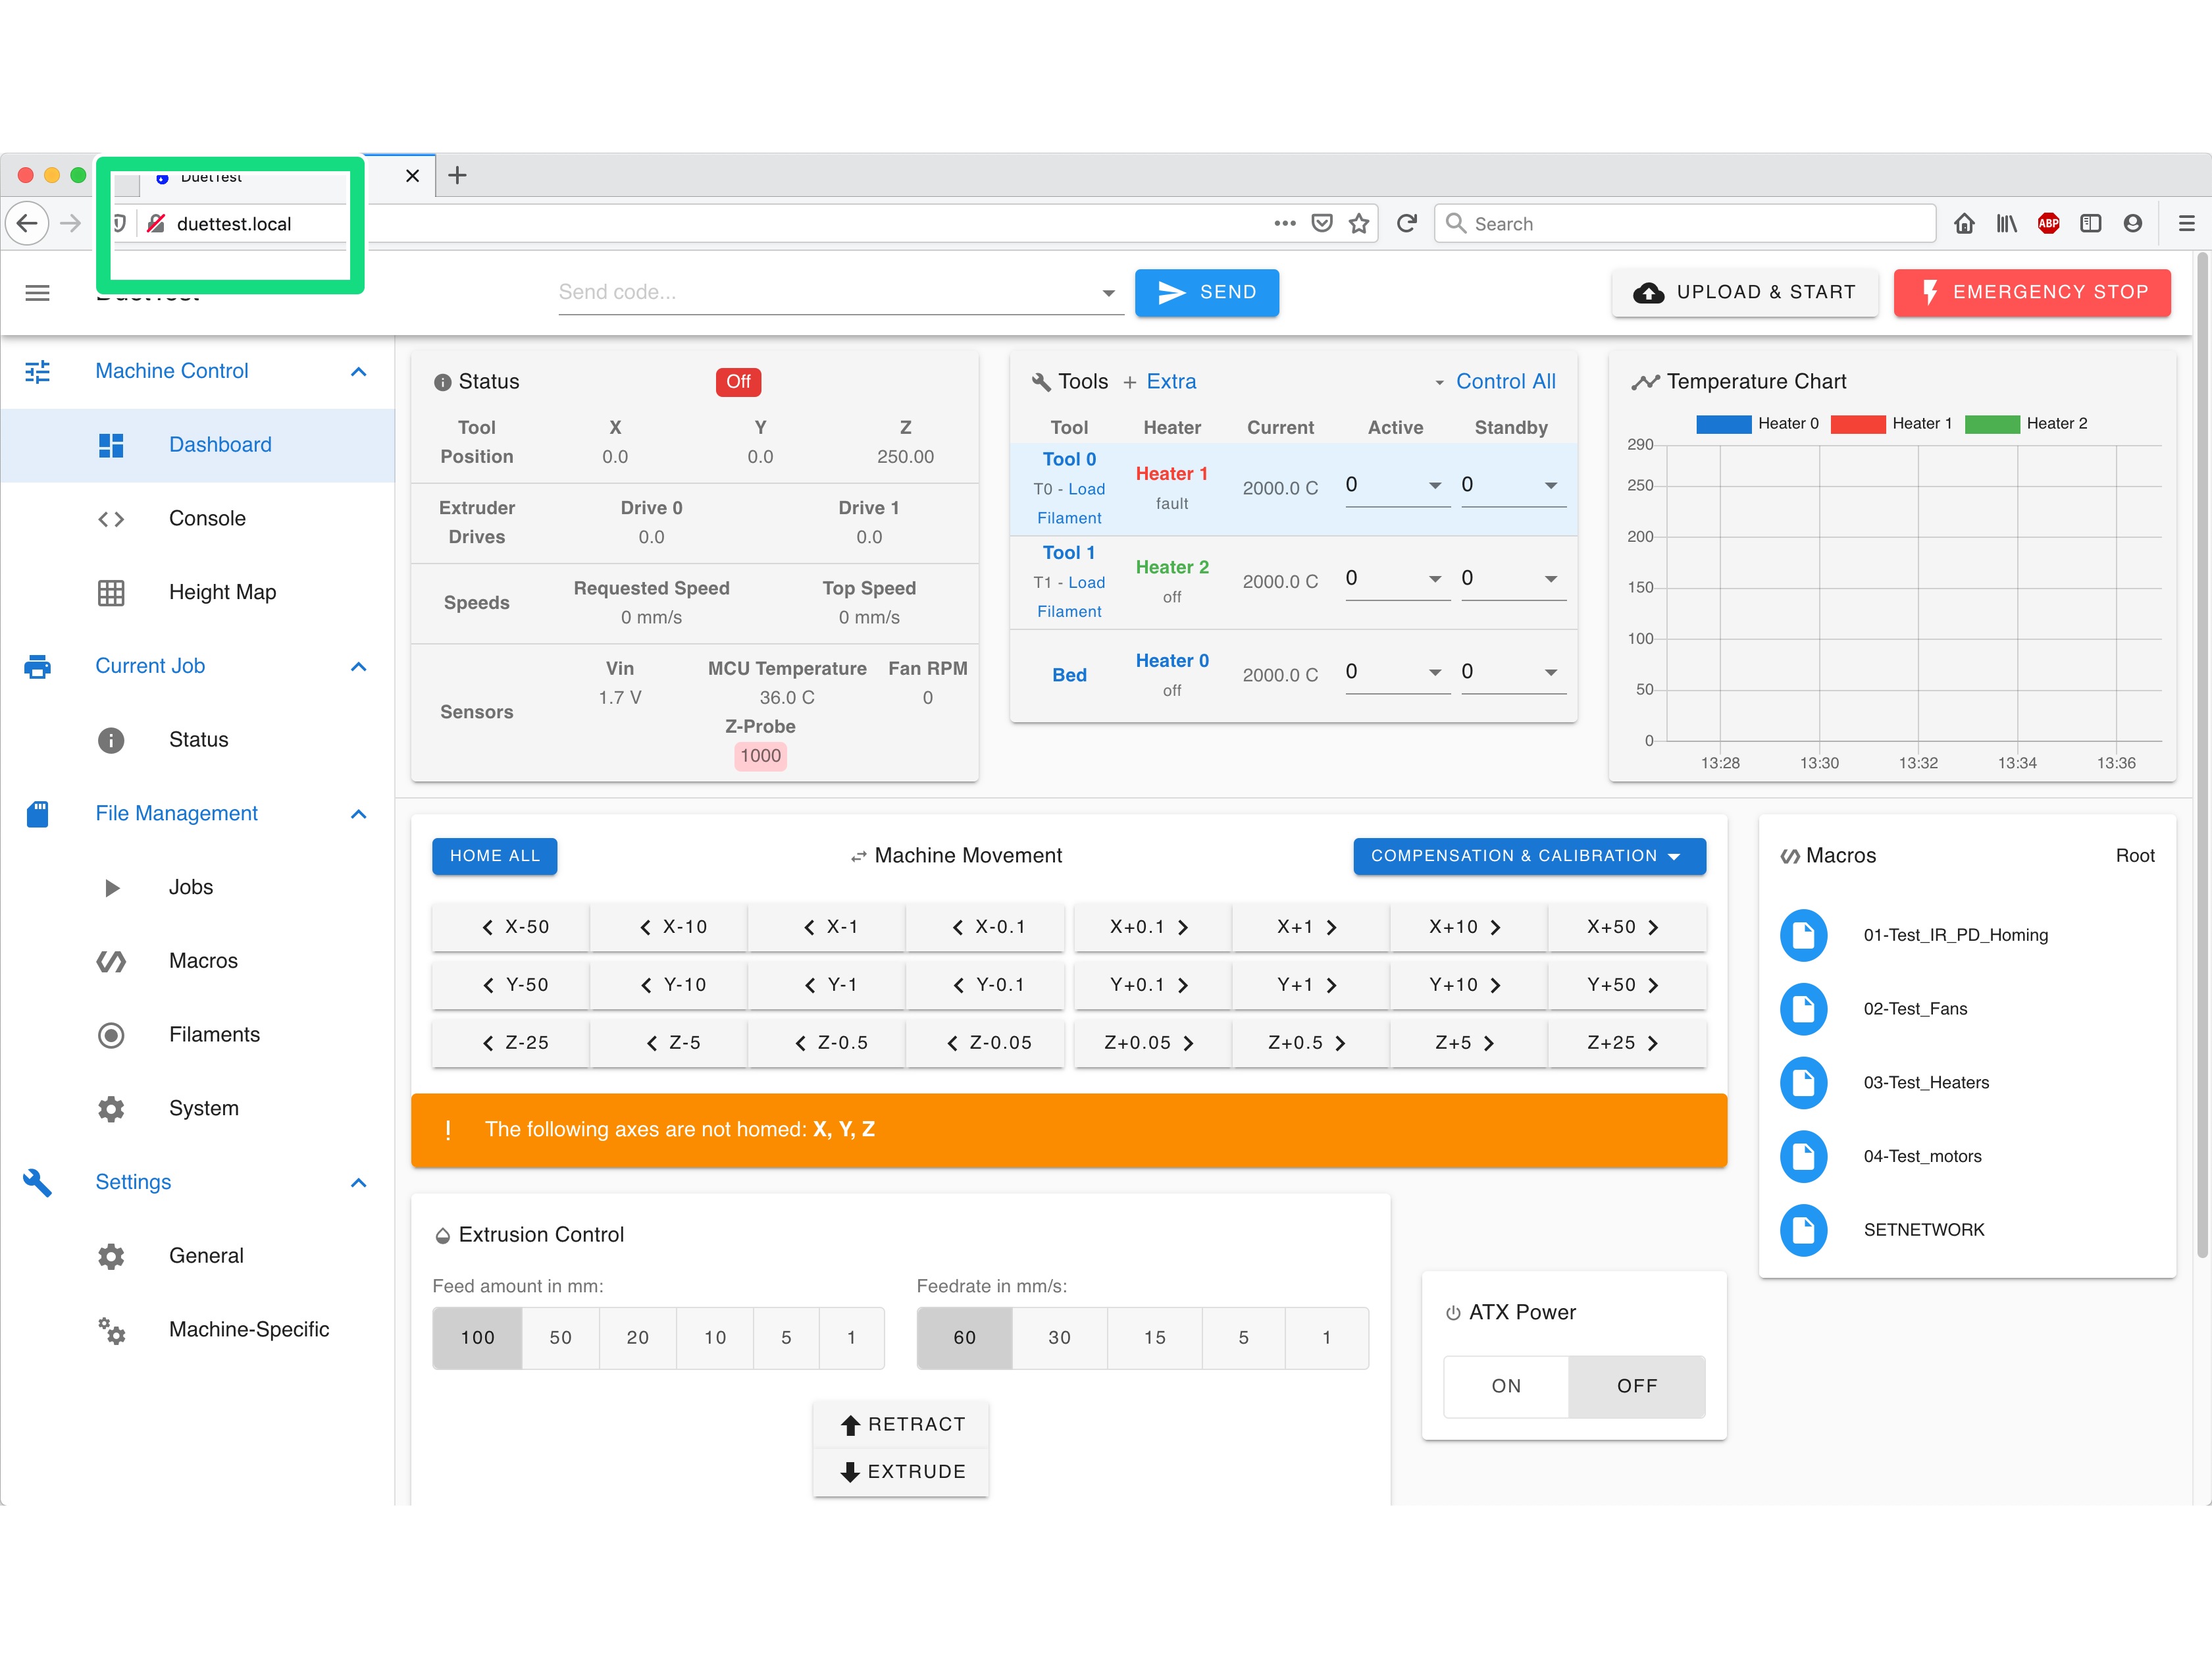 Open your browser and type the IP address assigned to the Duet, eg 192.168.1.90
You may also be able to access the Duet by typing http://duettest.local/ into your address bar. This is the easiest way to connect to your Duet if you are using a dynamic IP address (via DHCP). See this note about mDNS support if it doesn't work.
You should now see the main control page for the Duet!
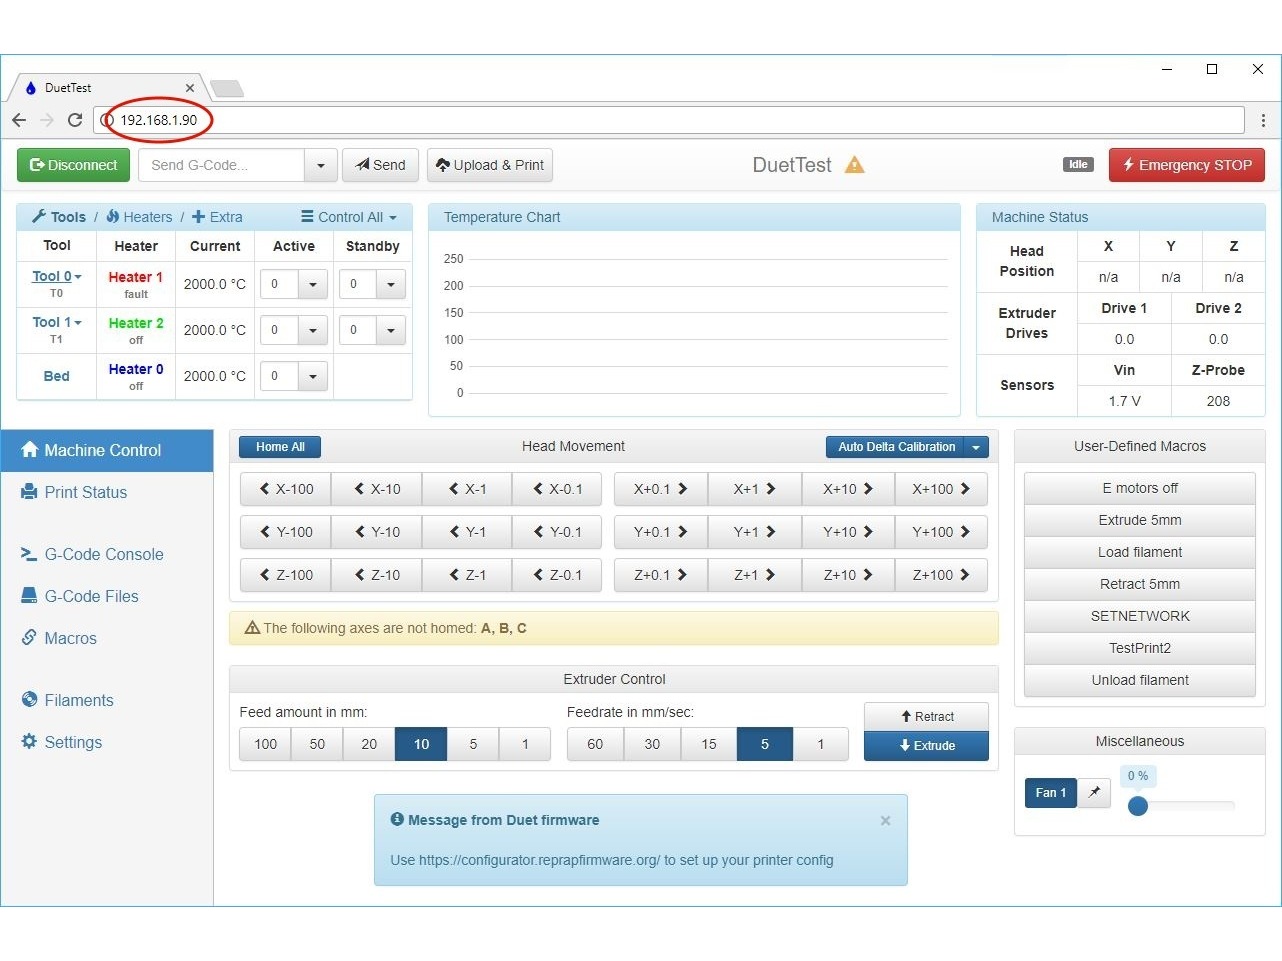 Your Duet may have shipped with older firmware and DWC version. We recommend updating to the latest available version as soon as possible; see User manual: Installing and updating firmware. A screenshot of DWC v1 is shown on the right.
¶ 7. Ensure Future Connectivity
We need to be sure the networking is configured properly for the future.
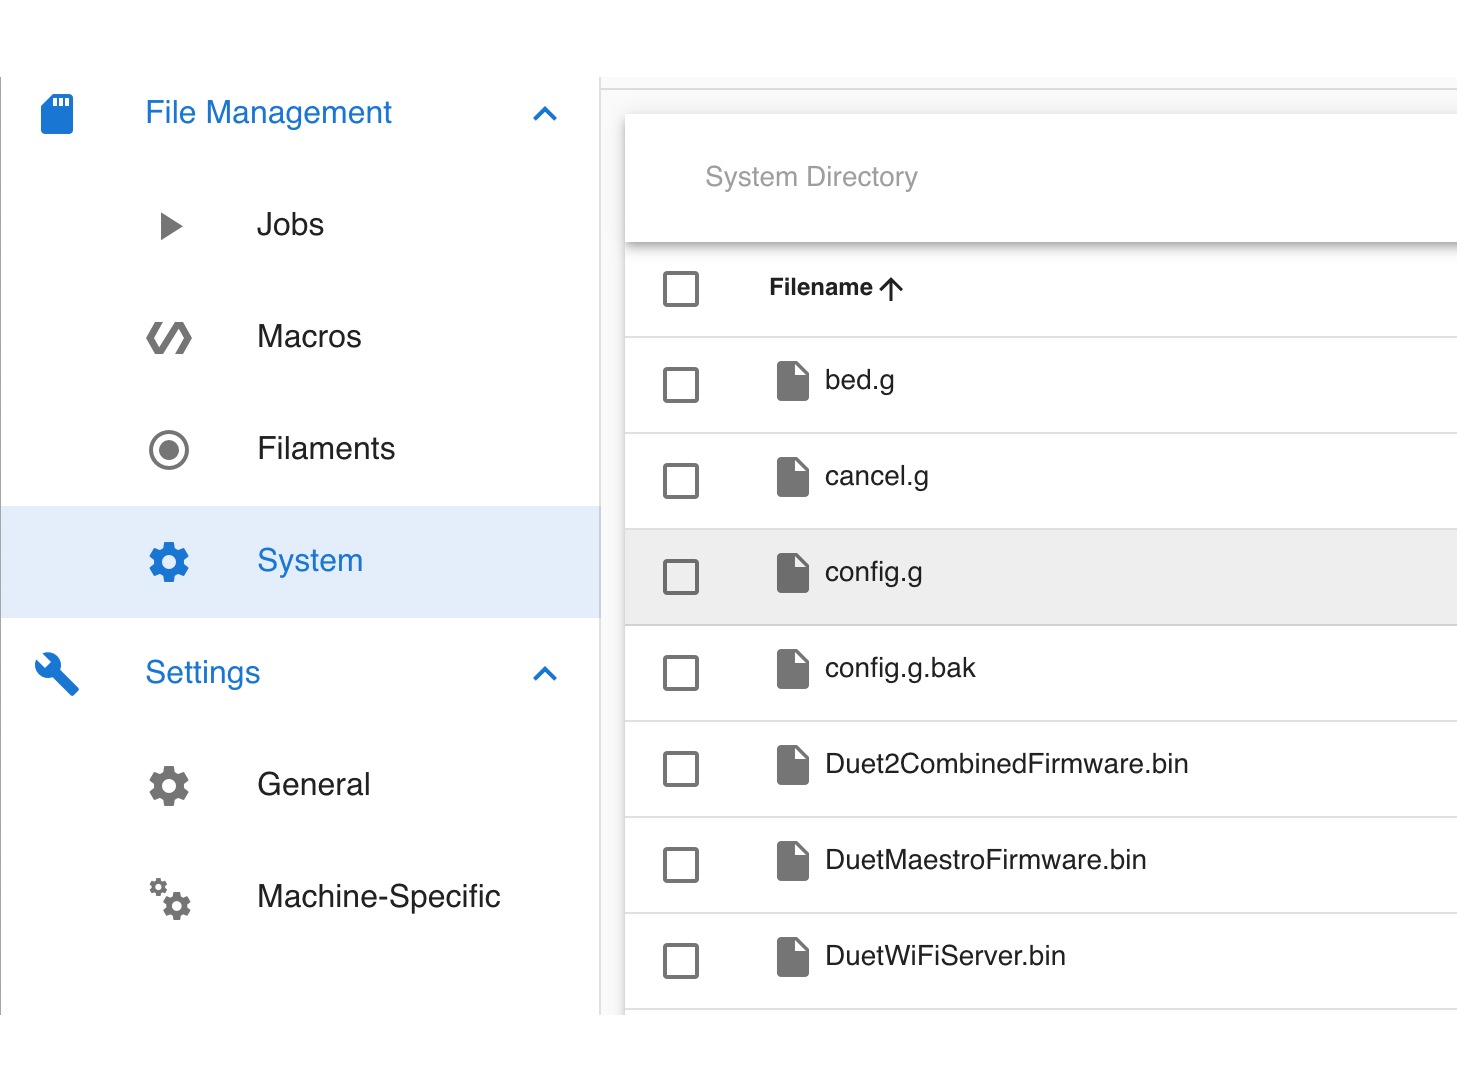 Navigate to config.g (which is the Duet configuration file) by clicking 'System' then 'config.g'.
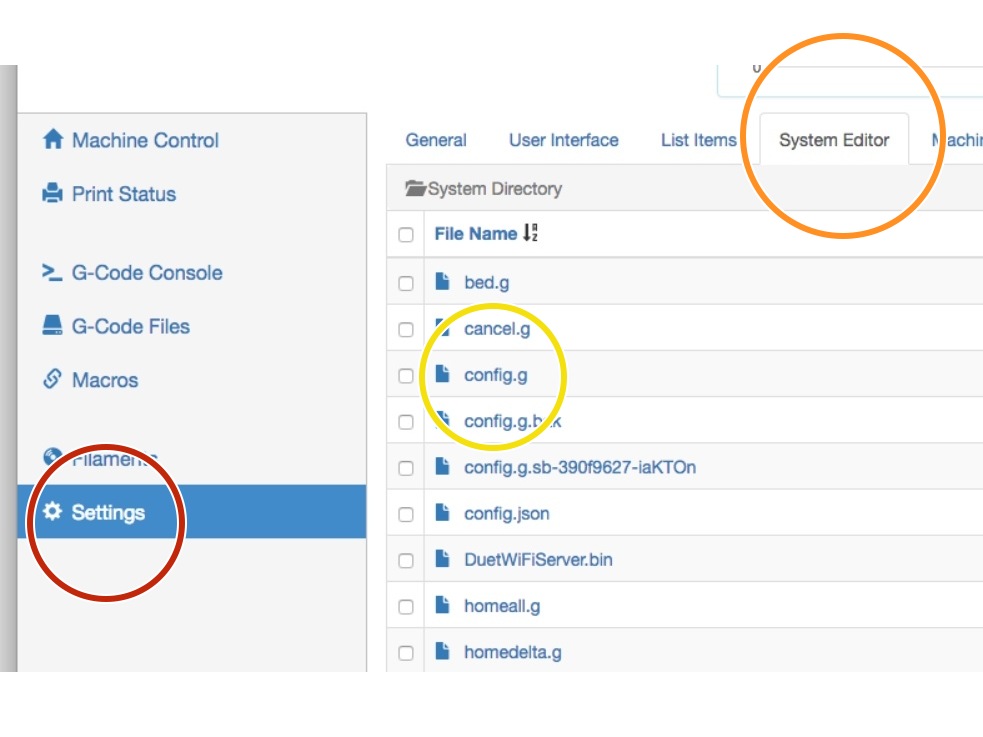 In the older version of DWC (v1), click Settings > System Editor > config.g
Then...
For Duets with WiFi: Duet 3 Mini 5+ WiFi, Duet 2 WiFi.
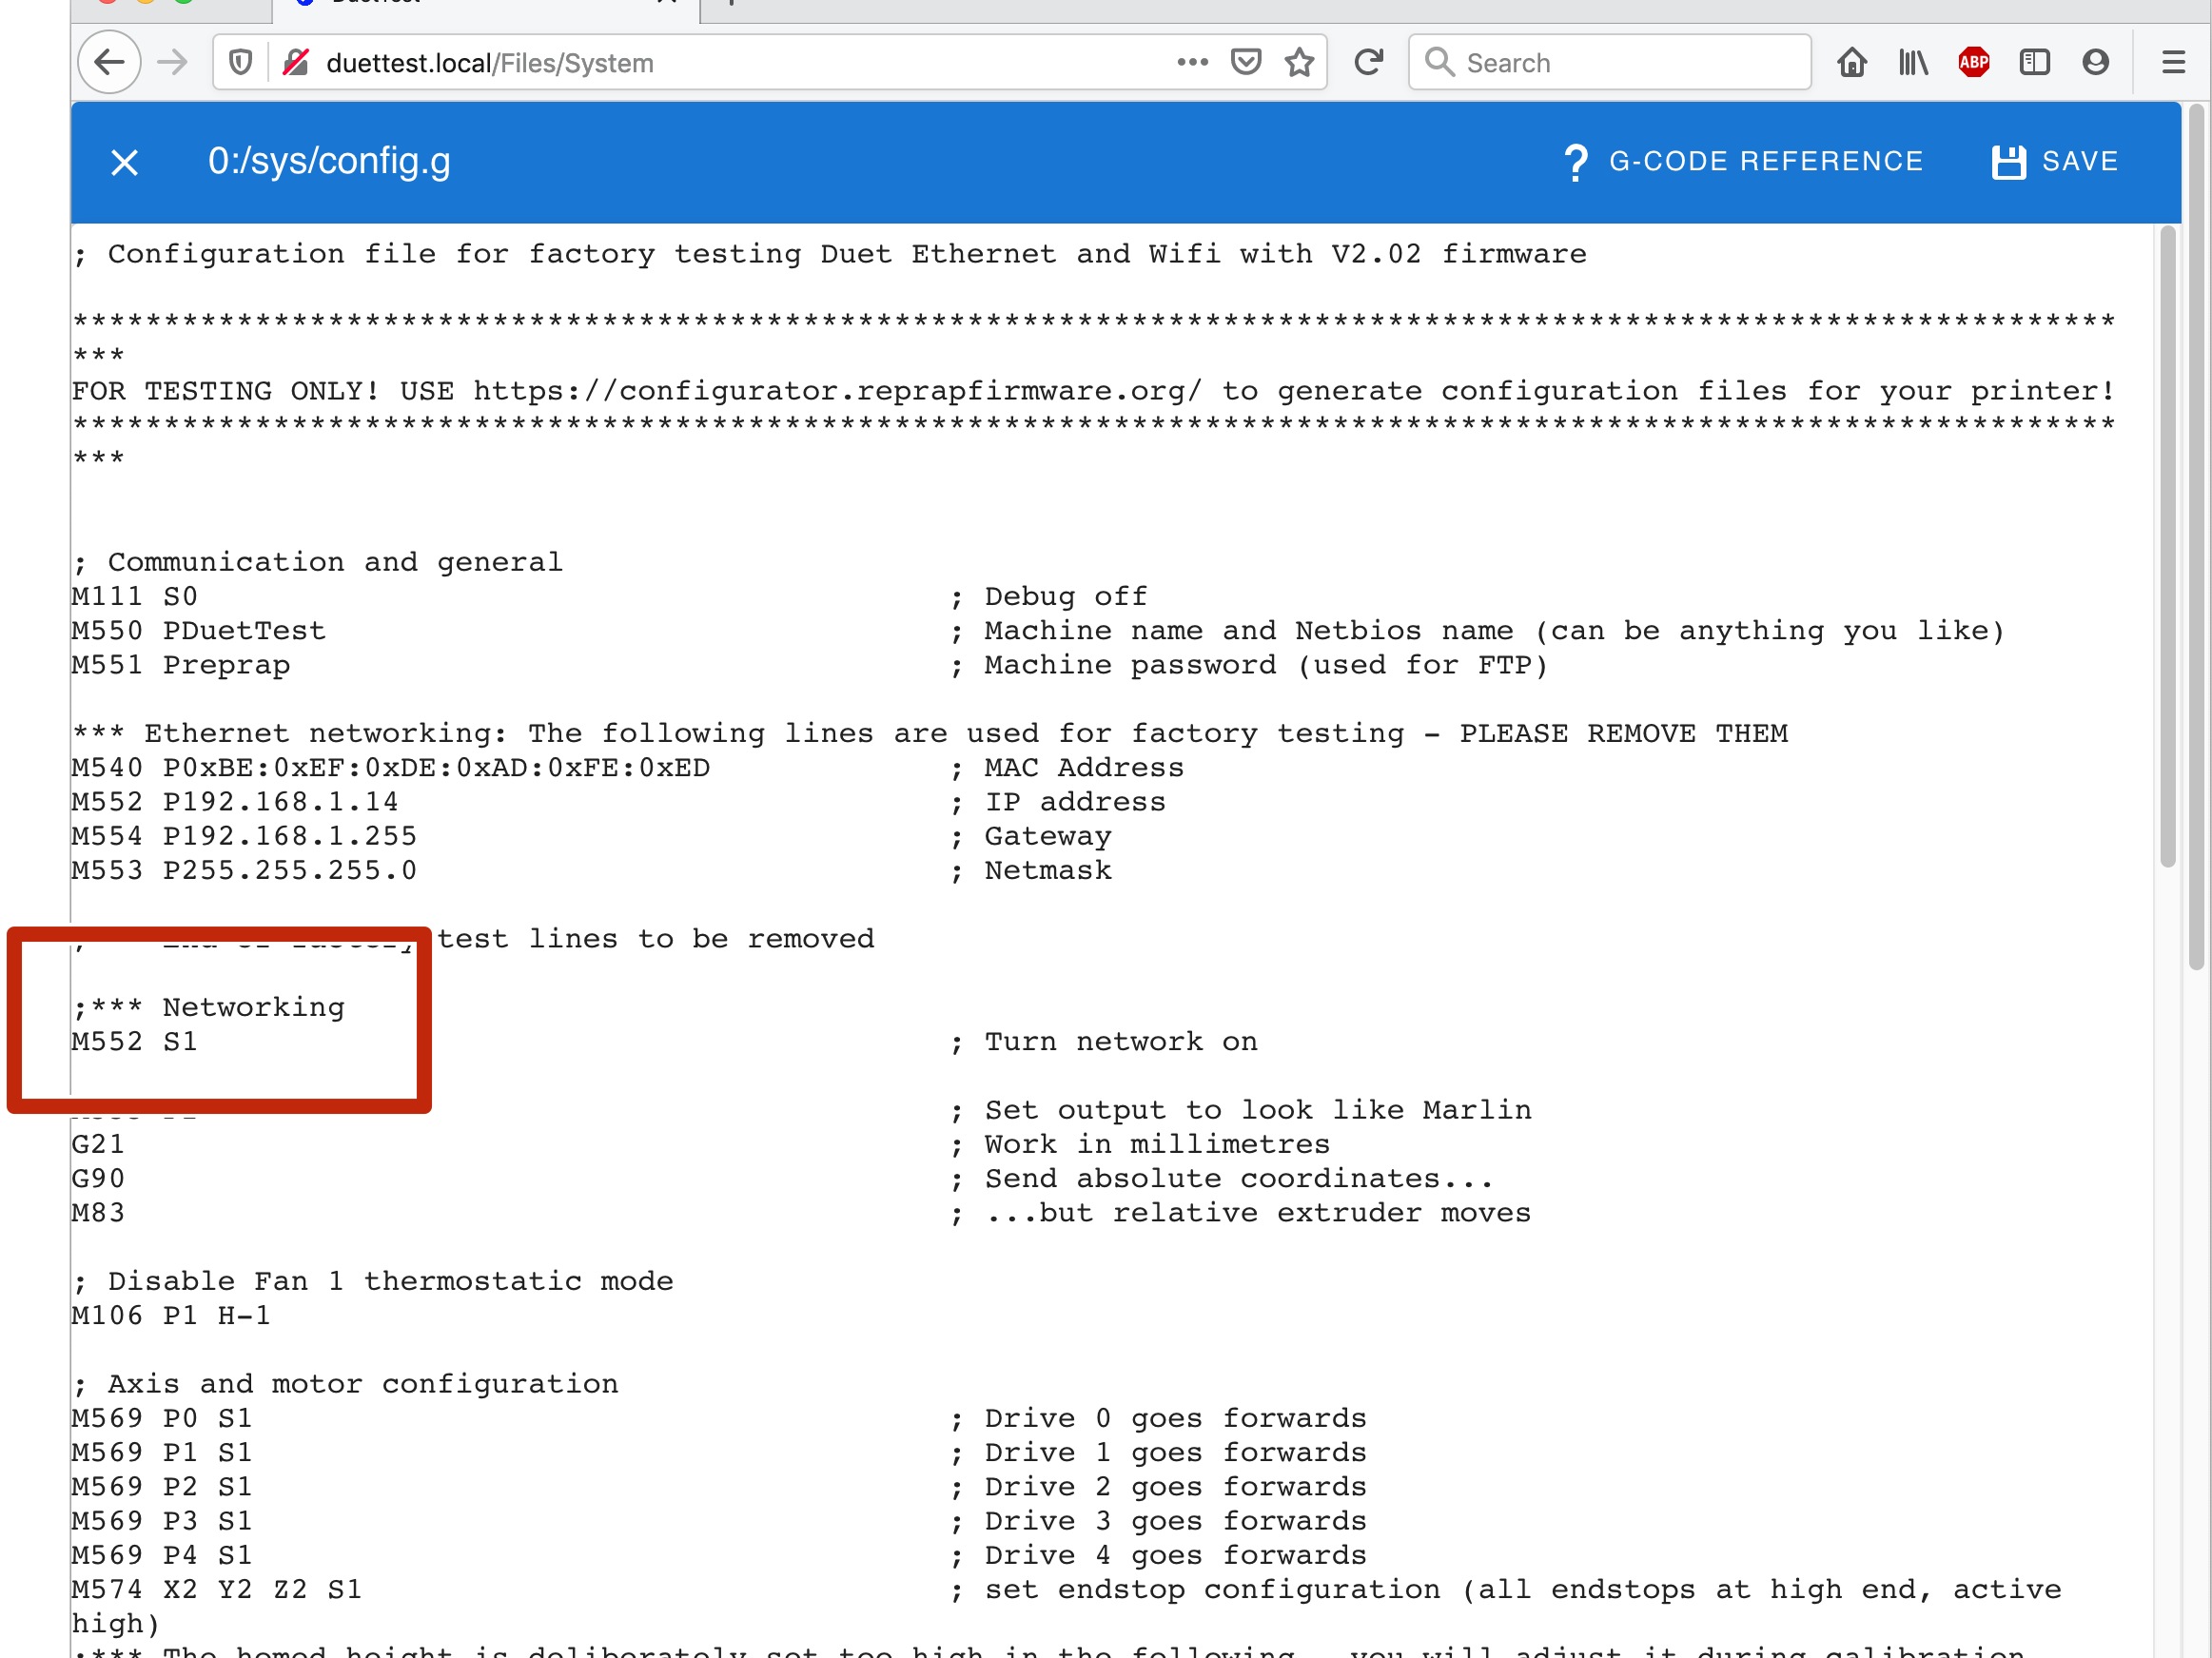 Check that there is a command
 M552 S1 without a semicolon at the beginning of the line. This enables the WiFi module at power on.
Setting M552 S1 in the config.g is sufficient to enable networking and let your network router assign an IP address via DHCP.
If you need to assign a static IP address, use M587 with the I parameter when setting up the SSID in Step 5. See M587 in the GCode dictionary.
For Duets with Ethernet: Duet 3 Mainboard 6HC, Duet 3 Mini 5+ Ethernet, Duet 2 Ethernet, Duet 2 Maestro.

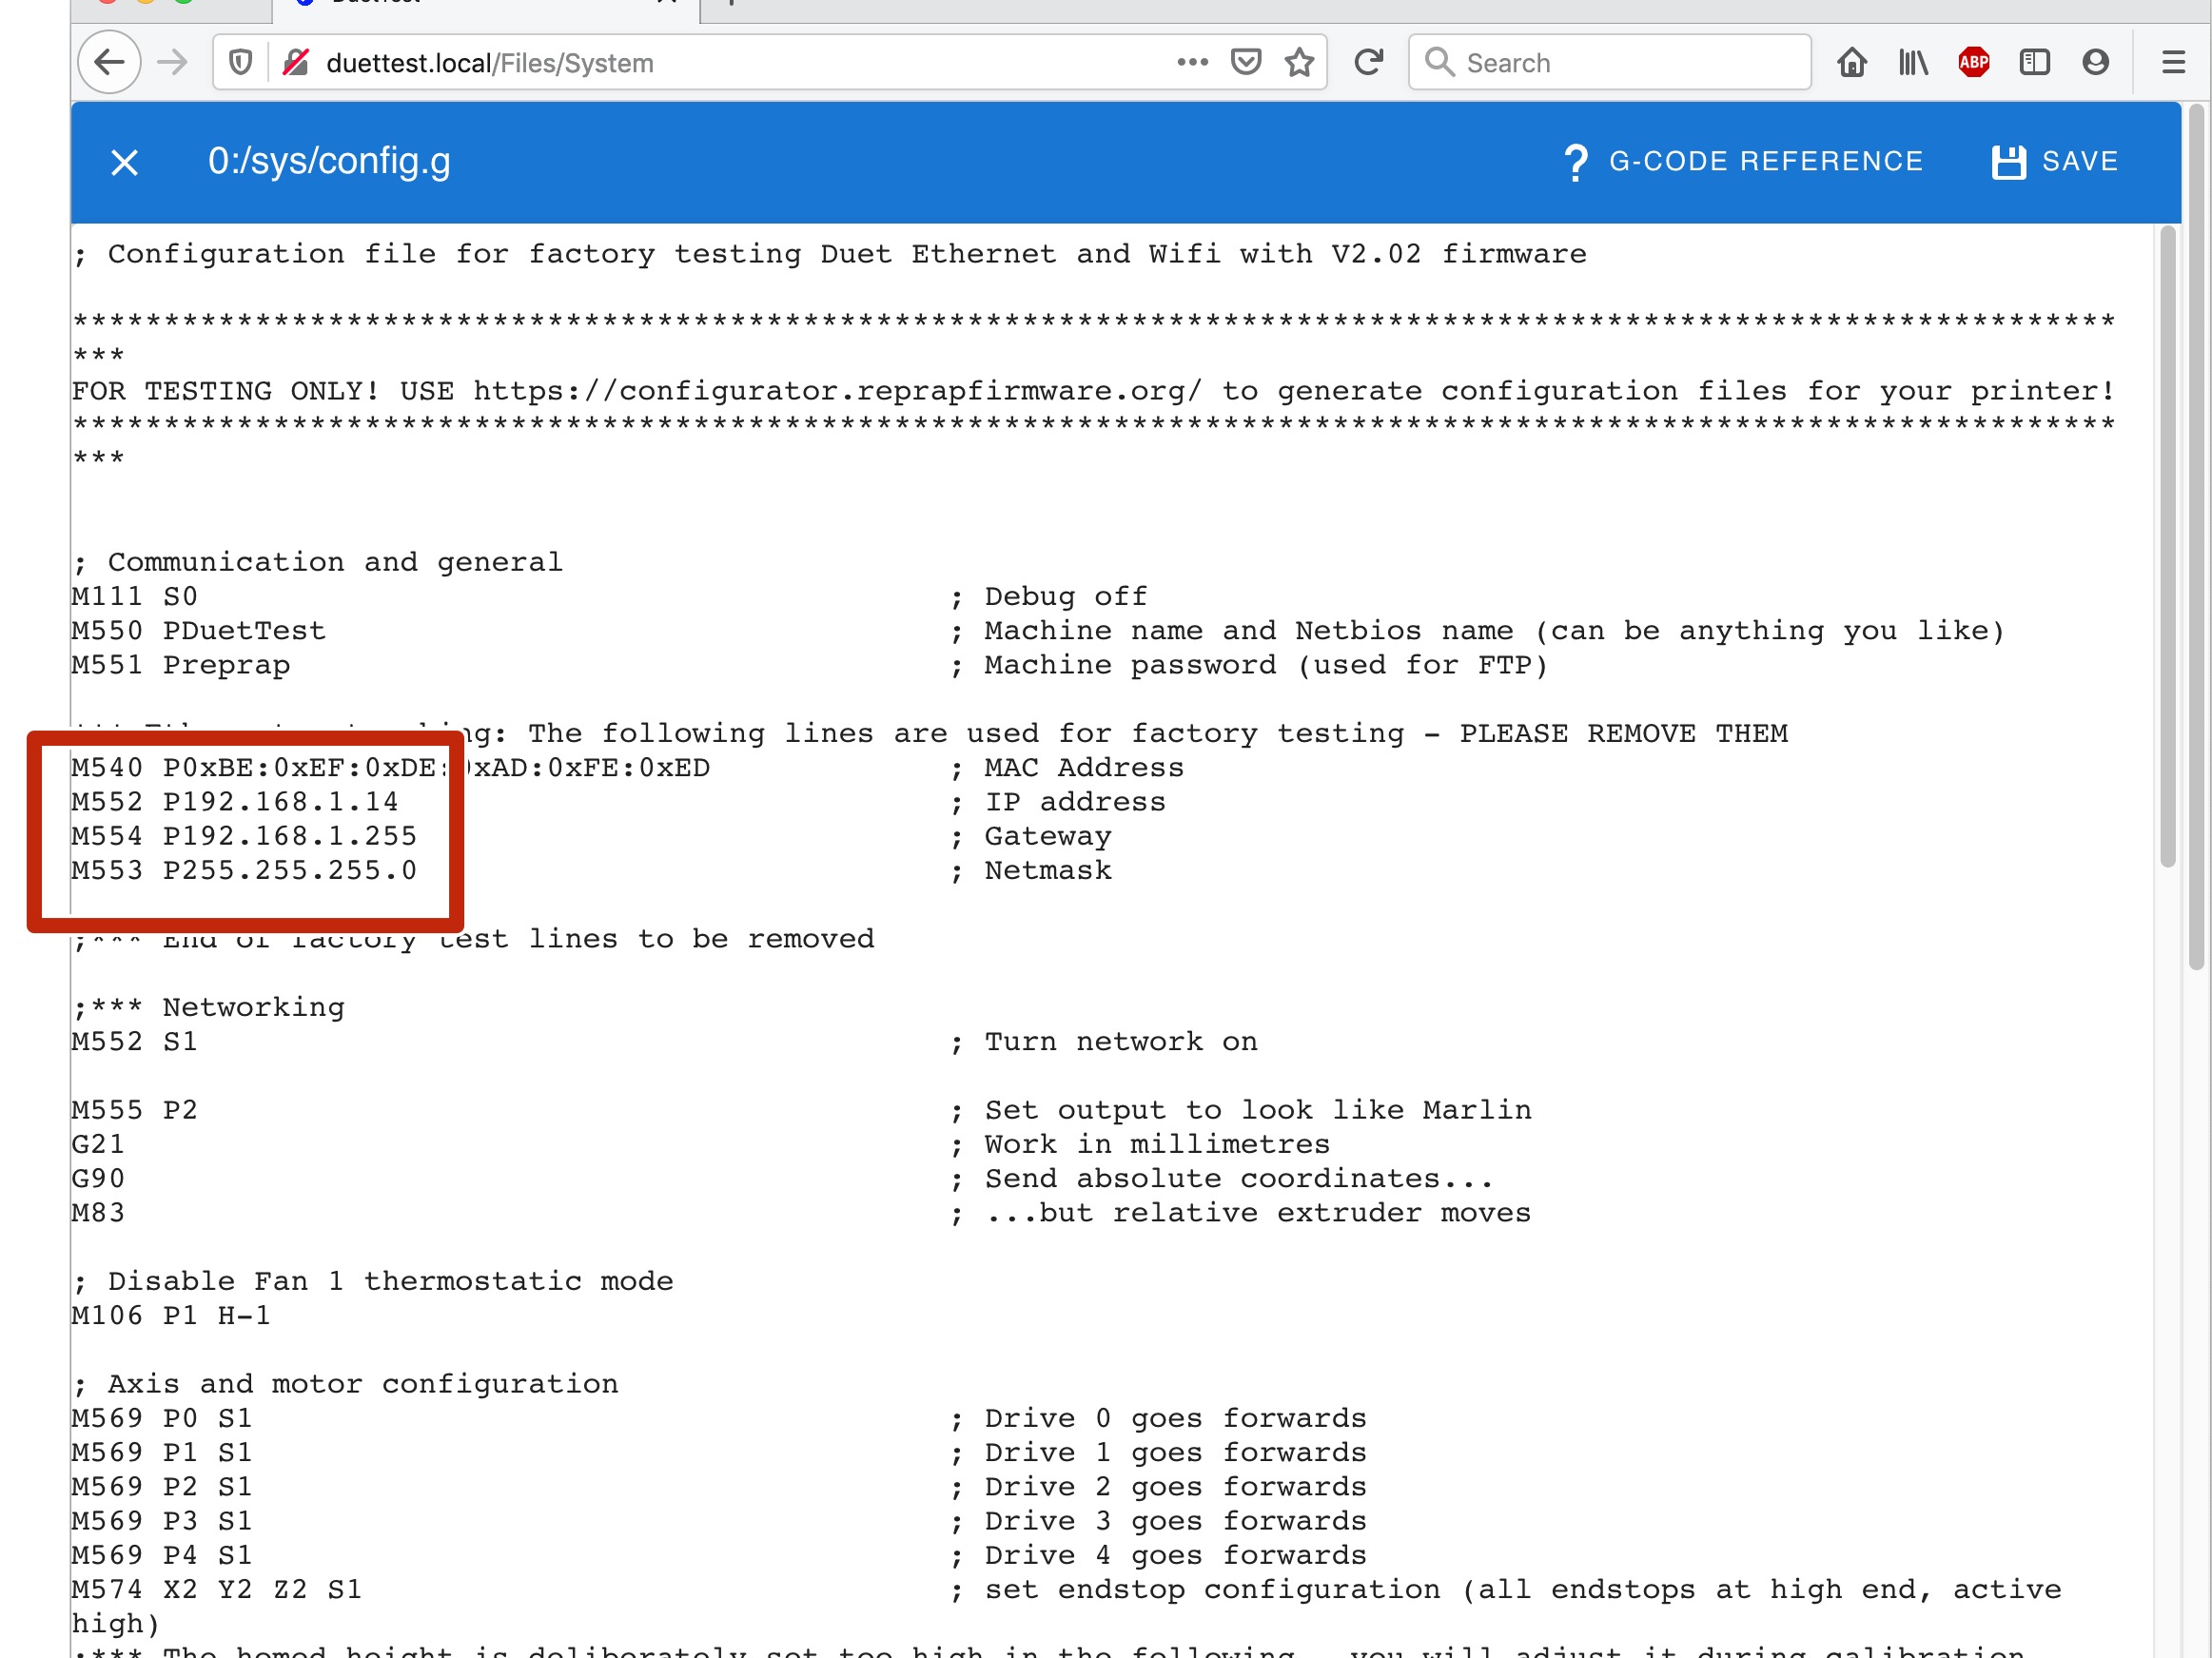 Check that there is a command
 M552 S1 without a semicolon at the beginning of the line. This enables the ethernet module at power on.
Ethernet-enabled Duets come with a factory-configured fixed IP address for testing. In the last few steps you set up network access temporarily. For these Duets you now need to change the config.g so you can access the Duet Web Console (DWC) following a power cycle.
For DHCP
Most home routers are setup to assign IP addresses by DHCP. Change the M552 P192.168.1.14 line in config.g to M552 P0.0.0.0 to have your router assign an IP address via DHCP. This is standard for most network devices. Any other network settings are set automatically.
If you are not familiar with networking, you should change this setting to M552 P0.0.0.0
For Fixed IP address
You can set the Duet to use a fixed IP address. Note that if you use a fixed address, care should be taken that it does not conflict with other devices on the network. Change the M552 P192.168.1.14 line to the IP address you want to use, eg M552 P192.168.0.15
You may also need to change the M554 (Gateway) and M553 (Netmask) commands to match your network.
¶ Note
Commands in config.g are processed from top to bottom, so a command at the bottom supersedes a command at the top of the file.
This version of the config.g configuration file will be replaced in the next section of the instructions. This version will be used for now, so making these changes will enable you to access the Duet until you do replace the config.g with a version that is more tailored for your machine.
¶ 8 Connection complete!
Congratulations - you are now connected to your Duet!
This guide assumes that you connect your Duet via WiFi or Ethernet to your network router, to make it accessible to your network. This may be impractical for your setup, so the Duet offers alternative connection methods:
- The Duet 3 Mini 5+ WiFi and Duet 2 WiFi offer an "Access Point" mode that allows a direct WiFi connection to the Duet.
- The Duet 3 MB6HC, Duet 3 Mini 5+ Ethernet, Duet 2 Ethernet and Duet 2 Maestro can be configured to connect directly to an available ethernet port on your PC.
A guide to these alternative network setups is available here: Setting up networking on Duet.
